21
ME-007_v01
1
2
3
4
Operational Safety Guidelines
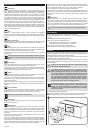
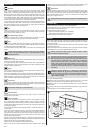
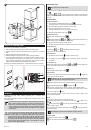
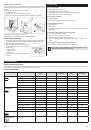
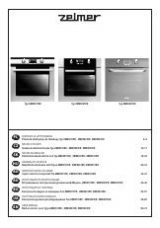
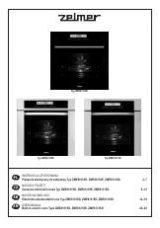
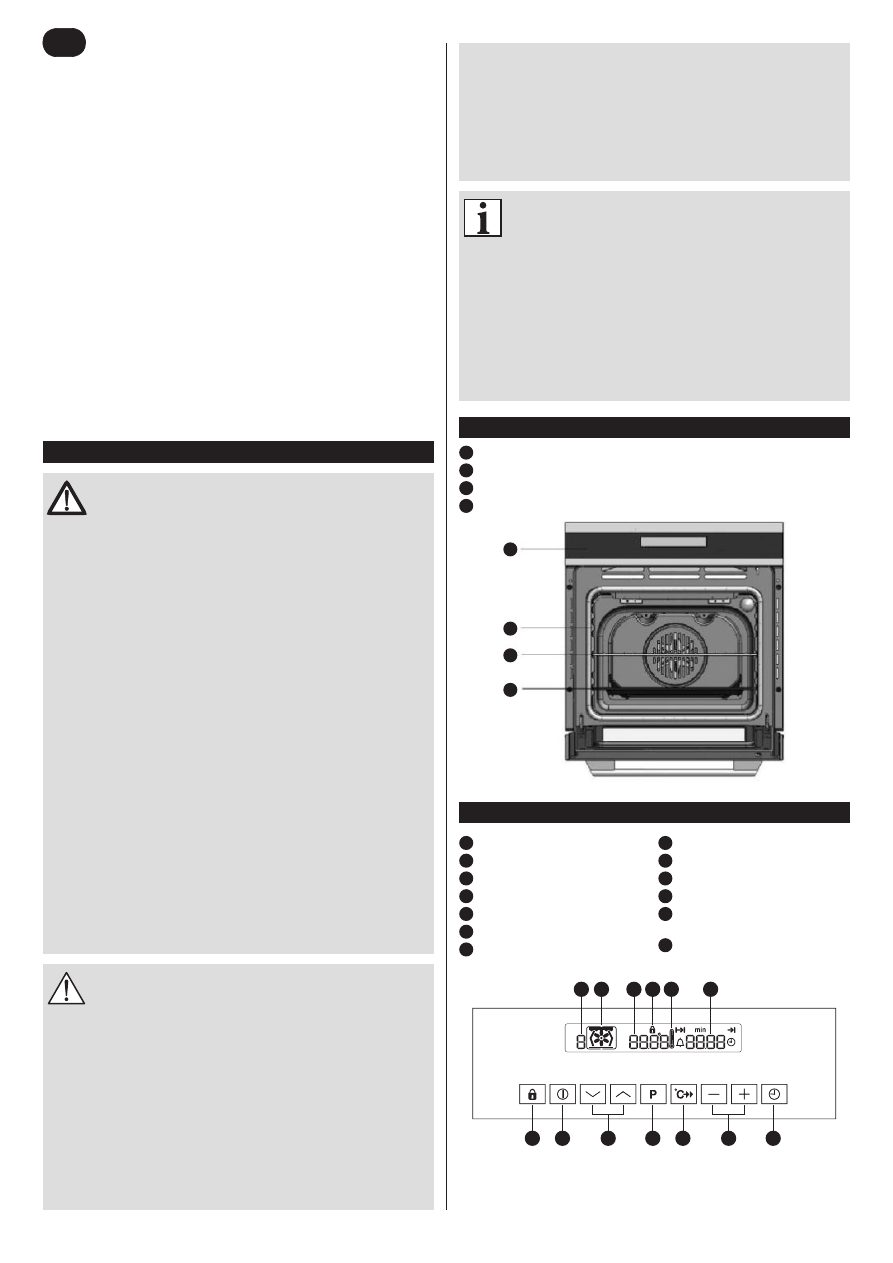
Design
1
Control panel
2
Runners used for installation and removing the shelf or the tin
3
Shelf
4
Tin or baking tray
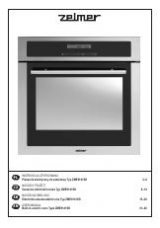
Control panel
Danger! / Warning!
Health hazard
Make sure the appliance has been unplugged before changing the lightbulb to
●
prevent the risk of electric shock.
Accessible parts may become hot. Do not let children near the oven.
●
This appliance is not intended for use by persons (including children) with reduced
●
physical, sensory or mental capabilities, or lack of experience and knowledge, unless
they have been given supervision or instruction concerning use of the appliance by
a person responsible for their safety.
Children should be supervised to ensure that they do not play with the appliance.
●
If the non-detachable part of the cord is damaged, it should be replaced by the
●
producer or at a proper service point or by a qualified person in order to avoid any
hazards.
The appliance can only be repaired by qualified service personnel. Improper
●
servicing may cause a serious hazard to the user. In case of defects please contact
a qualified service center.
Do not pull the cord to unplug the appliance.
●
Do not touch the oven with wet or moist hands or feet.
●
Any installation, maintenance or other actions involving the oven may only be
●
performed when the appliance is unplugged from the mains.
The appliance becomes hot when used. We recommend remaining careful not to
●
touch hot elements inside the oven.
Please be extremely careful when opening the oven door to avoid scalding with hot
●
steam coming from the inside.
If the power cord is damaged, it needs to be replaced immediately. When replacing
●
the power cord, please follow these instructions: Remove the power cord, and
replace it with a H05VVV-F or H05V2V2-F cord.
The power cord has to withstand the required voltage needed to power the oven.
●
The power cord may only be replaced by a qualified technician.
The earth conductor (green-and-yellow) has to be 10 mm longer than the power
●
cord.
Caution!
Not observance can result in damage to possessions
The appliance should be plugged into a power socket with alternating current
●
equipped with a safety pin, and voltage compatible with the one given on the rating
plate of the appliance.
The appliance is not designed to work with exterior time switches or separate remote
●
control systems.
Installation and repair works may only be performed by a qualified technician
●
following the guidelines of the producer.
The appliance is designed for domestic use only. It should be used only to prepare
●
food, never to other purposes.
Do not use coarse cleaning agents or sharp metal objects to clean the glass door, as
●
they may scratch the surface, and the glass may crack.
Do not use steam cleaners.
●
The oven may only be used for what it was intended; you may only use it to prepare
●
food. Any other use of the oven, e.g. as a heating appliance is incorrect, and
therefore considered hazardous. The producer cannot be held responsible for any
damages caused by incorrect or unreasonable use of the oven.
We recommend not using any extension cords, adaptors or power strips.
●
The conductors of power cables must have a nominal cross-section not smaller than
●
3 x 1.5 mm².
The disconnector should be installed on the non-detachable cables according to the
●
rules concerning cables.
Suggestion
Information on the product and suggestions for its use
Store this user manual in a safe place for future reference.
●
After the installation of the appliance is done, its plug should be easily accessible.
●
During first use an acrid smoke may come out of the oven. It is a result of heating up
●
the binder of insulating panels around the oven for the first time.
It is perfectly ordinary, and if smoke does appear, you need to wait until it goes away
before putting food into the oven.
If you do not obey the above guidelines, the producer cannot guarantee safety use
●
of the oven.
Make sure you read the whole of this instruction manual, before you start operating
●
the appliance.
Dear Customer!
Congratulations on your choice of our appliance, and welcome among the users of Zelmer
products.
In order to achieve best possible results we recommend using exclusively original Zelmer
accessories. They have been specially designed for this product.
Please read this user manual carefully. Pay special attention to any guidelines concerning
safety, in order to minimize any danger of accidents and/or to avoid damaging the
appliance while operating it.
Please save this user manual for future reference.
This user manual contains information on safety, operation, installation, problem-solving, etc.
Table of Contents
Operational Safety Guidelines
..........................................................................................21
Design
..............................................................................................................................21
Control Panel
....................................................................................................................21
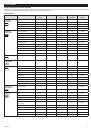
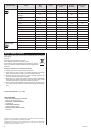
Oven Modes
.....................................................................................................................22
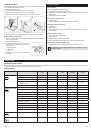
Technical Data
..................................................................................................................22
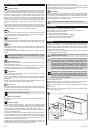
Installation
........................................................................................................................22
Connecting to a Power Source
.........................................................................................23
Operating the Oven
..........................................................................................................23
Cleaning and Maintenance
...............................................................................................24
Troubleshooting
................................................................................................................
25
Tables and Guidelines
......................................................................................................
25
Ecology – environment protection
....................................................................................26
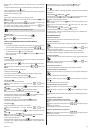
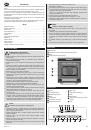
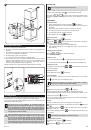
1
Memory: P
2
Oven modes
3
Children safety lock
4
Temperature
5
Thermometer icon
6
Clock/Timer
7
Children safety lock
8
On/Off
9
Select oven mode
10
Memory
11
Fast cooking
12
Selection buttons (temperature and time
settings)
13
Clock
1 2
4
6
5
3
7
8
9
10
11
12
13
EN