3
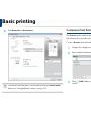
Media and tray
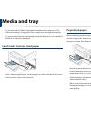
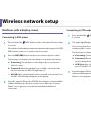
Manual feeding in the tray
The tray can hold special sizes and types of print material, such as postcards,
note cards, and envelopes (see "Print media specifications" on page 74).
To manually feed paper in the tray, see "Loading paper in the tray" on page 28
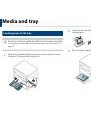
Tips on using the manual feeding in tray
•
If you select
Paper
>
Source
>
Manual Feeder
from your printer driver,
you need to press
OK
each time you print a page.
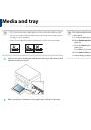
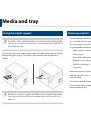
• Load only one type, size and weight of print media at a time in the tray.
• To prevent paper jams, do not add paper while printing when there is still
paper in the tray.
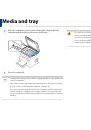
• Print media should be loaded face up with the top edge going into the
tray first and be placed in the center of the tray.
• To ensure printing quality and to prevent paper jams, only load the
available paper (see "Print media specifications" on page 74).
• Flatten any curl on postcards, envelopes, and labels before loading them
into the in the tray.
• When printing on special media, you must follow the loading guidelines
(see "Printing on special media" on page 30).
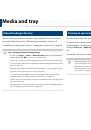
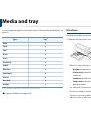
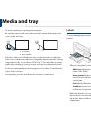
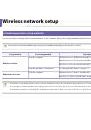
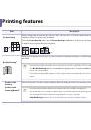
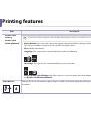
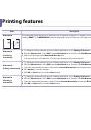
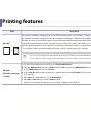
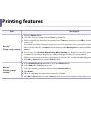
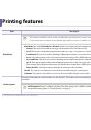
Printing on special media
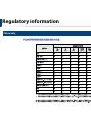
The table below shows the special media usable in tray.
The media is also shown in the
Printing Preferences
. To get the highest
printing quality, select the proper media type from the
Printing preferences
window >
Paper
tab >
Paper Type
(see "Opening printing preferences" on page
For example, if you want to print on labels, select
Labels
for
Paper Type
.
• When using special media, we recommend you feed one sheet at a time
(see "Print media specifications" on page 74).
• Illustrations on this user’s guide may differ from your machine
depending on its options or models. Check your machine type (see
"Front view" on page 17).
2. Basic Setup
30
 1
1
 2
2
 3
3
 4
4
 5
5
 6
6
 7
7
 8
8
 9
9
 10
10
 11
11
 12
12
 13
13
 14
14
 15
15
 16
16
 17
17
 18
18
 19
19
 20
20
 21
21
 22
22
 23
23
 24
24
 25
25
 26
26
 27
27
 28
28
 29
29
 30
30
 31
31
 32
32
 33
33
 34
34
 35
35
 36
36
 37
37
 38
38
 39
39
 40
40
 41
41
 42
42
 43
43
 44
44
 45
45
 46
46
 47
47
 48
48
 49
49
 50
50
 51
51
 52
52
 53
53
 54
54
 55
55
 56
56
 57
57
 58
58
 59
59
 60
60
 61
61
 62
62
 63
63
 64
64
 65
65
 66
66
 67
67
 68
68
 69
69
 70
70
 71
71
 72
72
 73
73
 74
74
 75
75
 76
76
 77
77
 78
78
 79
79
 80
80
 81
81
 82
82
 83
83
 84
84
 85
85
 86
86
 87
87
 88
88
 89
89
 90
90
 91
91
 92
92
 93
93
 94
94
 95
95
 96
96
 97
97
 98
98
 99
99
 100
100
 101
101
 102
102
 103
103
 104
104
 105
105
 106
106
 107
107
 108
108
 109
109
 110
110
 111
111
 112
112
 113
113
 114
114
 115
115
 116
116
 117
117
 118
118
 119
119
 120
120
 121
121
 122
122
 123
123
 124
124
 125
125
 126
126
 127
127
 128
128
 129
129
 130
130
 131
131
 132
132
 133
133
 134
134
 135
135
 136
136
 137
137
 138
138
 139
139
 140
140
 141
141
 142
142
 143
143
 144
144
 145
145
 146
146
 147
147
 148
148
 149
149
 150
150
 151
151
 152
152
 153
153
 154
154
 155
155
 156
156
 157
157
 158
158
 159
159
 160
160
 161
161
 162
162
 163
163
 164
164
 165
165
 166
166
 167
167
 168
168
 169
169
 170
170
 171
171
 172
172
 173
173
 174
174
 175
175
 176
176
 177
177
 178
178
 179
179
 180
180
 181
181
 182
182
 183
183
 184
184
 185
185
 186
186
 187
187
 188
188
 189
189
 190
190
 191
191
 192
192
 193
193
 194
194
 195
195
 196
196
 197
197
 198
198
 199
199
 200
200
 201
201
 202
202
 203
203
 204
204
 205
205
 206
206
 207
207
Инструкции и руководства похожие на DELL B1163, B1163w