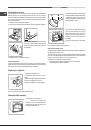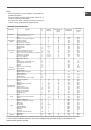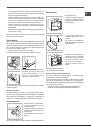
Start-up and use
WARNING!
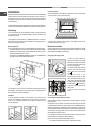
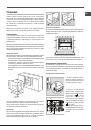
The oven is provided
with a stop system to extract the
racks and prevent them from
coming out of the oven (1).
As shown in the drawing, to extract
them completely, simply lift the
racks, holding them on the front
part, and pull (2).
!
The first time you use your appliance, heat the empty oven with its door
closed at its maximum temperature for at least half an hour. Make sure that
the room is well ventilated before switching the oven off and opening the
oven door. The appliance may emit a slightly unpleasant odour caused by
protective substances used during the manufacturing process burning away.
Starting the oven
1. Select the desired cooking mode by turning the SELECTOR knob.
2. Select the desired temperature with the THERMOSTAT knob. See the
Cooking advice table for cooking modes and the suggested cooking
temperatures (
see Cooking Modes
).
3. When lit, the THERMOSTAT indicator light indicates that the oven is heating
up to the temperature set.
4. You may do the following during cooking:
- change the cooking mode by turning the SELECTOR knob.
- change the temperature by turning the THERMOSTAT knob.
- stop cooking by turning the SELECTOR knob to the “0” position.
!
Never put objects directly on the oven bottom to avoid damaging the enamel
coating.
!
Always place cookware on the rack(s) provided.
Cooling ventilation
In order to cool down the external temperature of the oven, some models
are fitted with a cooling fan that blows out air between the control panel and
the oven door.
!
Once the cooking has been completed, the cooling fan remains on until the
oven has cooled down sufficiently.
Oven light
It goes on when selecting
with the SELECTOR knob. It stays on when
a cooking mode is selected.
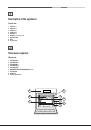
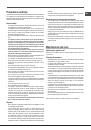
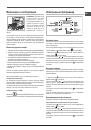
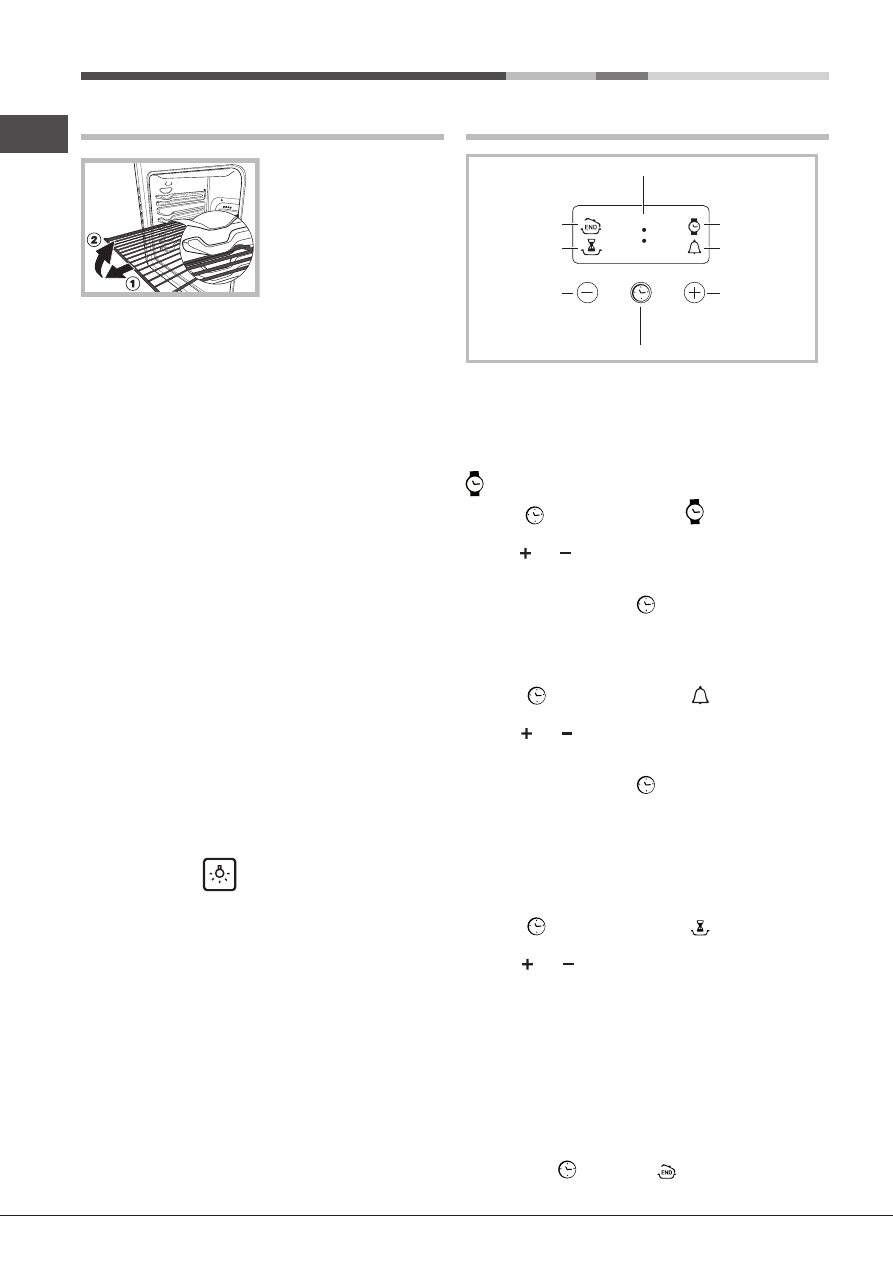
The electronic programmer
DISPLAY
SET TIME
button
END OF
COOKING
icon
CLOCK
icon
DURATION
icon
TIMER
icon
DECREASE TIME
button
INCREASE TIME
button
•• ••
Setting the clock
!
The clock may be set when the oven is switched off or when it is switched
on, provided that a the end time of a cooking cycle has not been programmed
previously.
After the appliance has been connected to the mains, or after a blackout, the
icon and the four numerical digits on the DISPLAY will begin to flash.
1. Press the button several times until the icon and the four digits on
the display begin to flash.
2. Use the “ ” and “
” buttons to adjust the time; if you press and hold either
button, the display will scroll through the values more quickly, making it quicker
and easier to set the desired value.
3. Wait for 10 seconds or press the
button again to finalise the setting.
Setting the timer
!
This function does not interrupt cooking and does not affect the oven; it is
simply used to activate the buzzer when the set amount of time has elapsed.
1. Press the button several times until the icon and the three digits
on the display begin to flash.
2. Use the “ ” and “
” buttons to set the desired time; if you press and hold
either button, the display will scroll through the values more quickly, making
it quicker and easier to set the value.
3. Wait for 10 seconds or press the
button again to finalise the setting.
The display will then show the time as it counts down. When this period of
time has elapsed the buzzer will be activated.
Programming cooking
!
A cooking mode must be selected before programming can take place.
Programming the cooking duration
1. Press the button several times until the icon and the three digits
on the DISPLAY begin to flash.
2. Use the “ ” and “
” buttons to set the desired duration; if you press and
hold either button, the display will scroll through the values more quickly,
making it quicker and easier to set the value.
4. When the set time has elapsed, the text END appears on the DISPLAY,
the oven will stop cooking and a buzzer sounds. Press any button to stop it.
• For example: it is 9:00 a.m. and a time of 1 hour and 15 minutes is
programmed. The programme will stop automatically at 10:15 a.m.
Setting the end time for a cooking mode
!
A cooking duration must be set before the cooking end time can be scheduled.
1. Follow steps 1 to 3 to set the duration as detailed above.
2. Next, press the button until the icon and the four digits on the
8
GB