English
Congratulations on your purchase, and welcome to Philips!
To fully benefit from the support that Philips offers, register your product at www.Philips.com/welcome.
1 Important
Safety
Read this user manual carefully before you use this 4-in-1 juicer and save it for future reference.
Danger
•
Don't immerse the motor unit of the juicer in water, any other fluid, nor rinse it under the tap. Use
only a moist cloth to clean.
Warning
•
Check if the voltage indicated on the juicer corresponds to the local power voltage before you
connect it.
•
Only connect the juicer to a grounded power outlet. Always make sure that the plug is inserted firmly
into the power outlet.
•
Do not use the appliance if the plug, the power cord, or other components are damaged.
•
Assemble the juicer properly before plugging it into the power outlet.
•
Make sure that the damaged power cord is replaced by Philips, a service center authorized by Philips
or similarly qualified persons in order to avoid a hazard.
•
If you detect cracks in the filter / rotating sieve or if the filter / rotating sieve is damaged in anyway, do
not use the appliance anymore and contact the nearest Philips service center.
•
Avoid touching the sharp blades, especially when you clean them and when the juicer is still connected
to power outlet.
•
The appliance is not intended for use by persons (including children) with reduced physical, sensory, or
mental capabilities, or lack of experience and knowledge, unless they have been given supervision or
instruction concerning use of the appliance by a person responsible for their safety.
•
Children should be supervised to make sure that they do not play with the juicer.
•
Keep the power cord out of the reach of children. Do not let the power cord hang over the edge of
the table or worktop on which the juicer stands.
•
Do not plug in the juicer or press any of the buttons on the control panel with wet hands.
•
Never use the accessories to turn the juicer on and off.
•
Never let the juicer operate unattended.
•
Make sure the blade unit is securely fastened to the accessories before you assemble them onto the
motor unit.
Caution
•
Never use any accessories or parts from other manufacturers or that Philips does not specifically
recommend. If you use such accessories or parts, your guarantee becomes invalid.
•
Do not remove accessories from the motor unit when the juicer is working.
•
Never reach into the jar or bowl with your fingers or an object while the juicer is running.
•
Do not exceed the quantities and processing times indicated in the recipe section.
•
Unplug the juicer immediately after use, e.g. before unscrewing the jar.
•
Avoid touching the sharp blades, especially when the juicer is still connected to power outlet.
•
If the blades get stuck, unplug the appliance before removing the ingredients that are blocking the blades by
using a spatula.
•
Place the juicer on a stable, horizontal, and level surface.
•
Switch off and unplug the juicer from the power supply before you take out and insert any accessories from the
main unit.
•
Always let the juicer cool down before you clean or move it.
•
Always clean the juicer after use. You can clean the juicer in dishwasher.
•
Always unplug the juicer if not used for a longer period.
•
This appliance is intended for household use only.
•
Make sure all parts are correctly mounted before you switch on the appliance.
•
Only use the appliance when both clamps are locked. Unlock the clamps after you have switched off
the appliance and the sieve has stopped rotating.
•
Food coloring can discolor components. This is normal and has no impact on use.
•
Noise level: Lc=86 dB(A)
Electromagnetic fields (EMF)
This Philips appliance complies with all applicable standards and regulations regarding exposure to
electromagnetic fields.
Built-in safety lock
This feature ensures that you can only switch on the appliance if the blender jar and lid, the mill beaker
or the chopper bowl and blade unit (specific types only) are assembled on the motor unit properly.
If the blender jar and lid, the mill beaker or the chopper bowl and blade unit are correctly assembled,
the built-in safety lock will be unlocked.
Overheat protection (HR1849 and HR1848 China only)
This appliance is equipped with overheat protection. If the appliance overheats, it switches off
automatically. Unplug the appliance and let it cool down for 10 minutes. Then put the mains plug
back into the wall socket and switch on the appliance again. Please contact your Philips dealer or an
authorized Philips service center if the overheat protection is activated too often.
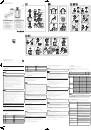
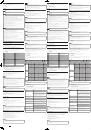
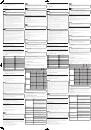
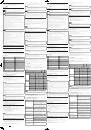
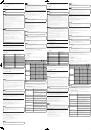
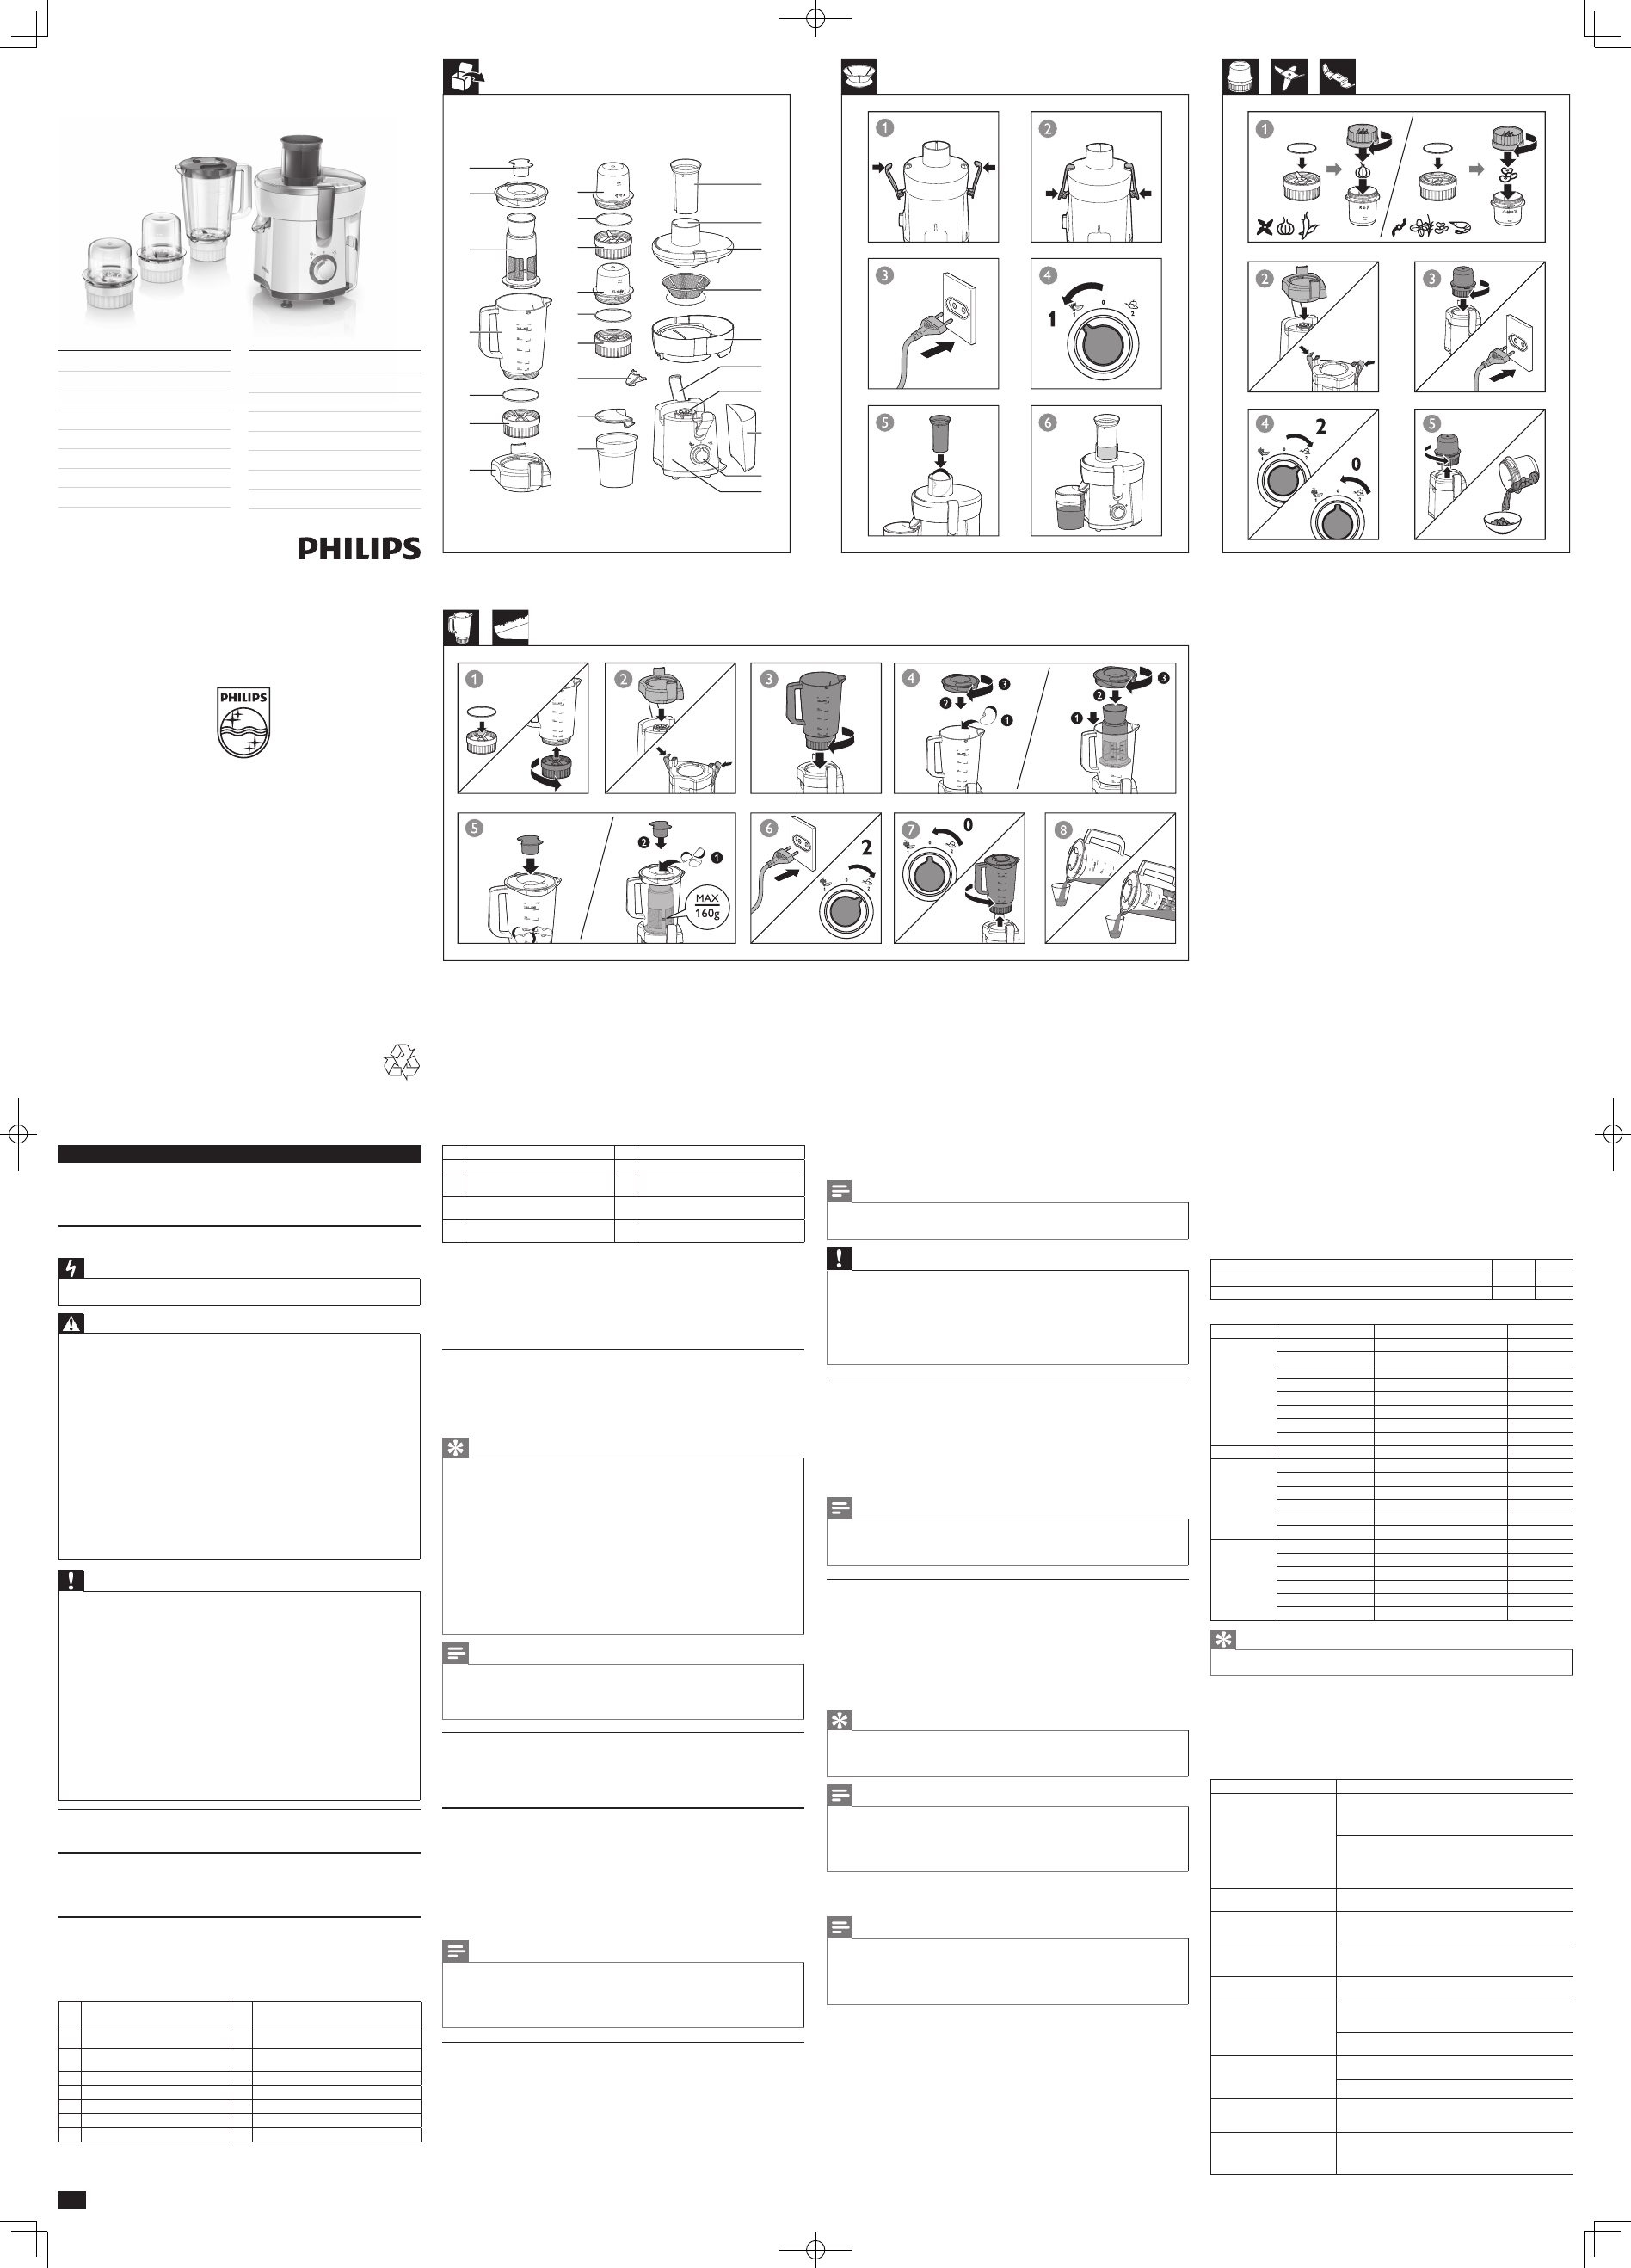
2 Overview
a
Measuring cup
n
Chopper blade unit
(HR1846, HR1847 and HR 1848 only)
b
Blender jar lid
o
Chopper rubber ring
(HR1846, HR1847 and HR 1848 only)
c
Filter
p
Chopper beaker
(HR1846, HR1847 and HR 1848 only)
d
Blender jar
q
Pusher
e
Blender rubber ring
r
Feeding tube
f
Blender blade unit
s
Lid
g
Central base
t
Sieve
h
Juice container
u
Juice collector
i
Juice container cover Spout
v
Locking clips
j
Spout
w
Driving shaft
k
Mill blade unit
(HR1847, and HR 1848 only)
x
Pulp container
l
Mill rubber ring
(HR1847, and HR 1848 only)
y
Switch
m
Mill beaker
(HR1847, and HR 1848 only)
z
Motor unit
3 Before first use
1
Take out all the accessories.
2
Clean the parts of the juicer thoroughly before using the juicer for the first time (see chapter
‘Cleaning’).
3
Make sure all parts are completely dry before you start using the juicer.
4 Using the juicer
Extracting Juice
The juicer can be used for preparing fresh fruit juices. Pulp, pips and skins will be separated.
Make sure the co ntrol switch is off. Then, connect to the power socket.
1
Clean and cut large ingredients into pieces that fit into the feeding tube.
2
Turn the control switch to the suggested speed.
3
Put your ingredients through the feeding tube.
4
Push the ingredients gently down with the pusher.
Tips
•
Remove stones from cherries, plums, peaches, etc. You do not have to remove cores or seeds from
fruits like melons, apples and grapes.
•
Use fresh fruit and vegetables; they contain more juice. Particularly suitable for processing in the juice
extractor are pineapples, beetroots, celery stalks, apples, cucumbers, carrots, spinach, melons, tomatoes,
oranges and grapes.
•
You do not have to remove thin peels or skins. Only remove thick peels, e.g. those of oranges,
pineapples and uncooked beetroots. Also remove the white pith of citrus fruits because it has a bitter
taste.
•
When you prepare apple juice, remember that the thickness of the apple juice depends on the apple
you are using. The juicier the apple the thinner the juice. Choose an apple that produces the type of
juice you prefer.
•
Apple juice turns brown very quickly. You can slow down this process by adding a few drops of lemon
juice.
•
Fruits that contain starch, such as bananas, papayas, avocados, figs and mangoes are not suitable for
processing in the juice extractor. Use a food processor, blender or bar blender to process these fruits.
•
Leaves and leafstalks of e.g. lettuce can also be processed in the juice extractor.
•
Drink the juice immediately after you have extracted it. If it is exposed to air for some time, the juice
will lose its taste and nutritional value.
•
You can get more juice output if you use softer force to push the fruit and vegetables down.
Notes
•
Do not exert too much pressure on the pusher, since this would affect the quality of the end result
and it could even cause the sieve to come to a halt.
•
Do not run the juicer continuously for more than 2 minutes. If you have not finished extracting juice,
switch the juicer off, and allow it to cool down to room temperature before you continue processing.
•
Do not reach into the sieve through the pulp outlet of the pulp collector.
Blending
The blender is intended for:
•
Blending fluids, for examples dairy products, sauces, fruit juices, soups, mixed drinks, shakes;
•
Mixing soft ingredients, for examples pancake batter or mayonnaise;
•
Pureeing cooked ingredients, for example making baby food.
Follow the assembling steps for blending. Remember to install the blender rubber ring before use.
Blending without Filter
1
Mount the the knife unit onto the jar. Fix it by turning it in the direction of the arrow.
2
Turn and lock the blender jar onto the motor unit until it locks into position, and you hear a click
sound.
3
Clean and cut large ingredients into pieces, and put them in the blender jar.
4
Press the lid into place.
5
Place the measuring cup into the opening in the lid until it is firmly fixed.
6
Make sure the control switch is off. Then, connect to the power socket.
7
Turn the control switch to the suggested speed.
8
Once complete, switch off and unplug. Remove the blender jar from the motor unit.
9
Pour out the drink through the spout of the blender jar.
Notes
•
Dry ingredients must not be processed for more than 1 minute.
•
While the motor is running, ingredients (for examples: ice cubes and tomatoes) can be added into the
blender through the opening in the lid.
•
Make sure to position the sieve of the lid is in front of the spout of the jar for smooth liquid pouring.
•
To disassemble the blender, follow the instructions above in reverse order and direction.
•
Refer to the end of this user manual for the recommended quantities, speed settings, and processing time.
Blending with Filter
For extra finely blended sauces, fresh fruit juices or soy milk, you can use the filter. All pips and skins
will remain in the filter.
1
Mount the the knife unit onto the jar. Fix it by turning it in the direction of the arrow.
2
Turn and lock the blender jar onto the motor unit until it locks into position.
3
Put the filter in the blender jar. Make sure the filter is properly fitted on the bottom of the jar.
4
Put the lid in place to fix the filter.
5
Put the ingredients, water, or any other liquid in the filter.
6
Put the measuring cup in place and switch on the blender.
7
Select the highest speed and let the appliance run for maximum of 60 seconds.
8
Switch the blender off and remove the blender jar from the motor unit.
9
Pour out the drink through the spout of the blender jar.
Notes
•
Never overfill the filter. Do not exceed “MAX/160g” marking in filter for processing ingredients weight.
•
Cut fruits into small pieces, and soak dried ingredients thoroughly, like soy beans, before processing.
•
Do not use the filter to process hot ingredients.
Cautions
•
Be careful not to exert too much pressure on the handle of the jar.
•
Never fill the jar with ingredients that have a temperature of over 60°C.
•
Never overfill the blender jar above the maximum level indication (1.0 liters) to avoid spillage.
•
Always insert the measuring cup into the lid before you start processing.
•
Do not run the blender for more than 3 minutes at a time. If you have not finished blending after
3 minutes, switch the blender off and let it cool down to room temperature before you continue
processing.
•
Never put your hand or any object in the jar while the blender is running.
•
Always set the control knob to 0 before you open the lid.
Grinding
The mill attachment can be used for grinding dry ingredients only.
Follow the assembling steps for grinding dry ingredients. Remember to install the mill rubber ring
before use.
Put the ingredients in the beaker.
1
Screw the blade unit onto the beaker. Fix it by turning it in the direction of the arrow.
2
Turn the assembled mill upside down, place and lock it on the motor unit.
3
Turn the control switch to the suggested speed.
4
Once complete, switch off, unlock, and remove the mill from the motor unit.
5
Unscrew the blade unit from the beaker.
Notes
•
The mill is not suitable for ice crushing. Use the blender.
•
Do not fill the beaker beyond the maximum indication. See the table for the advised quantities.
•
Never use the mill for more than 30 seconds without interruption.
•
Never fill the mill with hot ingredients.
Chopping
The chopper attachment can be used for chopping ingredients such as nuts, meat, hard cheese, dried
fruits, chocolate, garlic, herbs, dry bread etc.
Follow the assembling steps for chopping. Remember to install the chopper rubber ring before use.
1
Put the ingredients in the beaker.
2
Screw the blade unit onto the beaker. Fix it by turning it in the direction of the arrow.
3
Turn the assembled chopper upside down, place and lock it on the motor unit.
4
Switch the chopper on.
5
When you have finished chopping, switch the chopper off.
6
Unlock and remove the assembled chopper from the motor unit.
7
Unscrew the blade unit from the beaker.
Tips
•
Cut large ingredients into pieces approximately 2 cm before processing.
•
If the ingredients are not evenly distributed, turn the appliance off. Open the lid and distribute the
ingredients evenly on the surface of the chopper. Turn the appliance on again.
•
Never fill the chopper with hot ingredients.
Notes
•
The chopper is not suitable for chopping hard ingredients like coffee beans, dry beans, nutmeg and
uncooked rice. Use the mill.
•
Do not use the chopper for mixing liquids. Use the blender.
•
The cutting edge of the blades are very sharp, avoid touching them.
•
Never exceed the maximum quantity. See the table for the advised quantities.
•
Never use the chopper for more than 30 seconds without interruption.
5 Cleaning
It is easiest to clean the juicer, its parts and accessories immediately after use.
Notes
•
Unplug the juicer before you started cleaning it.
•
Wait until the juicer has cooled down sufficiently before cleaning it.
•
All detachable accessories can be cleaned in dishwasher.
•
Clean the motor unit with a moist cloth.
•
Do not use scouring pads, abrasive cleaning agents or aggressive liquids such as petrol, alcohol or
acetone to clean the appliance.
1
After you unplug the juicer, detach the used accessories, rubber rings, and parts and clean them in
lukewarm washing up liquid.
2
Rinse all accessories and parts under a tap.
3
To clean the blender jar, pour lukewarm water and some detergent into it.
4
Assemble the lid and the measuring cup, and then let the blender runs for a few seconds.
5
Detach the blender jar, knife unit, and remove the lid and measuring cup. Clean and rinse them as
well.
6
For better cleaning, you can use the brush to clean.
6 Storage
1
Keep it in dry places to avoid the sieve, blades get rusty.
2
Plug could be inserted into the main unit for storage.
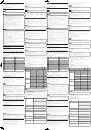
7 Recipes
With 4-in-1 Juicer, you can experiment endlessly and try out all kind of recipes. You can make
delicious juices, shakes, soups, and sauces in no time at all. To give you an idea of the possibilities,
you can go to www.kitchen.philips.com.
For Juicing
Ingredients
Weight
Speed
Cucumbers/ Spinach/ Melons/ Tomatoes/ Oranges/ Lemon/ Grapes/ Berries
500g
1
Apples/ Carrots/ Pineapples/ Beetroots/ Celery/ Pear
500g
2
For blending, milling, and chopping
Features
Ingredients
Weight | Speed - 2
Time
Blending
Smoothies
1000ml
60 sec.
Shakes & mixed drinks
1000ml
60 sec.
Fruits & vegetables
1000ml
60 sec
Soups
500ml
60 sec
Batters
1000ml
60 sec
Sauces
1000ml
60 sec
Baby food
500ml
60 sec
Ice
6 pieces (approx. 38x30x23mm)
15 x 1sec.
Blending - filter
Soy bean milk
160g soaked beans, 450g water
60 sec
Milling
Coffee
50g
30 sec.
Nuts
50-100g
30 sec
Cheese
50-100g
30 sec
Sesame seeds
50-100g
30 sec
Dry beans
50-100g
30 sec
Chili paste
50g
30 sec
Chopping
Garlics
100g
5 x 1 sec.
Cooked eggs
100g
5 x 1 sec.
Meat & fish
100g
5 sec.
Herbs
20g
5 x 1 sec.
Cheese
100g
3 x 5 sec.
Nuts
100g
2 x 10 sec.
Tip
•
For crushing ice in blender jar and chopping in chopper, it is suggested to use the pulse to have a better
result. That is to turn the appliance on and off to simulate the pulse effect.
8 Environment
Do not throw away the appliance with normal household waste at the end of its life, but hand it in at
an official collection point for recycling. By doing this, you can help to preserve the environment.
9 Troubleshooting
If you encounter problems when using this juicer, check the following points before requesting service.
If you cannot solve the problem, contact the Philips Consumer Care Center in your country.
Problem
Solution
The juicer does not work.
The juicer is equipped with a safety system. If the accessories are
not properly connected with the motor unit, the juicer does not
work. Check whether the accessories have been connected in
the right way (see the various sections). Turn off the juicer first!
This appliance is equipped with overheat protection. If the
appliance overheats, it switches off automatically. Unplug the
appliance and let it cool down for 10 minutes. Then put the mains
plug back into the wall socket and switch on the appliance again.
(HR1849 and HR1848 China only)
The knife unit/ motor unit is
blocked.
Turn off the juicer and process a smaller quantity.
The motor unit gives an
unpleasant smell during the first
few times of use.
This is normal for the first few applications. If the smelling
continues, check the quantity you are processing, the application
time, or used speed.
The blender shows leakage.
Turn off the juicer. Release the knife unit by turning it anti-
clockwise. Check whether the rubber ring is properly assembled
on the knife unit (rest on flat position).
The lid and/or measuring cup of
the blender show leakage.
Make sure the lid is attached properly, and the measuring cup
fits well.
The sieve of the juicer makes
contact with the feeding tube
or shows a high vibration during
processing.
Turn off the juicer. Check if the sieve is properly connected. The
ribs on the bottom of the sieve should fit properly on the motor
coupling opening.
Check if the sieve is not damaged. Cracks, fissures, loose grater
disc or any other irregularity may cause malfunction.
The mill / blender / chopper
shows a high vibration, produces
a lot of noise or the blade unit is
out of alignment.
Check whether the knife is properly and firmly attached to the
beaker.
Check whether the rubber ring is assembled in a correct way.
The mill or chopper leaks.
Small amount of leakage is normal.
Make sure the rubber ring is assembled properly. The ring
should rest around all interface, in a flat position.
The fruit juice or soy milk
contains a lot of pulp or skins
after filtering from the filter
accessory in the blender.
Make sure that the filter is placed properly in the blender jar, the
lid is closed and the measuring cup is inserted in the lid.
Register your product and get support at
www.philips.com/welcome
HR1849
HR1848
HR1847
HR1846
Specifications are subject to change without notice
© 2013 Koninklijke Philips Electronics N.V.
All rights reserved.
HR1849_1848_1847_1846_CEE_UM_V4.0
3140 035 30774
EN
User manual
BG
Ръководство за потребителя
CS
Příručka pro uživatele
ET
Kasutusjuhend
HR
Korisnički priručnik
HU
Felhasználói kézikönyv
KK
Қолданушының нұсқасы
LT
Vartotojo vadovas
LV
Lietotāja rokasgrāmata
PL
Instrukcja obsługi
RO
Manual de utilizare
RU
Руководство пользователя
SK
Príručka užívateľa
SL
Uporabniški priročnik
SR
Korisnički priručnik
UK
Посібник користувача
1/5
a
p
o
n
m
k
j
i
h
w
v
x
y
z
u
t
s
r
q
b
c
d
f
e
g
l