20
English
Basic Features
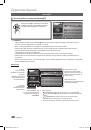
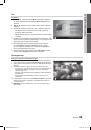
Before using 3D function...
NOTE
✎
You may notice a small amount of screen flickering
x
when watching 3D images in poor light conditions
(from a strobe light, etc.), or under a fluorescent lamp
(50Hz ~ 60Hz) or 3 wavelength lamp. If so, dim the
light or turn the lamp off.
3D mode is automatically disabled in following cases:
x
when changing a channel or the input source, or
accessing
Media Play
or
Internet@TV
.
Some Picture functions are disabled in
x
3D
mode.
x
PIP
and data broadcast is not supported in
3D
mode.
3D Active Glasses from other manufacturers may not
x
be supported.
When the TV is initially powered on, may take some
x
time until the 3D display is optimized.
The 3D Active Glasses may not work properly if there
x
is any other 3D product or electronic devices turned
on near the glasses or TV. If there is a problem, keep
other electronic devices as far away as possible from
the 3D Active Glasses.
x
Photos
of
Media Play
are shown in “2D
→
3D”
mode only.
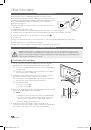
If you lie on your side while watching TV with 3D
x
Active Glasses, the picture may look dark or may not
be visible.
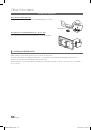
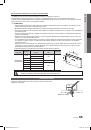
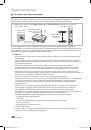
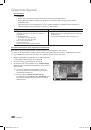
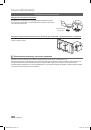
Be sure to stay within the viewing angle and optimum
x
TV viewing distance when watching 3D pictures.
Otherwise, you may not be able to enjoy proper 3D
–
effects.
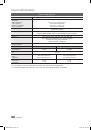
The ideal viewing distance should be three times
x
or more the height of the screen. We recommend
sitting with viewer’s eyes on a level with the screen.
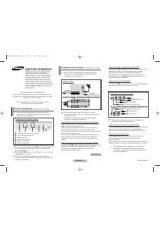
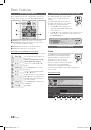
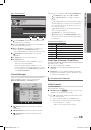
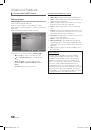
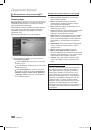
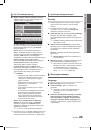
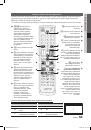
Picture Reset (OK / Cancel)
Resets your current picture mode to its default settings.
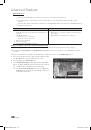
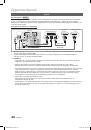
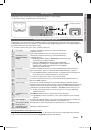
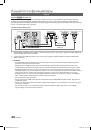
Setting up the TV with Your PC
¦
Set the input source to PC.
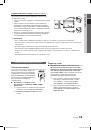
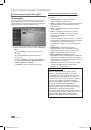
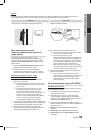
Auto Adjustment
t
Adjust frequency values/positions and fine tune the settings
automatically.
Not available when connecting with an HDMI/DVI cable.
✎
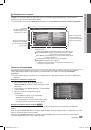
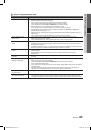
Screen
Coarse / Fine
■
: Removes or reduces picture noise. If the
noise is not removed by Fine-tuning alone, then adjust
the frequency as best as possible (
Coarse
) and Fine-
tune again. After the noise has been reduced, readjust
the picture so that it is aligned to the centre of screen.
Position
■
: Adjust the PC screen position with direction
button (
▲
/
▼
/
◄
/
►
).
Image Reset
■
: Resets the image to default settings.
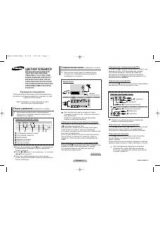
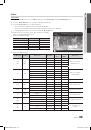
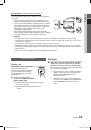
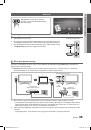
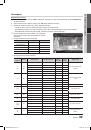
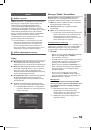
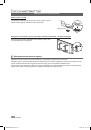
Using Your TV as a Computer (PC) Display
Setting Up Your PC Software (Based on Windows XP)
Depending on the version of Windows and the video card,
the actual screens on your PC may differ in which case the
same basic set-up information will almost always be applied.
(If not, contact your computer manufacturer or Samsung
Dealer.)
1.
Click on “Control Panel” on the Windows start menu.
2.
Click on “Appearance and Themes” in the “Control
Panel” window and a display dialog-box will appear.
3.
Click on “Display” and a display dialog box will appear.
4.
Navigate to the “Settings” tab on the display dialog-box.
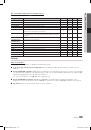
The correct size setting (resolution) [Optimum: 1920 X
y
1080 pixels]
If a vertical-frequency option exists on your display
y
settings dialog box, the correct value is “60” or “60 Hz”.
Otherwise, just click “OK” and exit the dialog box.
BN68-02808A_Eng.indb 20
2010-05-18 �� 10:26:13
 1
1
 2
2
 3
3
 4
4
 5
5
 6
6
 7
7
 8
8
 9
9
 10
10
 11
11
 12
12
 13
13
 14
14
 15
15
 16
16
 17
17
 18
18
 19
19
 20
20
 21
21
 22
22
 23
23
 24
24
 25
25
 26
26
 27
27
 28
28
 29
29
 30
30
 31
31
 32
32
 33
33
 34
34
 35
35
 36
36
 37
37
 38
38
 39
39
 40
40
 41
41
 42
42
 43
43
 44
44
 45
45
 46
46
 47
47
 48
48
 49
49
 50
50
 51
51
 52
52
 53
53
 54
54
 55
55
 56
56
 57
57
 58
58
 59
59
 60
60
 61
61
 62
62
 63
63
 64
64
 65
65
 66
66
 67
67
 68
68
 69
69
 70
70
 71
71
 72
72
 73
73
 74
74
 75
75
 76
76
 77
77
 78
78
 79
79
 80
80
 81
81
 82
82
 83
83
 84
84
 85
85
 86
86
 87
87
 88
88
 89
89
 90
90
 91
91
 92
92
 93
93
 94
94
 95
95
 96
96
 97
97
 98
98
 99
99
 100
100
 101
101
 102
102
 103
103
 104
104
 105
105
 106
106
 107
107
 108
108
 109
109
 110
110
 111
111
 112
112
 113
113
 114
114
 115
115
 116
116
 117
117
 118
118
 119
119
 120
120
 121
121
 122
122
 123
123
 124
124
 125
125
 126
126
 127
127
 128
128
 129
129
 130
130
 131
131
 132
132
 133
133
 134
134
 135
135
 136
136
 137
137
 138
138
 139
139
 140
140
 141
141
 142
142
 143
143
 144
144
 145
145
 146
146
 147
147
 148
148
 149
149
 150
150
 151
151
 152
152
 153
153
 154
154
 155
155
 156
156
 157
157
 158
158
 159
159
 160
160
 161
161
 162
162
 163
163
 164
164
 165
165
 166
166
 167
167
 168
168
 169
169
 170
170
 171
171
 172
172
 173
173
 174
174
 175
175
 176
176
 177
177
 178
178
 179
179
 180
180
 181
181
 182
182
 183
183
 184
184
 185
185
 186
186
 187
187
 188
188
 189
189
 190
190
 191
191
 192
192
 193
193
 194
194
 195
195
 196
196
 197
197
 198
198
 199
199
 200
200
 201
201
 202
202
 203
203
 204
204
 205
205
 206
206
 207
207
 208
208
 209
209
 210
210
 211
211
 212
212
 213
213
 214
214
 215
215
 216
216
 217
217
 218
218
 219
219
 220
220
 221
221
 222
222
 223
223
 224
224
 225
225
 226
226
 227
227
 228
228
 229
229
 230
230
 231
231
 232
232
 233
233
 234
234
 235
235
 236
236
 237
237
 238
238
 239
239
 240
240
 241
241
 242
242
 243
243
 244
244
 245
245