Инструкция для ZELMER HD1250

(скачивание инструкции бесплатно)
Формат файла: PDF
Доступность: Бесплатно как и все руководства на сайте. Без регистрации и SMS.
Дополнительно: Чтение инструкции онлайн
background image

29

HD1250-001_v01

Always unplug hair dryer after use.


Use hair dryer according to its intended use only as 


stipulated in the present instruction.

CAUTION: In order to ensure additional protection it 

is recommended to equip electric circuit supplying 

the  bathroom  with  a  residual  current  device  (RCD) 

with a residual current not exceeding 30 mA. In this 

respect a specialized electrician is to be addressed.

Use and operation of the hair dryer

USE

Dry  your  hair  well  with  a  towel  after  washing.  Make  sure 

that the airflow adjustment switch 

(4)

 is set to “0”. Plug the 

appliance  and  select  the  desired  airflow  speed  using  the 

adjustment switch 

(4)

.

IONIC TECHNOLOGY

Hair  dryer  is  equipped  with  a  built-in  generator  producing 

negative  ions,  which  enhance  moist  absorption,  thanks  to 

which hair does not get dried during styling and is softer and 

more shiny. Ionization function is switched on automatically 

when the hair dryer is turned on.

COLD BLOW

Cold  blow  is  used  for  fixing  hair  style.  Pressing  cold  blow


switch 

 will start emission of cold air from the appliance. 

After  release  of  the  switch  the  hair  dryer  will  get  back  to 

normal operation.

AIR CONCENTRATOR

Air concentrator allows to direct air stream precisely at the 

desired place, thanks to which you will in an easy and fast 

way  dry  particular  parts  of  hair.  Air  concentrator  is  easily 

affixed to the front part of hair dryer.

Hair drying and styling

After washing your hair dry it thoroughly with a towel.


Before  plugging  the  appliance,  make  sure  that  the 


airflow adjustment switch 

(4)

 is set to “0”.


Then plug the 

appliance.

If you want to quickly dry your hair place the air stream 


strength switch in position "3".

When  hair  dryer  is  switched  on  the  ionisation  function 


thanks to which you will easier set your dream hair style 

and your hair will remain healthier.

In order to fix the hairstyle press and hold the switch of 


cold blow 

.

After the drying is finished place the switch of air stream 


strength regulation 

(4)

 in position "0".

Always  unplug  the  appliance  from  the  electrical  autlet 


after each use. 

Immediately  after  the  use  accessories  can  be  hot. 


Always leave the appliance to cool down before removal 

of accessories.

Cleaning and maintenance of hair dryer

After each use, always turn off the appliance and unplug 


the power cord from the electrical outlet.

Never put hair dryer, power supply cord or plug in water 


or any other liquid.

It is recommended to remove the air inlet cover 


(2)

 from 

time to time in order to clean it and to clean the air inlet 

(3)

, located under the cover.

When required clean hair dryer casing with a dump cloth 


(it can be moistened with some washing-up liquid) dry it 

out or wipe it till dry.

Safety instructions

This  hair  dryer  is  equipped  with  an  overheating  protection 

device which turns off the appliance when the temperature of 

the outflow air is too hot or when the air inlet is partly blocked. 

If the hair dryer switches off during operation please switch off 

all buttons and allow to cool. The protection device will then 

automatically reset. Before using check if air inlet and outlet 

is not blocked. If necessary unplug the appliance and clean 

the  openings.  While  using  the  appliance  do  not  block  the 

openings and do not allow hair to get inside the hair dryer.

Technical parameters

The technical parameters are indicated on the rating label.

ZELMER hair dryer fulfills the requirements of the existing 

norms. 

The hair dryers are produced in II insulation class, they don’t 
need grounding


.

Noise level: 

69

 dB/A.

This  device  complies  with  Commission  Regulation  (EC) 

no. 1275/2008 on eco-design requirements.

The appliance is in conformity with the requirements of the 

directives:

Low voltage appliance (LVD) – 2006/95/EC.


Electromagnetic compatibility (EMC) – 2004/108/EC.


The  appliance  was  marked  by  the  CE  sign  on  the  rating 

label.

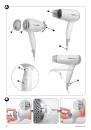
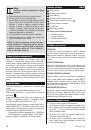
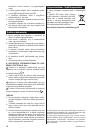
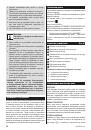
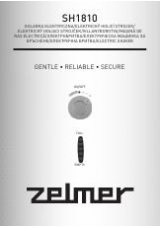
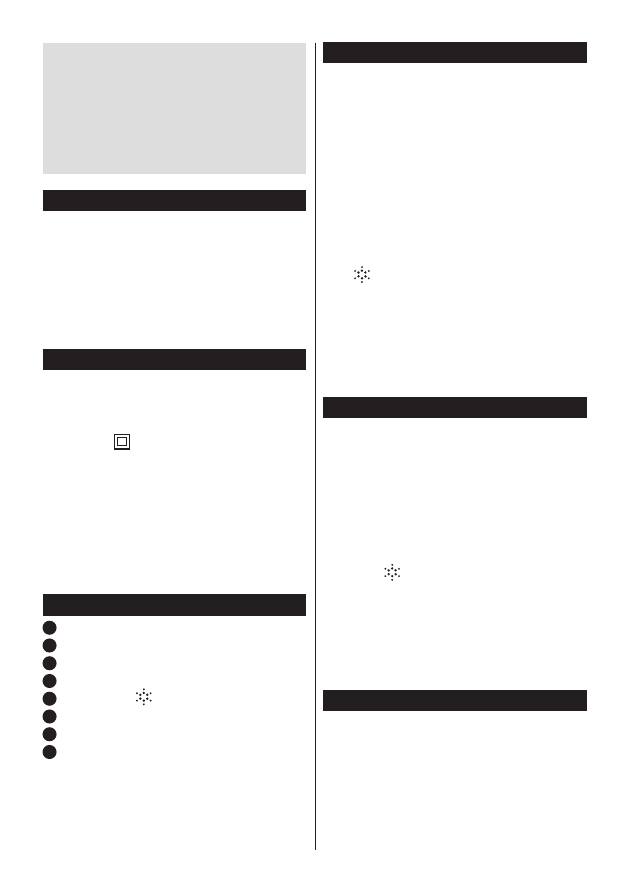
Construction of appliance 

(Fig. A)

1

 Air outlet

2

 Air inlet cover

3

 Air inlet

4

 Regulation of air stream strength switch

5


Cold blow switch


6

 Practical handle for hanging

7

 Power supply cord

8

 Air concentrator

Regulation of air stream strength

  0

  –  appliance off

  1

  –  delicate stream of air

  2

  –  medium air flow

  3

  –  strong stream of air

1
2
3
4
5
6
7
8
9
10
11
12
13
14
15
16
17
18
19
20
21
22
23
24
25
26
27
28
29
30
31
32
Оглавление инструкции
  • Страница 1 из 33
    PL INSTRUKCJA UŻYTKOWANIA SUSZARKA DO WŁOSÓW Typ HD1250 CZ NÁVOD K POUŽITÍ VYSOUŠEČ VLASŮ Typ HD1250 SK NÁVOD NA OBSLUHU SUŠIČ NA VLASY Typ HD1250 12–14 BG ИНСТРУКЦИЯ ЗА УПОТРЕБА СЕШОАР ЗА КОСА Тип HD1250 21–23 6–8 RO INSTRUCŢIUNI DE UTILIZARE USCĂTOR DE PĂR Tip HD1250 15–17 UA ІНСТРУКЦІЯ З
  • Страница 2 из 33
    A 1 2 8 3 7 5 6 4 B 1 2 2 3 HD1250-001_v01
  • Страница 3 из 33
    PL Szanowni Klienci! Gratulujemy wyboru naszego urządzenia i witamy wśród użytkowników produktów Zelmer. W celu uzyskania najlepszych rezultatów rekomendujemy używanie tylko oryginalnych akcesoriów firmy Zelmer. Zostały one zaprojektowane specjalnie dla tego produktu. Prosimy o uważne przeczytanie
  • Страница 4 из 33
    ●● Nie wyciągaj wtyczki zasilania przez ciągnięcie za przewód zasilający, a jedynie za samą wtyczkę. ●● Nie zwijaj przewodu zasilającego wokół suszarki (ryzyko przerwania przewodu). ●● Nigdy nie wolno niczym przykrywać suszarki, ponieważ może to powodować akumulację ciepła w jej wnętrzu. ●● Nie
  • Страница 5 из 33
    ZIMNY NADMUCH Nadmuch zimnego powietrza służy do utrwalania fryzury. Naciśnięcie przycisku nadmuchu zimnego powietrza spowoduje, że z urządzenia zacznie wydobywać się zimne powietrze. Po zwolnieniu przycisku suszarka powróci do normalnego trybu pracy z ogrzewaniem. KONCENTRATOR POWIETRZA
  • Страница 6 из 33
    CZ Vážení zákazníci Blahopřejeme Vám k nákupu našeho přístroje a vítáme Vás mezi uživateli výrobků Zelmer. Pro dosažení nejlepších výsledků Vám doporučujeme používat pouze originální příslušenství firmy Zelmer. Bylo vyvinuto speciálně pro tento výrobek. Přečtěte si prosím pečlivě tento návod k
  • Страница 7 из 33
    Pokyny Informace o výrobku a pokyny k použití ●● Vysoušeč by měl být používán pouze k sušení vlasů. ●● Vysoušeč je určen pouze pro domácí použití. ●● Pokud předáváte vysoušeč jiné osobě, předejte ji rov- něž tento návod. Přístroj, jehož životnost uplynula, musí být odstraněn dle platných předpisů o
  • Страница 8 из 33
    ●● Pro prodloužení trvanlivosti účesu stiskněte a držte tla- čítko studeného proudu vzduchu . ●● Po ukončení sušení nastavte přepínač rychlosti toku vzduchu (4) do polohy „0“. ●● Po každém použití vždy vyjměte zástrčku přívodního kabelu ze zásuvky elektrické sítě. ●● Po použití vysoušeče
  • Страница 9 из 33
    SK Vážení zákazníci! Blahoželáme Vám k výberu nášho zariadenia a vítame Vás medzi používateľmi výrobkov Zelmer. Ak chcete získať najlepšie výsledky, odporúčame Vám používať len originálne príslušenstvo firmy Zelmer. Príslušenstvo bolo navrhnuté špeciálne pre tento výrobok. Prosíme, pozorne si
  • Страница 10 из 33
    Pokyn Zloženie prístroja Informácia o výrobku a pokyny, ktoré sa týkajú používania 1 2 3 4 5 6 7 8 ●● Sušič môžete používať výlučne na sušenie vlasov. ●● Sušič je určený výlučne pre domáce účely. ●● Ak sušič dáte inej osobe, odovzdajte jej prosím aj tieto pokyny. Sušiče, ktoré už nebudete používať,
  • Страница 11 из 33
    ●● Ak chcete vymodelovať účes, stlačte a pridržte tlačidlo fúkania studeného vzduchu . ●● Po ukončení sušenia nastavte prepínač rýchlosti fúkania vzduchu (4) do polohy „0”. ●● Po každom použití nezabudnite napájací kábel spotrebiča vytiahnuť zo zásuvky. ●● Prídavné prvky môžu byť krátko po použití
  • Страница 12 из 33
    HU Tisztelt Vásárlók! Gratulálunk a készülék kiválasztásához és üdvözöljük a Zelmer termékek felhasználói között. A legjobb hatások elérése érdekében javasoljuk, hogy használjon eredeti Zelmer tartozékokat. Kifejezetten ehhez a termékhez lettek kifejlesztve. Kérjük figyelmesen olvassa el az alábbi
  • Страница 13 из 33
    Javaslat A készülék felépítése Információk a a termékről és felhasználási javaslatok 1 2 3 4 5 6 7 8 ●● A hajszárító csak hajszárításra használható. ●● A hajszárító csak háztartási használatra alkalmas. ●● Ha kölcsönadja a hajszárítót, mellékelje a használati utasítást is. A használatra már nem
  • Страница 14 из 33
    formázható a frizura, valamint a haj egészségesebb marad. ●● A frizura rögzítése céljából, tolja a levegőkifúvó szabályozóját hideglevegő kifúvás pozícióba. ●● A hajszárítás befejeztével állítsa a levegőkifúvó szabályozójót (4) „0” pozícióba. ●● Húzza ki a hálózati kábel dugaszát az elektromos
  • Страница 15 из 33
    RO Stimaţi Clienţi! Vă felicităm pentru că aţi ales aparatul nostru şi vă urăm bunvenit în rândul utilizatorilor de produse ale firmei Zelmer. Pentru a obţine cele mai bune rezultate vă recomandăm să folosiţi doar accesoriile originale fabricate de firma Zelmer. Accesoriile au fost proiectate
  • Страница 16 из 33
    Indicaţii Construcţia aparatului Informaţii despre produs şi indicaţii referitoare la utilizarea acestuia 1 2 3 4 5 6 7 8 ●● Aparatul poate fi utilizat doar pentru uscarea părului. ●● Uscătorul este destinat doar pentru uz casnic. ●● Vă rugăm ca atunci când încredinţaţi uscătorul altei persoane
  • Страница 17 из 33
    ●● Atunci când porniţi uscătorul funcţia de ionizare a aerului este activată automat şi datorită acesteia veţi obţine frizura dorită iar părul va fi mai sănătos. ●● Pentru a permanentiza frizura ţineţi apăsat butonul de suflare aer rece . ●● După ce v-aţi uscat părul, setaţi comutatorul vitezei de
  • Страница 18 из 33
    RU Уважаемые Пользователи! Поздравляем Вас с выбором нашего устройства и приветствуем среди пользователей товарами Zelmer. Чтобы достичь наилучших результатов, мы рекомендуем использовать только оригинальные аксессуары компании Zelmer. Они спроектированы специально для этого продукта. Просим
  • Страница 19 из 33
    ●● Держите шнур электропитания вдали от горячих поверхностей. ●● Перед тем как отложить фен, позвольте ему остыть. ●● Для того, чтобы вынуть вилку из розетки, не тяните за шнур, а только за саму вилку. ●● Не накручивайте шнур электропитания вокруг фена (во избежание повреждения провода). ●● Никогда
  • Страница 20 из 33
    КОНЦЕНТРАТОР ВОЗДУХА Концентратор воздуха позволяет направлять воздушную струю, туда, куда необходимо, благодаря этому можно быстро и легко высушить определенные участки волос. Концентратор воздуха легко надевается на переднюю часть фена. Сушка и укладка волос 2 Установите защитную решётку
  • Страница 21 из 33
    BG Уважаеми клиенти! Поздравяваме Ви за избора и добре дошли сред потребителите на продукти Zelmer. За постигане на най-добри резултати Ви препоръчваме да използвате само оригинални аксесоари от фирмата Zelmer. Те са проектирани специално за тези продукти. Моля прочетете внимателно тази инструкция
  • Страница 22 из 33
    ●● Държете захранващия кабел далече от горещи повърхности. ●● Преди да отложите фена, оставете го да изстине. ●● Не изтегляйте захранващия щепсел, като дърпате захранващия кабел, а единствено самия щепсел. ●● Не увивайте захранващия кабел наоколо фена (риск от скъсване на кабела). ●● Никога не бива
  • Страница 23 из 33
    студен въздух. След отпускане на копчето фенът ще се върне към нормалния режим на работа с нагряване. КОНЦЕНТРАТОР НА ВЪЗДУХ Концентратор на въздух позволява да насочите струята от въздух точно там, където искате, благодарение на което ще изсушите определени зони на косата по лесен и бърз начин.
  • Страница 24 из 33
    UA Шановні Клієнти! Вітаємо Вас із вибором нашого пристрою та ласкаво просимо до спільноти користувачів товарів Zelmer. Для того, щоб отримати найкращі результати, ми рекомендуємо використовувати тільки оригінальні аксесуари компанії Zelmer. Вони спроектовані спеціально для цього продукту. Просимо
  • Страница 25 из 33
    ●● Перед відкладенням ручного фену дайте йому охо- лонути. ●● Не виймайте штепсельну вилку, тягнучи за кабель електроживлення, а лише за саму штепсельну вилку. ●● Не намотуйте кабель електроживлення довкола фену (небезпека обривання кабелю). ●● Ніколи не можна прикривати будь-чим фен, оскільки це
  • Страница 26 из 33
    КОНЦЕНТРАТОР ПОВІТРЯ Концентратор повітря дозволяє скерувати струмінь повітря там, де потрібно, завдяки чому легко і швидко можна висушити визначені ділянки волосся. Концентратор повітря просто накладається на передню частину фену для волосся. ДИФУЗОР Дифузор дозволяє легко висушити волосся та
  • Страница 27 из 33
    Транспортування і зберігання ●● Транспорутвання виробу може здійснюватись усіма видами транспорту відповідно до вимог та правил які діють на конкретному виді транспорту. ●● Під час перевезення повинна бути усунена можливість переміщенння виробів всередині тарнспорного засобу. ●● Під час
  • Страница 28 из 33
    EN Dear Customers! Congratulations on your choice of our appliance, and welcome among the users of Zelmer products. In order to achieve best possible results we recommend using exclusively original Zelmer accessories. They have been specially designed for this product. Please read these
  • Страница 29 из 33
    ●● Always unplug hair dryer after use. ●● Use hair dryer according to its intended use only as stipulated in the present instruction. CAUTION: In order to ensure additional protection it is recommended to equip electric circuit supplying the bathroom with a residual current device (RCD) with a
  • Страница 30 из 33
    ●● Do not use scrubbing agents or solvents. ●● Carefully dry all the parts which have been cleaned. CLEANING AIR INLET COVER AND NETLIKE FILTER (Fig. B) 1 Remove the air inlet (2) by turning it counter-clockwise to the position . ●● Clean the air inlet and wipe it with a dry or slightly damp cloth.
  • Страница 31 из 33
    HD1250-001_v01
  • Страница 32 из 33
    HD1250-001_v01
  • Страница 33 из 33