21
ME-008_v01
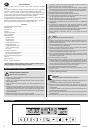
Lamp:
The newest model is equipped with an additional lamp, so you can
see what is happening inside the oven without opening the door.
Defrosting:
Room-temperature air is set in motion by a strong forced
airflow, which makes it circulate around the food. It is a gentle way to
reduce the time needed to defrost delicate dishes, such as fish or poultry.
Thermaflow:
A ring-shaped element around the fan constantly produces
hot air, which is circulated next inside the oven providing fixed temperature.
It is both an effective and economical mode, especially efficient for cooking
on several levels at the same time.
Fan-Assisted Grill:
The heat is circulated by the grill element, and directly
touches the surface of the dish, in the same time the fan distributes the
air in the oven. This mode saves up to 30-40% of energy, and makes the
food evenly crispy. It is ideal for achieving spit-roasted-effect for meat and
poultry.
Full Grill:
The infrared element and top heater work simultaneously grilling
the whole food surface, and giving precise control over temperature.
Infrared Grill:
only the inner grill element turns on and off keeping
temperature at fixed level. The mode is ideal for little portions of food or for
cooking only the middle part of a dish.
Conventional Cooking:
The top and bottom heater work simultaneously
which means the oven is heated up conventionally. Natural conduction
makes the hot air go through the middle of the oven.
Bottom Heating:
the bottom heater provides more concentrated heat to
the bottom of the dish. This mode is ideal for heating up pizza base to
crisp.
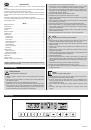
Technical Data
The technical data is given on the rating plate of the appliance.
The oven is a 1st class appliance, equipped with a power cable with a protective conduct.
The appliance fulfills all the current standards.
The appliance is in conformity with the following directives:
Low Voltage Directive (LVD) – 2006/95/EC.
–
Electromagnetic Compatibility (EMC) – 2004/108/EC.
–
The rating plate of the appliance has the CE mark on it.
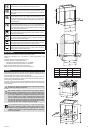
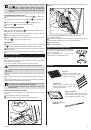
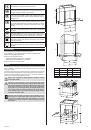
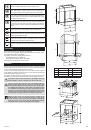
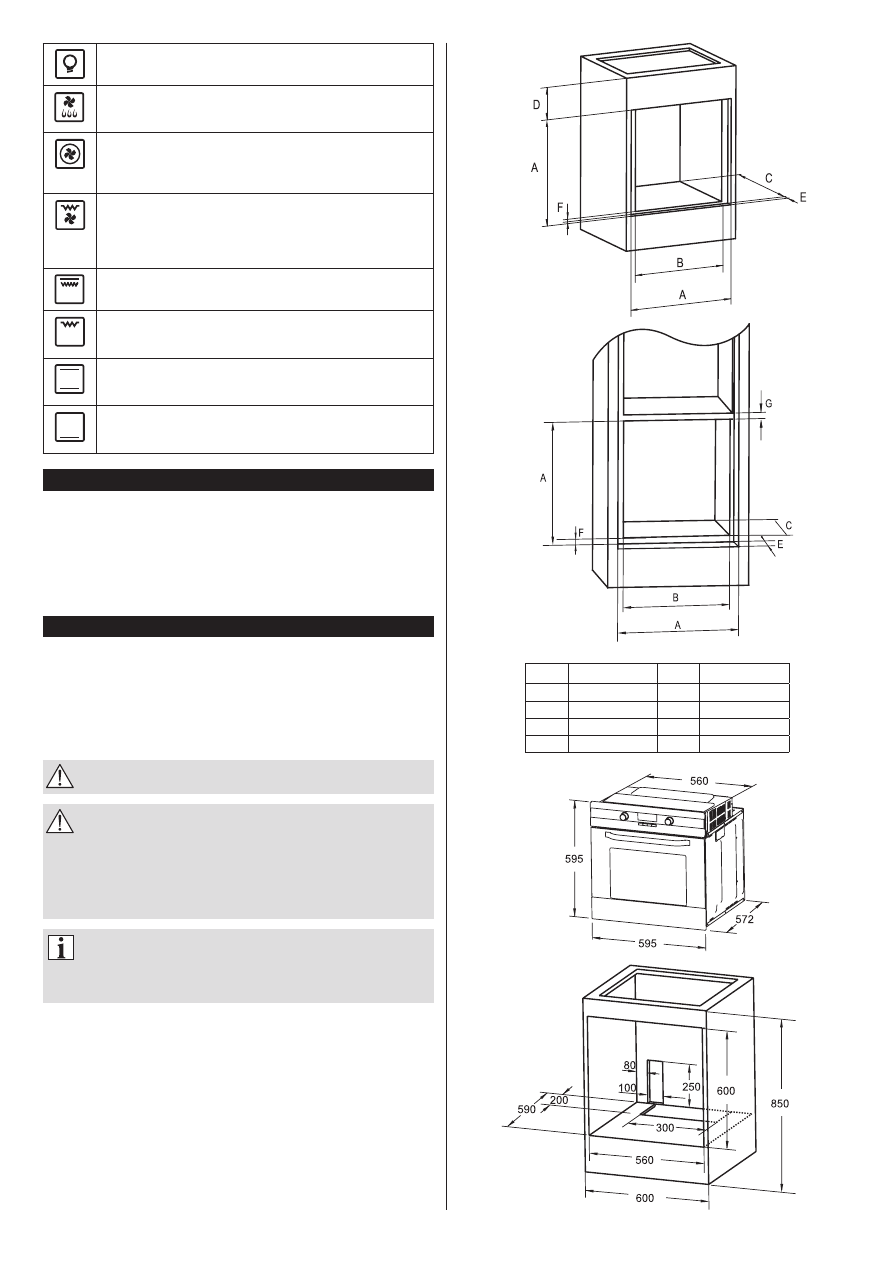
Installation
Place the oven in the desired and appropriate unit in the kitchen; it may also be installed
under the work surface or in a vertical unit. Install the oven in the appropriate position by
means of screws situated into two fastening holes in the casing.
In order to locate the fastening holes open the oven doors, and look inside. In order to
provide appropriate ventilation, please make sure the correct dimensions and distances
are observed during the installation of the oven
The appliance should be installed by a qualified technician. The producer cannot be held
responsible for any damages and accidents caused by incorrect installation of the oven.
The producer cannot be held responsible for any damages caused by
wrong installation, as well as an improper use or misuse of the oven.
The oven may only function properly with an appropriate casing. The
paneling of units situated near the oven has to be made from heat�
resistant materials. Make sure that the adhesive used in wooden�veneer
units withholds the temperature of 120°C. Plastics and adhesives which
do not withstand such temperature are going to melt and deform the unit.
According to current safety regulations, if the appliance is built�in, all its
electrical elements have to be completely insulated. All protections have to
be well secured, so that they cannot be removed without special tools.
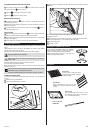
Remove the back of the unit, and make the holes presented in the
installation �gures in order to provide the necessary air flow around
the oven. The power cord is situated in the back. Before connecting the
appliance to a power source, you have to check, if the voltage in the mains
corresponds to the one given on the rating plate of the appliance.
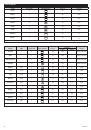
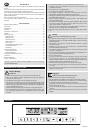
Dimensions [mm]
Dimensions [mm]
A
600
+2
B
560
+2
C
590
+2
D
90
E
24
+2
F
5
G
25
+2