6
iNUKE NU6000DSP/NU3000DSP/NU1000DSP User Manual
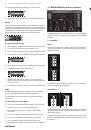
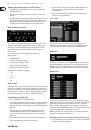
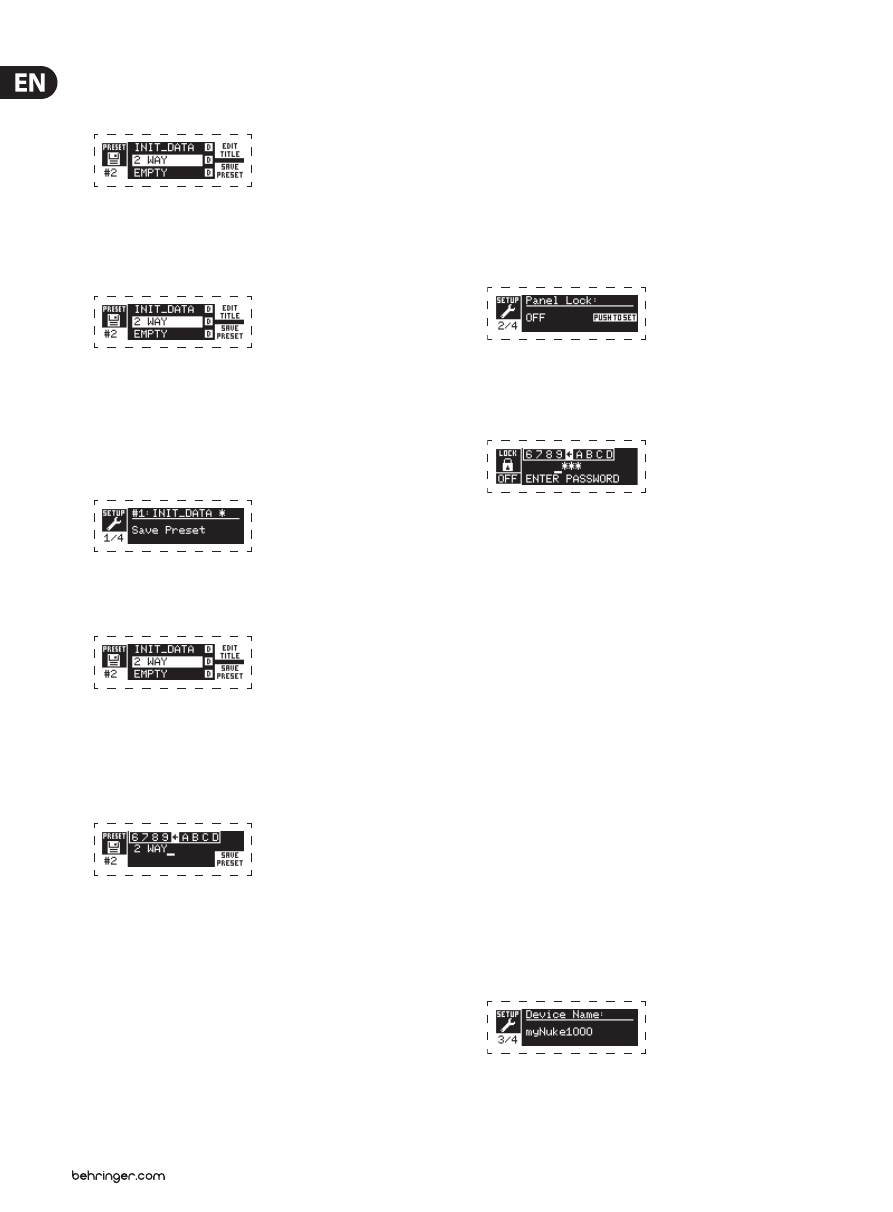
2. Press the SELECT encoder knob to access the DSP’s internal Preset list on the
next sub-screen. The correct sub-screen will display the EDIT TITLE and SAVE
PRESET options on the right-hand side of the screen.
3. Scroll through the list until you find an EMPTY Preset slot or another Preset
you wish to overwrite.
4. If you wish to edit your Preset title before saving, press the UP arrow button
to choose the EDIT TITLE option.
5. Edit the Preset title (see “Editing the Preset” title below).
6. Select the SAVE PRESET option by pressing the DOWN arrow key.
Editing a Preset title
1. Make sure the “Save Preset” option appears on the screen. (Rotate the
SELECT encoder to toggle between “Load Preset” and “Save Preset.”)
2. Press the SELECT encoder knob to access the DSP’s internal Preset list on the
next sub-screen. The correct sub-screen will display the EDIT TITLE and
SAVE PRESET options on the right-hand side of the screen.
3. Scroll through the Preset list by rotating the SELECT encoder knob.
4. Select a Preset slot as a save destination by pressing the SELECT encoder knob.
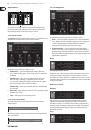
5. Press the UP arrow button to select the EDIT TITLE function. The EDIT TITLE
window will appear, with alphanumeric characters in a row at the top and
the current title directly below with the editing cursor.
6. Select the backward arrow from the row of characters by rotating the
SELECT knob until the backward arrow is highlighted.
7. Press the SELECT encoder knob to erase characters. The cursor will erase
characters from right to left across the existing title.
8. Rotate the SELECT encoder to select new characters from the row above the
current Preset title.
9. Insert selected characters into the Preset title by pressing the SELECT
encoder knob. Once you select and insert a character, the editing cursor will
change direction and advance from left to right.
10. Save the new Preset title by pressing the DOWN arrow key to activate the
SAVE PRESET function.
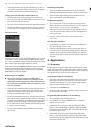
SETUP 2/4: Panel Lock
The Panel Lock function uses a 4-character alphanumeric access code to lock
the front panel controls and prevent unauthorized changes to DSP settings.
Current settings can still be viewed while the unit is locked, but the parameters
cannot be changed.
The amplifier can only be locked or unlocked from the Panel Lock screen.
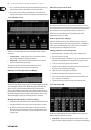
Locking the amplifier
1. Go to the Panel Lock screen by pressing the SETUP button.
2. Press the SELECT encoder knob to access the password screen.
3. Set an access code by using the SELECT encoder knob. Rotate the knob to
scroll through the character list, and then select characters by pressing.
With each press on the SELECT encoder knob, the password cursor will
advance left to right by one space.
4. The amplifier will automatically lock when you select the final character
for the access code. The display will flash a brief confirmation message:
“Device Locked!”
5. The status displayed on the Panel Lock screen will state “LOCKED!”
Unlocking the amplifier
1. Go to the Panel Lock screen by pressing the SETUP button.
2. Press the SELECT encoder knob to access the password screen.
3. Enter the access code by using the SELECT encoder knob. Rotate the knob
to scroll through the character list, and then select characters by pressing.
With each press on the SELECT encoder knob, the password cursor will
advance left to right by one space.
4. The amplifier will automatically unlock when you select the final
character for the access code. The display will flash a brief confirmation
message: “Unlocked.”
5. The status displayed on the Panel Lock screen will state “OFF.”
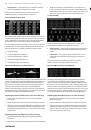
SETUP 3/4: Device Name
Each iNUKE DSP amplifier can be individually named for easy identification
within a rack or remotely via the BEHRINGER Amp Remote control software
(go to Behringer.com to download the software).
Naming the amplifier
1. Access the Device Name screen by pressing the SETUP button.