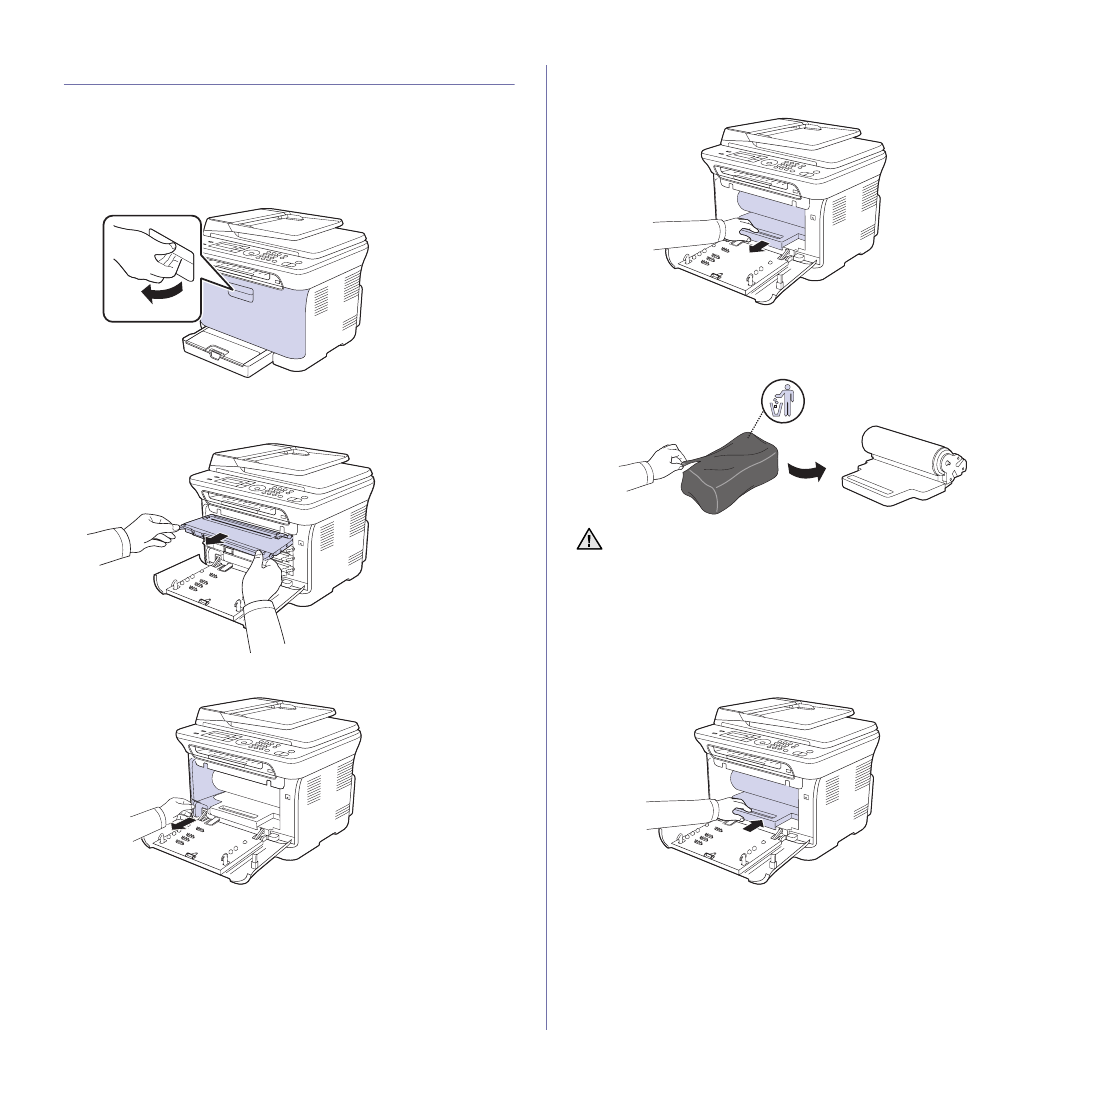
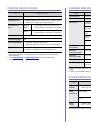
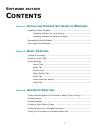
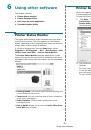
Maintenance | 55
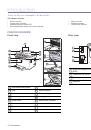
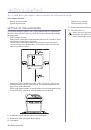
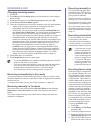
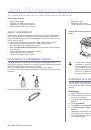
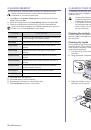
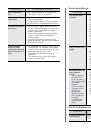
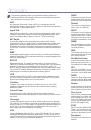
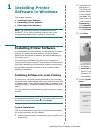
REPLACING THE IMAGING UNIT
When the life span of the imaging unit has expired, the Dell Toner
Management System™ program window appears on the computer,
indicating the imaging unit needs to be replaced. If the imaging unit is not
replaced, your printer fails to print.
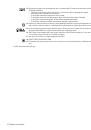
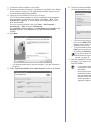
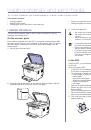
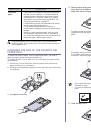
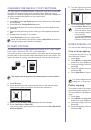
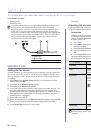
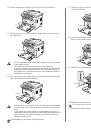
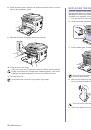
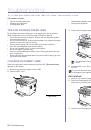
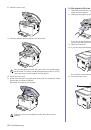
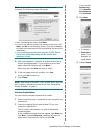
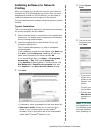
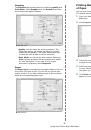
1. Turn the printer off, then wait a few minutes for the printer to cool.
2. Using the handle, completely open the front cover.
3. Grasp the handles on the toner cartridge and pull to remove the four
cartridges from the printer.
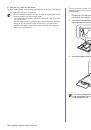
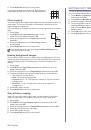
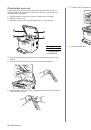
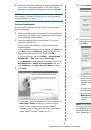
4. Pull the waste toner container out of the printer using its handle.
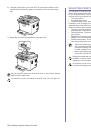
5. Pull the imaging unit out of the printer using the groove on the front of
the imaging unit.
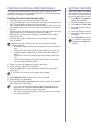
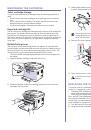
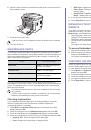
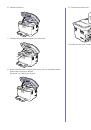
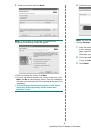
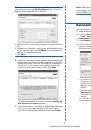
6. Take a new imaging unit out of its package. Remove the protective
devices on both sides of the imaging unit and the paper protecting the
surface of the imaging unit.
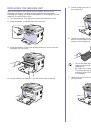
7. Holding the groove on the front of the imaging unit, push imaging unit
into the printer.
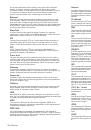
•
Do not use sharp objects, such as a knife or scissors, to open the
imaging unit package. You could damage the surface of the
imaging unit.
•
Be careful not to scratch the surface of the imaging unit.
•
To prevent damage, do not expose the imaging unit to light for
more than a few minutes. Cover it with a piece of paper to protect
it if necessary.
 1
1
 2
2
 3
3
 4
4
 5
5
 6
6
 7
7
 8
8
 9
9
 10
10
 11
11
 12
12
 13
13
 14
14
 15
15
 16
16
 17
17
 18
18
 19
19
 20
20
 21
21
 22
22
 23
23
 24
24
 25
25
 26
26
 27
27
 28
28
 29
29
 30
30
 31
31
 32
32
 33
33
 34
34
 35
35
 36
36
 37
37
 38
38
 39
39
 40
40
 41
41
 42
42
 43
43
 44
44
 45
45
 46
46
 47
47
 48
48
 49
49
 50
50
 51
51
 52
52
 53
53
 54
54
 55
55
 56
56
 57
57
 58
58
 59
59
 60
60
 61
61
 62
62
 63
63
 64
64
 65
65
 66
66
 67
67
 68
68
 69
69
 70
70
 71
71
 72
72
 73
73
 74
74
 75
75
 76
76
 77
77
 78
78
 79
79
 80
80
 81
81
 82
82
 83
83
 84
84
 85
85
 86
86
 87
87
 88
88
 89
89
 90
90
 91
91
 92
92
 93
93
 94
94
 95
95
 96
96
 97
97
 98
98
 99
99
 100
100
 101
101
 102
102
 103
103
 104
104
 105
105
 106
106
 107
107
 108
108
 109
109
 110
110
 111
111
 112
112
 113
113
 114
114
 115
115
 116
116
Инструкции и руководства похожие на DELL 1235cn