1
GB
RU
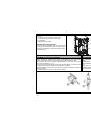
OPERATING AND MAINTENANCE INSTRUCTIONS
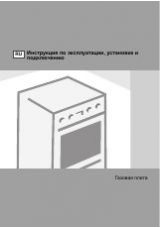
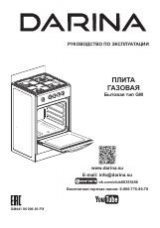
РУКОВОДСТВО ПО ЭКСПЛУАТАЦИИ
Dear customer!
Thank you for purchasing the appliance from our new range of gas cookers. The
following information will help you understand the features of the appliance and use it
safely. We hope the appliance will serve you successfully for a long period of time.
Уважаемый покупатель!
Вы приобрели изделие из новой серии газовых плит. Мы хотим, чтобы наше
изделие Вам хорошо и надёжно служило. Поэтому, перед выполнением
монтажа, вводом в эксплуатацию и обслуживанием плиты рекомендуем
ознакомиться с правилами, изложенными в данном “Руководстве ...”, и
соблюдать их.
IMPORTANT PRECAUTIONS
ОБЩИЕ РЕКОМЕНДАЦИИ
•
This appliance is not connected to a kitchen hood.
•
It must be installed and connected according to the standing regulations and
relevant installation instructions. Special attention is drawn on room ventilation
requirements.
•
Make sure the technical information regarding gas type and voltage indicated on
the rating plate agree with the type of gas and voltage of your local distribution
system.
•
The product is assembled and set up by the manufacturer for use of natural gas
G20 (13 mbar).
•
Installation, repairs, adjustments or resetting of the appliance to another type of
gas may be performed by authorized persons only (see Certificate of Warranty)
•
Installation of the appliance and resetting to another type of gas must be endorsed
in the Certificate of Warranty by the authorized service. Failure to do so would
render the warranty void.
•
Do not store any flammable objects in the bottom drawer of the appliance.
•
The appliance must not be used for any other purposes other than for the
preparation of food. Using the appliance for any other purposes may result in life
threatening concentration of combustion by-products, or cause malfunction. The
warranty does not apply to faults resulting from the incorrect use of the appliance.
•
It is recommended to have the appliance checked by the authorized service
personnel every two years. Such professional maintenance will extend the useful
life of the appliance.
•
If you should smell gas, immediately shut the gas pipe cock and cut the gas
supply. In such cases the appliance may be used only after the cause of such gas
escape is discovered and removed by qualified personnel and the room thoroughly
ventilated.
•
When using gas for cooking, heat and moisture are generated into the room, so
make sure it gets sufficient air supply: keep a window open or install a mechanical
ventilation device (a vapor hood with mechanical extraction). Prolonged operation
of the appliance may require extensive ventilation, for instance opening the
window or boosting the performance of the hood with a mechanical fan.
•
Данный прибор должен быть установлен, подключен и введён в эксплуатацию в
соответствии с нормами и правилами, действующими в стране Покупател.
•
Плита не присоединяется к устройству для отвода продуктов сгорания, поэтому
особое внимание необходимо обратить на вентиляцию помещения.
•
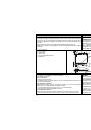
Проверьте, соответствуют ли данные о виде газа и напряжения, указанные на
заводском типовом щитке, который расположен на передней планке, и который Вы
увидите, вытащив ящик для хранения принадлежностей плиты, виду и давлению
газа Вашей распределительной газовой сети и напряжению электрической сети.
•
Монтаж, подключение, ввод плиты в эксплуатацию, ремонт, а также переналадку
плиты на другой вид газа может выполнить только уполномоченная сервисная
организация, имеющая разрешение (лицензию) соответствующих служб
Государственного надзора.
•
О проведении этих операций специалист уполномоченной сервисной организации
обязан сделать соответствующие записи в „Гарантийном талоне“ с обязательным
подтверждением подписью и печатью. При отсутствии данных записей
„Гарантийный талон“ будет считаться недействительным и обязательства по
гарантийному ремонту снимаются.
•
Уполномоченная сервисная организация, вводящая плиту в эксплуатацию, должна
в дальнейшем производить её техническое обслуживание и, при необходимости,
выполнять ремонт в гарантийный период.
•
Плита укомплектована и отрегулирована для работы на природном газе давлением
1,3 кПа.
•
Для плит, работающих на природном газе, допускается установить регулятор
давления газа. Для плит, работающих на пропан-бутане, установка регулятора
давления газа на баллоне должна выполняться в полном соответствии с нормами,
действующими в стране Покупателя.
•
Плита предназначена только для теплового приготовления пищи. Недопустимо
использовать плиту с целью отапливания помещения, так как это может привести к
нарушению функции плиты из-за чрезмерной тепловой нагрузки.
•
Предупреждаем, что на самой плите и на расстоянии меньше, чем безопасное
расстояние, не должны находиться предметы из горючих материалов. Наименьшее
расстояние между плитой и горючими материалами в направлении основного
теплового излучения может быть 750 мм, в остальных направлениях - 100 мм.
•
Недопустимо в ящик для хранения принадлежностей плиты класть какой-либо