19
•
Stick new gas setting label with relevant nozzle information.
установлен на подводящем газопроводе),
•
первоначальный заводской типовой щиток заменить новым, поставляемым
совместно с комплектом сопел,
•
о проведении данной операции сделать соответствующие записи в
“Гарантийном талоне”.
CONNECTION TO THE MAINS POWER
ЭЛЕКТРОПОДКЛЮЧЕНИЕ ПЛИТЫ
The appliance is fitted with power cord plug for connection to the mains.
Power socket to which the appliance is connected must be accessible at all times.
Faulty power cord must be immediately replaced with a new one.
Электроподключение плиты должно быть выполнено в соответствии с нормами
и правилами безопасности электрических приборов, действующими в стране
Покупателя.
CAUTION:
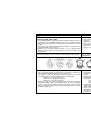
Make sure that the power cord is installed in such way to avoid touching hot parts of
the cooker (exhaust at the back side, bottom part of the hob). High temperature could
cause damage to the insulation.
ВНИМАНИЕ!
Следите за тем, чтобы электрический подводящий шнур не касался горячих
частей плиты (труба отвода на задней стене плиты и нижняя часть варочного
стола), при прикосновении к которым может произойти повреждение изоляции
провода.
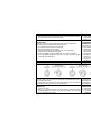
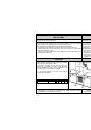
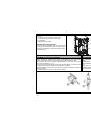
LEVELING THE APPLIANCE
РЕГУЛИРОВКА ВЫСОТЫ ПЛИТЫ
(certain models only)
Cooker hob must be leveled in horizontal position by means of 4 leveling screws
supplied with the appliance.
Установка плиты в горизонтальное положение или регулировка её по высоте
выполняется с помощью 4-х регулировочных винтов, которые входят в состав
принадлежностей плиты.
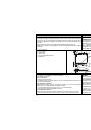
PROCEDURE:
•
Remove the range receptacle;
•
Tilt the cooker on one side;
•
Screw plastic screws into the bottom crossbar front and rear openings on one side;
•
Tilt the cooker on the opposite side and fix the screws into the openings on the
other side;
•
Level the cooker using a screwdriver from the receptacle area, or by turning the
leveling screw with a hexagon wrench;
•
The procedure is less complicated if performed by using leveling screws.
ПРОЦЕСC:
•
Вытащите ящик для хранения принадлежностей плиты,
•
плиту наклоните на одну сторону,
•
завинтите регулировочные винты в передние и задние отверстия
перегородки на этой стороне,
•
плиту наклоните в противоположную сторону и подобным образом завинтите
винты на другой стороне плиты,
•
плиту поставьте на место и отрегулируйте её горизонтальное положение с
помощью отвёртки из пространства, откуда был вытащен ящик для хранения
принадлежностей плиты.
NOTE:
Leveling screws are unnecessary if the appliance height and horizontal position are
acceptable.
ЗАМЕЧАНИЕ :
Установка высотной регулируемости (болтов) не обусловлена, если высота и
точность установки плиты удовлетворяет без использования пластовых болтов.
NOTICE
The manufacturer reserves the right to make minor changes in these instructions for
use resulting from technological changes which have no impact on the functioning of
the appliance.
ЗАМЕЧАНИЕ :
Производитель оставляет за собой право небольших изменений инструкции,
исходящих из инновационных или технологических изменений изделия,
которые не имеют влияние на функцию изделия.