28
29
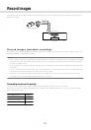
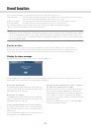
Playback by designating a timeline
When playback starts, the date & time operation panel will change to playback display.
This section explains how to use the timeline display to designate a playback time and date by operating the
playback slider.
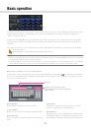
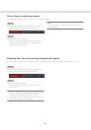
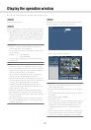
Date & time operation panel (playback display)
The playback display shows available recorded images and displays these on a timeline sorted by type. It is
possible to change the type of recorded images displayed on the timeline, change the timeline scale, and des-
ignate the recorded image to play.
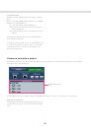
Display range selection
button
Timeline
Jump buttons
Display range selection
button
Playback slider
Scale selection button
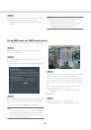
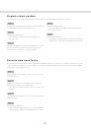
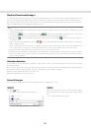
[REC Event]
Mark the checkboxes of different types of recorded
images and display them on a timeline. If changes are
made during playback, playback will be paused and a
new search will be performed.
Schedule: Schedule-recorded images will be dis-
played in pink
Event: Event-recorded images will be displayed in red
[Information/VMD]
When this box is checked, the time zone recorded
when the VMD function was activated (motion was
detected in an image) will be displayed in blue on the
timeline. (Playback will be paused.)
Periods for which no recorded images are available
will be displayed in black.
Note:
• To display the result of the motion detection
search, it is necessary to configure the settings of
the connected cameras that support the motion
detection search function in advance.
Refer to the "readme.txt" on the provided
CD-ROM about supported cameras. Refer to the
operating instructions of the camera in use for fur-
ther information.
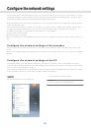
[Advanced setup] button
Display the advanced setup panel and change event
types and other information displayed on the timeline.
(☞ Page 30)
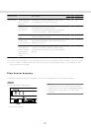
Scale selection button
Select between a timeline display covering 8 hours (8
h) and one covering 24 hours (24 h).
Display range selection button
The timeline will be displayed on 8-hour or 24-hour
basis depending on the setting of the scale selection
button.