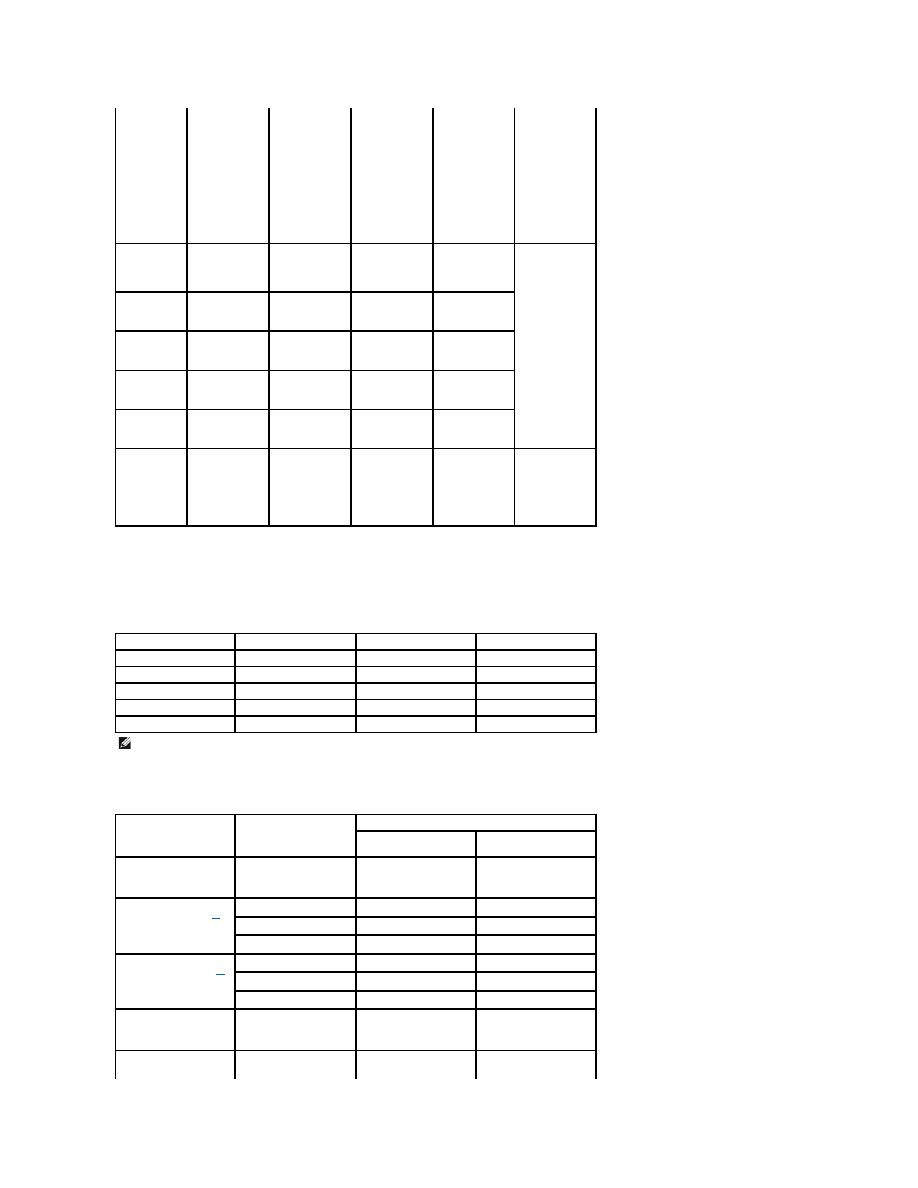
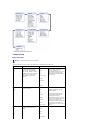
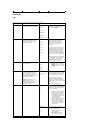
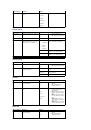
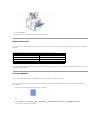
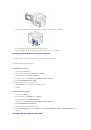
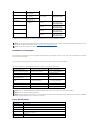
Print Media Supported
Print Media Types and Weights
NOTE:
Ensure
the A5 paper
is NOT A4
paper that has
been cut in
half.
(148.5 x 210
mm)
75 g/m
2
(20 lb)
paper for
the tray.
l
100
sheets of
75 g/m
2
(20 lb)
paper for
the multi-
purpose
feeder.
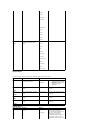
Envelope 7-
3/4
(Monarch)
3.88 x 7.5 in.
(98.4 x 190.5
mm)
-
Y
-
10 sheets of 75
g/m
2
(20 lb) in
the multi-
purpose feeder.
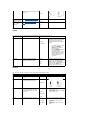
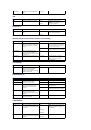
Envelope
COM-10
4.12 x 9.5 in.
(105 x 241 mm)
-
Y
-
Envelope DL
4.33 x 8.66 in.
(110 x 220 mm)
-
Y
-
Envelope C5
6.38 x 9.02 in.
(162 x 229 mm)
-
Y
-
Envelope C6
4.49 x 6.38 in.
(114 x 162 mm)
-
Y
-
Custom
NOTE:
Paper
Tray
supports
custom paper
from A5 to
Legal size.
3x 5 in. to 8.5 x
14 in.
(76 x 127 mm to
215.9 x 355.6
mm)
-
Y
-
Refer to the
above
Capacity
sections
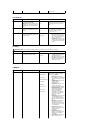
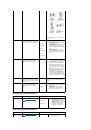
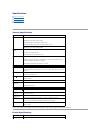
Print Media
Paper Tray
Multi-purpose feeder
Standard output tray
Paper
Y
Y
Y
Card Stock
-
Y
Y
Transparencies
-
Y
-
Labels
-
Y
Y
Envelopes
-
Y
Y
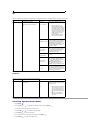
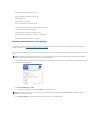
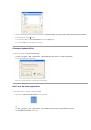
NOTE:
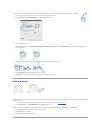
To use recycled paper, click "paper" tab then select recycled paper in driver's paper tab.
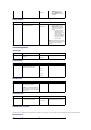
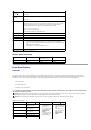
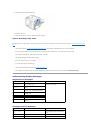
Print Media
Type
Print Media Weight
Tray 1 and Optional
Trays
Multi-purpose Feeder
Paper
Xerographic or business
paper
60-120 g/m
2
grain long
(16-32 lb bond)
60-210 g/m
2
grain long
(16 to 56 lb bond)
Card stock -
maximum (long grain)
Index Bristol
-
Up to 210 g/m
2
(56 lb)
Tag
-
Up to 210 g/m
2
(56 lb)
Cover
-
Up to 210 g/m
2
(56 lb)
Card stock -
maximum (grain short)
Index Bristol
-
Up to 210 g/m
2
(56 lb)
Tag
-
Up to 210 g/m
2
(56 lb)
Cover
-
Up to 210 g/m
2
(56 lb)
Transparencies
Laser printer
-
138-146 g/m
2
(37-39 lb bond)
Labels - maximum
Paper
-
176 g/m
2
 1
1
 2
2
 3
3
 4
4
 5
5
 6
6
 7
7
 8
8
 9
9
 10
10
 11
11
 12
12
 13
13
 14
14
 15
15
 16
16
 17
17
 18
18
 19
19
 20
20
 21
21
 22
22
 23
23
 24
24
 25
25
 26
26
 27
27
 28
28
 29
29
 30
30
 31
31
 32
32
 33
33
 34
34
 35
35
 36
36
 37
37
 38
38
 39
39
 40
40
 41
41
 42
42
 43
43
 44
44
 45
45
 46
46
 47
47
 48
48
 49
49
 50
50
 51
51
 52
52
 53
53
 54
54
 55
55
 56
56
 57
57
 58
58
 59
59
 60
60
 61
61
 62
62
 63
63
 64
64
 65
65
 66
66
 67
67
 68
68
 69
69
 70
70
 71
71
 72
72
 73
73
 74
74
 75
75
 76
76
 77
77
 78
78
 79
79
 80
80
 81
81
 82
82
 83
83
 84
84
 85
85
 86
86
 87
87
 88
88
 89
89
 90
90
 91
91
 92
92
 93
93
 94
94
 95
95
 96
96
 97
97
 98
98
 99
99
 100
100
 101
101
 102
102
 103
103
 104
104
 105
105
 106
106
 107
107
 108
108
 109
109
 110
110
 111
111
 112
112
 113
113
 114
114
 115
115
 116
116
 117
117
 118
118
 119
119
 120
120
 121
121
 122
122
 123
123
 124
124
 125
125
 126
126
 127
127
Инструкции и руководства похожие на DELL 5330dn