I n k C a r t r i d g e M a i n t e n a n c e
6 5
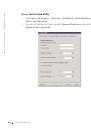
The part number that appears should be the number of the cartridge you are
using.
d
Press Select to choose the part number that appears.
e
Continue with Aligning Ink Cartridges to ensure proper installation.
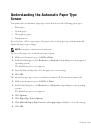
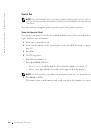
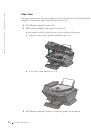
Aligning Ink Cartridges
Align your ink cartridges after installing new cartridges and to solve print quality problems.
Using the Operator Panel
1
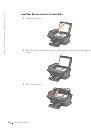
Load plain paper. For help, see page 25.
2
On the operator panel, press Copy.
3
Press Options until
Maintenance
appears.
4
Press + until
Align
appears, and then press Select.
Alignment Page Printing
appears on the display, and an alignment page prints.
Once the alignment page prints, your automatic alignment is complete.
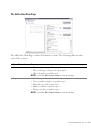
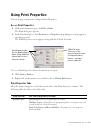
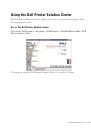
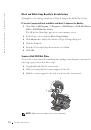
Using the Printer Software to Automatically Align Ink Cartridges
When automatically aligning your ink cartridges, a page prints with vertical, horizontal, and
slanted lines.
1
Load paper. For help, see page 25.
2
Click Start
→
All Programs (or Programs)
→
Dell Printers
→
Dell AIO Printer
A960
→
Dell Printer Solution Center.
3
From the Maintenance tab, click Align to fix blurry edges.
4
Click Print.
An alignment page prints.
 1
1
 2
2
 3
3
 4
4
 5
5
 6
6
 7
7
 8
8
 9
9
 10
10
 11
11
 12
12
 13
13
 14
14
 15
15
 16
16
 17
17
 18
18
 19
19
 20
20
 21
21
 22
22
 23
23
 24
24
 25
25
 26
26
 27
27
 28
28
 29
29
 30
30
 31
31
 32
32
 33
33
 34
34
 35
35
 36
36
 37
37
 38
38
 39
39
 40
40
 41
41
 42
42
 43
43
 44
44
 45
45
 46
46
 47
47
 48
48
 49
49
 50
50
 51
51
 52
52
 53
53
 54
54
 55
55
 56
56
 57
57
 58
58
 59
59
 60
60
 61
61
 62
62
 63
63
 64
64
 65
65
 66
66
 67
67
 68
68
 69
69
 70
70
 71
71
 72
72
 73
73
 74
74
 75
75
 76
76
 77
77
 78
78
 79
79
 80
80
 81
81
 82
82
 83
83
 84
84
 85
85
 86
86
 87
87
 88
88
 89
89
 90
90
 91
91
 92
92
 93
93
 94
94
 95
95
 96
96
 97
97
 98
98
 99
99
 100
100
 101
101
 102
102
 103
103
 104
104
 105
105
 106
106
 107
107
 108
108
 109
109
 110
110
 111
111
 112
112
 113
113
 114
114
 115
115
 116
116
 117
117
 118
118
 119
119
 120
120
 121
121
Инструкции и руководства похожие на DELL A960