9
Basic Image Quality Adjustments
Basi
c
Im
a
g
e
Qual
it
y Adj
u
s
tments
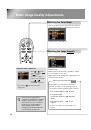
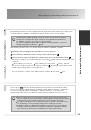
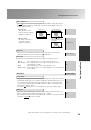
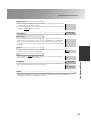
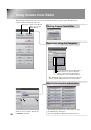
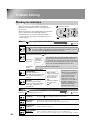
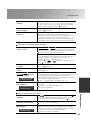
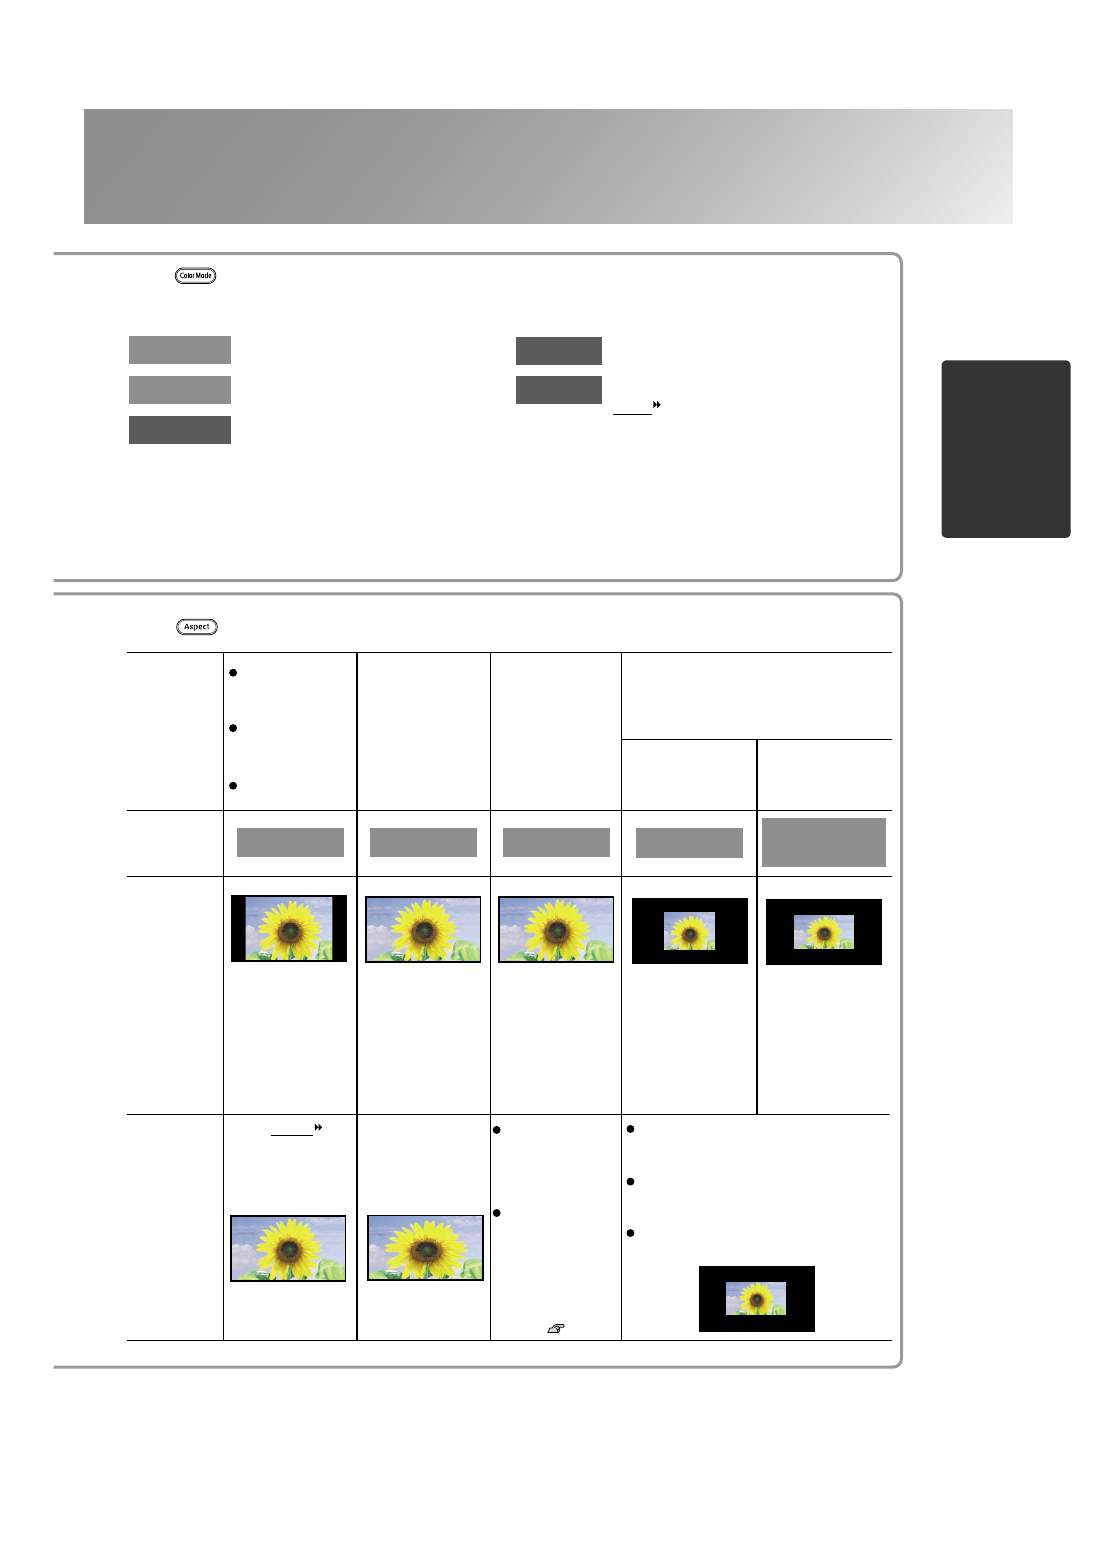
Squeeze
Normal
Zoom
Through
The images are
projected onto the
screen with the
input signal
resolution
unchanged.
Images will be
projected in 16:9
format at the
original input
signal resolution.
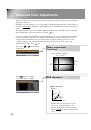
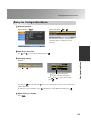
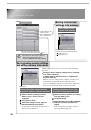
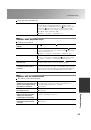
Living Room
Natural
sRGB
Theatre
Dynamic
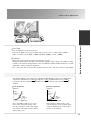
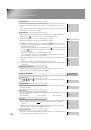
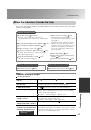
Squeeze
Through
Images recorded
in squeeze mode
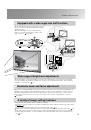
The images are not compressed or enlarged in
accordance with the panel resolution, and so
clearer images are projected.
To project images so that they fill the whole of
the screen, use the zoom adjustment or move the
projector further away from the screen.
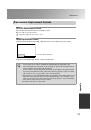
If HDTV images are projected in Through
mode, the images will be elongated horizontally.
Input signals will
be projected at
the same width as
the projector's
panel resolution.
Black bands will
appear at the left
and right of the
images.
Input signals will
be projected at the
same height as the
projector's panel
resolution.
If 4:3 images are
projected, the top
and bottom of the
images will be
truncated.
If images with
subtitles are
projected and the
subtitles are
truncated, use the
"Zoom Caption"
menu command to
adjust. p.19
If 4:3 images are
projected, the
images will be
elongated
horizontally.
When HDTV
images are
projected, the
images appear in
16:9 size.
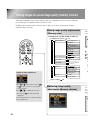
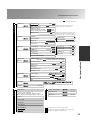
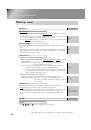
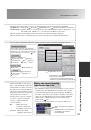
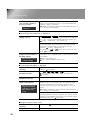
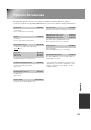
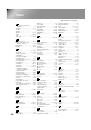
Input
signal
Recommended
aspect mode
Result
Remarks
Images recorded by
a video camera or
DVD software in
squeeze mode
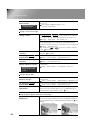
Images from
normal TV
broadcasts
Images with
standard aspect
ratio (4:3)
Computer images
Letterbox images
such as from a
DVD
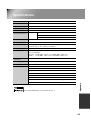
Images with an input resolution of
1280
×
720 or less
Images at
standard size
(4:3)
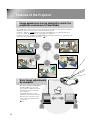
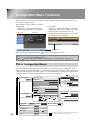
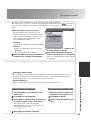
Press and select the aspect mode from the selection menu.
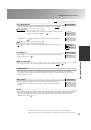
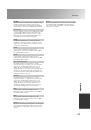
Press and select the colour mode from the five available modes in the selection menu in accordance
with the place where the projector is being used.
Setting is also possible using the configuration menu.
If "Natural", "Theatre" or "sRGB" is selected, the Epson Cinema Filter effect will be applied
automatically. This increases contrast and makes flesh tones appear more natural.
When you select "Living Room", the Black-White Stretch function will operate to produce images with
greater contrast between lighter and darker shades.
: Ideal for using in bright rooms.
: Ideal for using in rooms in which the
curtains are closed.
: Ideal for using in dark rooms. It is
recommended that you start in this mode
when making colour adjustments.
: Ideal for using in dark rooms.
: If the connected signal source has an
sRGB mode, set both the projector and
the connected signal source to sRGB.
(Ideal for viewing computer images.)