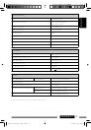
1
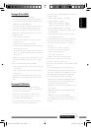
KD-R506/KD-R505/KD-RC502/KD-RC501
Installation/Connection Manual
°“√µ‘¥µ—Èß/§ŸË¡◊Õ°“√µ‘¥µ—Èß
GET0584-006B
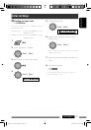
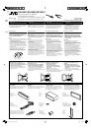
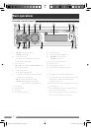
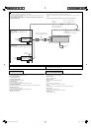
[U/UH]
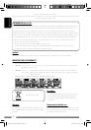
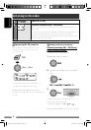
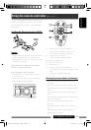
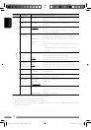
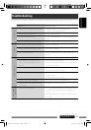
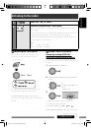
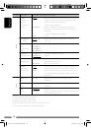
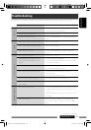
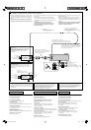
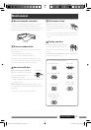
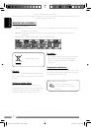
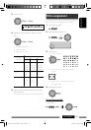
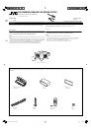
F
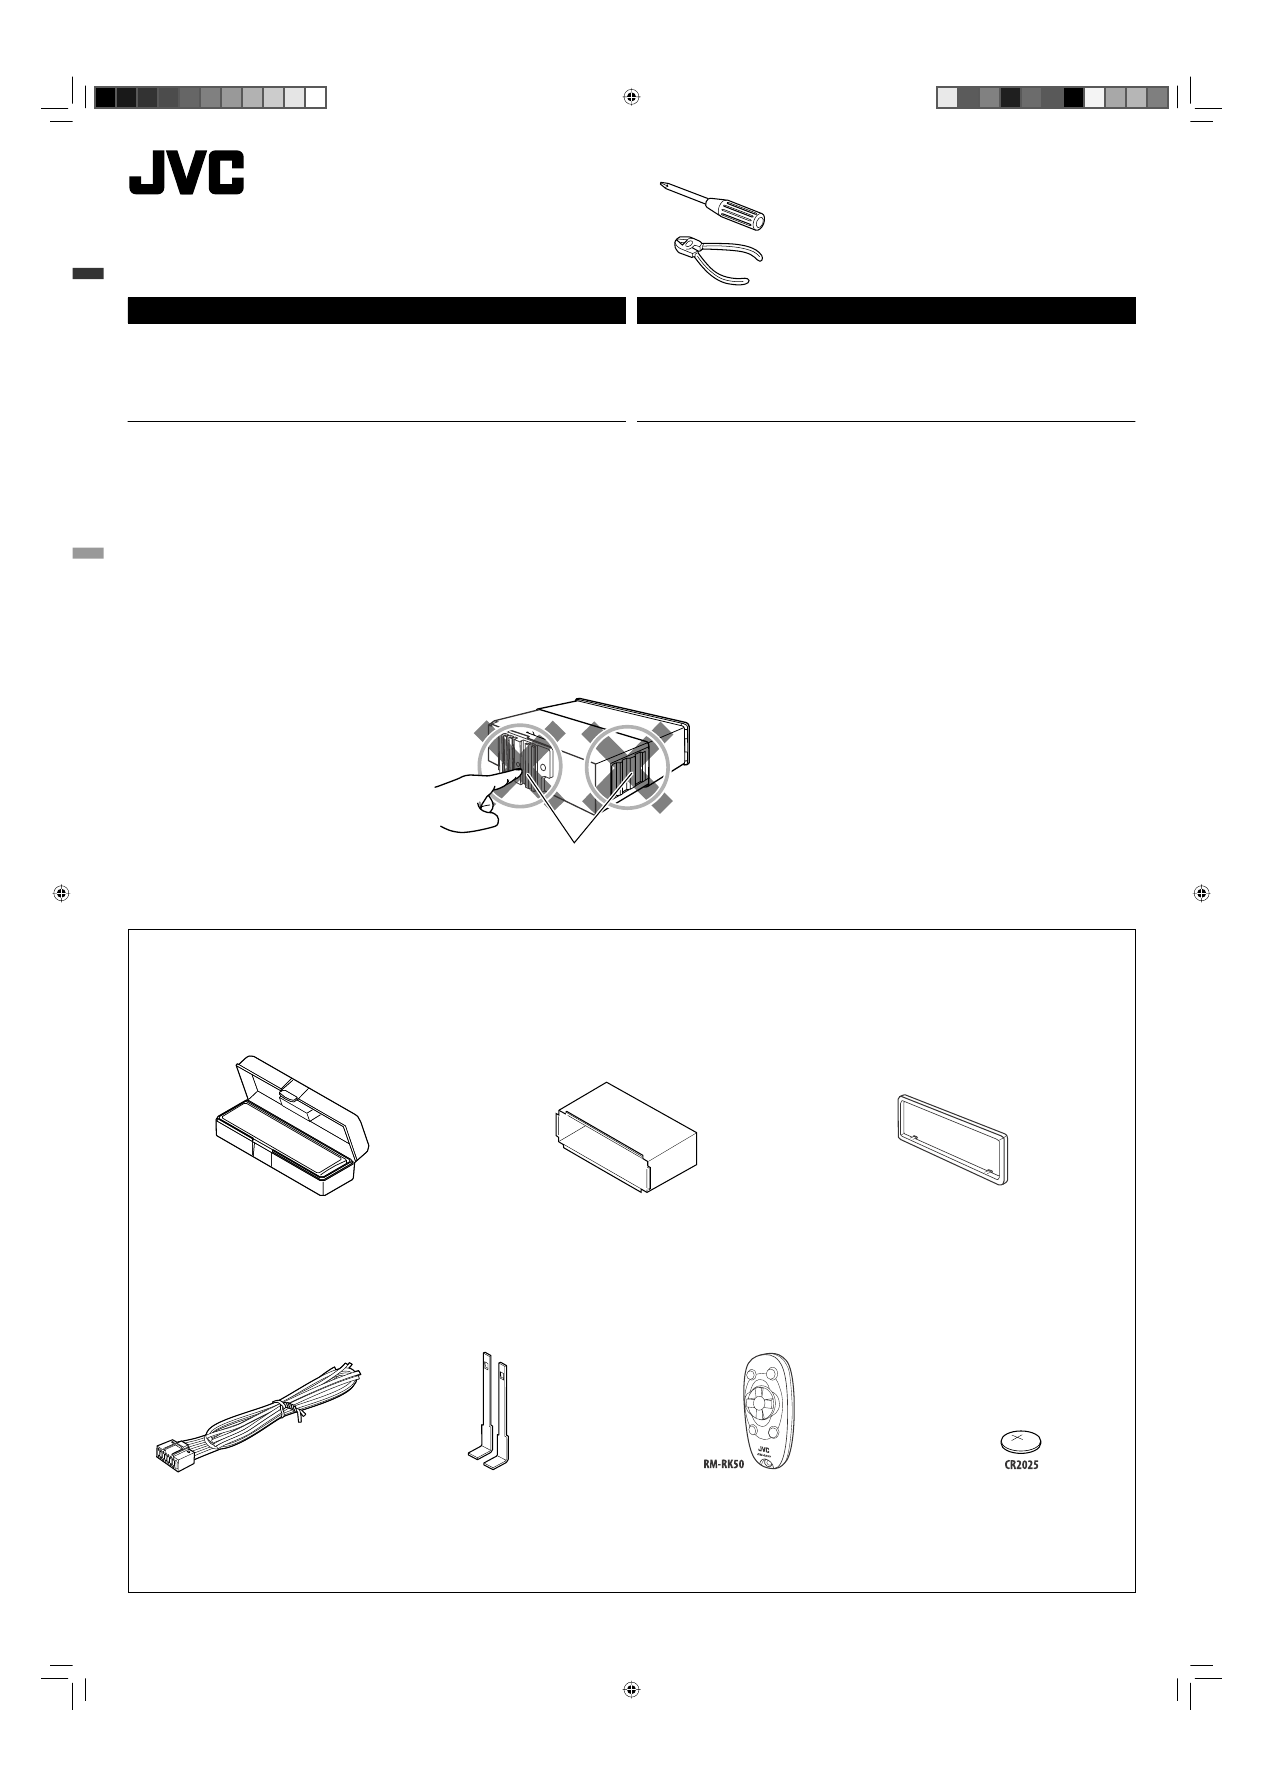
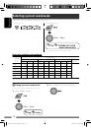
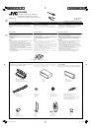
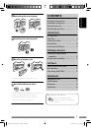
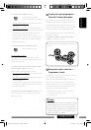
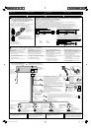
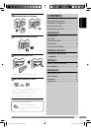
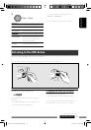
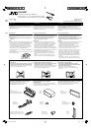
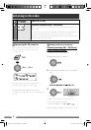
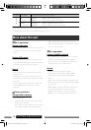
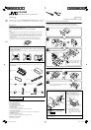
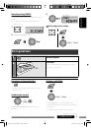
Handles
§—π∫—ߧ—∫
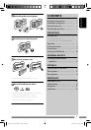
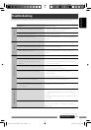
A / B
Hard case/Control panel
≈—ß∫√√®ÿ
/
ÀπÈ“ªí¥
C
Sleeve
ª≈Õ°ÀÿÈ¡
D
Trim plate
·ºËπ‚≈À–¢Õ∫·µËß
E
Power cord
“¬‡§‡∫‘≈°”≈—ß
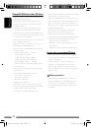
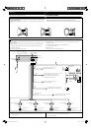
ENGLISH
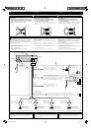
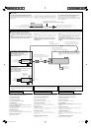
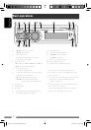
This unit is designed to operate on 12 V DC, NEGATIVE ground electrical systems. If your vehicle does
not have this system, a voltage inverter is required, which can be purchased at JVC car audio dealers.
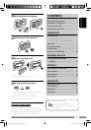
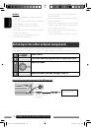
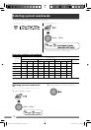
Parts list for installation and connection
The following parts are provided for this unit. If any item is missing, consult your JVC car audio dealer
immediately.
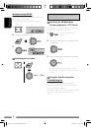
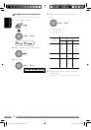
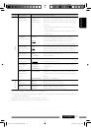
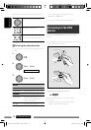
G
Remote controller
√’‚¡µ§Õπ‚∑√≈
H
Battery
·∫µ‡µÕ√
0409DTSMDTJEIN
EN, TH
© 2009 Victor Company of Japan, Limited
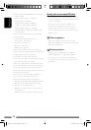
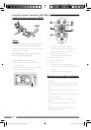
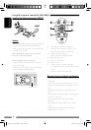
Heat sink /
·ºËπ√–∫“¬§«“¡√ÈÕπ
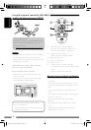
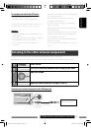
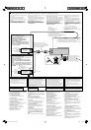
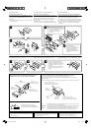
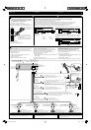
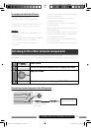
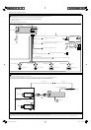
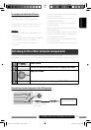
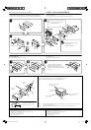
WARNINGS
To prevent short circuits, we recommend that you disconnect the battery’s negative terminal and make all
electrical connections before installing the unit.
• Be sure to ground this unit to the car’s chassis again after installation.
Notes:
• Replace the fuse with one of the specified rating. If the fuse blows frequently, consult your JVC car audio
dealer.
• It is recommended to connect speakers with a maximum power of more than 50 W (both at the rear and
at the front, with an impedance of 4 Ω to 8 Ω). If the maximum power is less than 50 W, change “AMP
GAIN” setting to prevent the speakers from being damaged (see page 15 of the INSTRUCTIONS).
• To prevent short circuits, cover the terminals of the UNUSED leads with insulating tape.
• The heat sink becomes very hot after use. Be careful not to touch it when removing this unit.
‰∑¬
™ÿ¥ª√–°Õ∫π’ȉ¥È√—∫°“√ÕÕ°·∫∫¡“‡æ◊ËÕ„™Èß“π°—∫√–∫∫ °√–· ‰øøÈ“ “¬¥‘π¢—È«≈∫°√–· µ√ß
12
‚«≈∑Ï À“°√∂¬πµÏ¢Õߧÿ≥‰¡ò‰
¥È„™È√–∫∫π’È µÈÕß„™È‡§√◊ËÕß·ª≈ß°√–· ‰ø™Ë«¬ ´÷Ëß “¡“√∂À“´◊ÈÕ‰¥È®“°√È“π¢“¬‡§√◊ËÕ߇ ’¬ß√∂¬πµÏ
JVC
§”‡µ◊Õπ
‡æ◊ËÕªÈÕß°—π°“√‡°‘¥‰øøÈ“≈—¥«ß®√ ¢Õ·π–π”„ÀȪ≈¥¢—È«·∫µ‡µÕ√’Ë≈∫ÕÕ° ·≈È«®÷ßµËÕ “¬‰ø°ËÕ𵑥µ—È߇§√◊ËÕß
•
µ√«® Õ∫„ÀÈ·πË„®«Ë“‰¥È‡¥‘𠓬¥‘πµËÕ√–À«Ë“߇§√◊ËÕß°—∫µ—«∂—ß √∂¬πµÏ„À¡Ë·≈È«À≈—ß®“°µ‘¥µ—Èß
À¡“¬‡Àµÿ
:
•
„™Èæ‘°—¥®”‡æ“–·∑πøî« À“°øî« Ï¢“¥∫ËÕ¬ „ÀȪ√÷°…“√È“ π¢“¬‡§√◊ËÕ߇ ’¬ß√∂¬πµÏ
JVC
•
¢Õ·π–π”„ÀȵËÕ≈”‚æß ∑’Ë¡’°”≈—ߢ—∫ ß ÿ¥‡°‘π°«Ë“
50 W
(
∑—ÈߥȓπÀπÈ“·≈–¥È“πÀ≈—ß ¡’§Ë“§«“¡µÈ“π∑“π
4
Ω
∂÷ß
8
Ω
)
∂È“°”≈—ߢ—∫µË”°«Ë“
50 W
„Àȇª≈’ˬπ§Ë“
“AMP GAIN”
‡æ◊ËÕªÈÕß°—π‰¡Ë„ÀÈ≈”‚æß™”√ÿ¥
(
¥ŸÀπÈ“
15
§”·π–π”
)
•
°“√ªÈÕß°—π°“√≈—¥«ß®√ ®–µÈÕßæ—π¢—È« “¬µ–°—Ë« ∑’ˉ¡Ë„™È·≈È«¥È«¬‡∑ ªæ—𠓬‰ø
•
·ºËπ√–∫“¬§«“¡√ÈÕπ®–√ÈÕπ¡“°À≈—ß®“°„™È √–¡—¥√–«—ßլ˓‰ª —¡º— ‡¡◊ËÕ∂Õ¥™ÿ¥ª√–°Õ∫π’È
√“¬°“√ Ë«πª√–°Õ∫ ”À√—∫µ‘¥µ—Èß·≈–‡™◊ËÕ¡µËÕ°—π
Ë«πª√–°Õ∫µËÕ‰ªπ’È„ÀÈ¡“°—∫™ÿ¥ª√–°Õ∫π’È À“°¡’ ‘Ëß„¥‰¡Ë§√∫ °√ÿ≥“ª√÷°…“µ—«·∑π®”ÀπË“¬‡§√◊ËÕ߇ ’¬ßµ‘¥√∂¬πµÏ
JVC
‚¥¬∑—π∑’
TH Install1-2_KD-R506_009B.indd 1
TH Install1-2_KD-R506_009B.indd 1
4/27/09 6:30:50 PM
4/27/09 6:30:50 PM
 1
1
 2
2
 3
3
 4
4
 5
5
 6
6
 7
7
 8
8
 9
9
 10
10
 11
11
 12
12
 13
13
 14
14
 15
15
 16
16
 17
17
 18
18
 19
19
 20
20
 21
21
 22
22
 23
23
 24
24
 25
25
 26
26
 27
27
 28
28
 29
29
 30
30
 31
31
 32
32
 33
33
 34
34
 35
35
 36
36
 37
37
 38
38
 39
39
 40
40
 41
41
 42
42
 43
43
 44
44
 45
45
 46
46
 47
47
 48
48
 49
49
 50
50
 51
51
 52
52
 53
53
 54
54
 55
55
 56
56
 57
57
 58
58
 59
59
 60
60
 61
61
 62
62
 63
63
 64
64
 65
65
 66
66
 67
67
 68
68
 69
69
 70
70
 71
71
 72
72
 73
73
 74
74
 75
75
 76
76
 77
77
 78
78
 79
79
 80
80
 81
81
 82
82
 83
83
 84
84
 85
85
 86
86
 87
87
 88
88
 89
89
 90
90
 91
91
 92
92
 93
93
 94
94
 95
95
 96
96
 97
97
 98
98
 99
99
 100
100
 101
101
 102
102
 103
103
 104
104
 105
105
 106
106
 107
107
 108
108
 109
109
 110
110
 111
111
 112
112
 113
113
 114
114
 115
115
 116
116
 117
117
 118
118
 119
119
 120
120
 121
121
 122
122
 123
123
 124
124
 125
125
 126
126
 127
127
 128
128
 129
129
 130
130
 131
131
 132
132
 133
133
 134
134
 135
135
 136
136
 137
137
 138
138
 139
139
 140
140
 141
141
 142
142
 143
143
 144
144
 145
145
 146
146