17
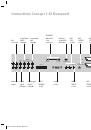
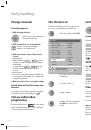
Your TV set has a combined analog-digital video
interface (Digital Visual Interface (DVI) and VGA
- RGB analog). You can use this to show PC
pictures with the TV set for example.
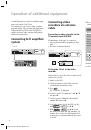
Connecting the PC
Note
: Switch off the PC and the TV before con-
necting the cables.
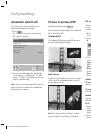
DVI mode
Connect the external digital video source to the
socket on the rear labeled “AV6/7” with a DVI
cable.
You can connect the analog stereo audio signal
to the input “LINE IN AV6/7”.
Switch on the TV set and select the AV station
slot AV7 - PC DVI with
AV
.
Switch on your PC and select monitor mode here.
Set the resolution if necessary.
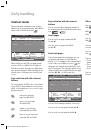
You can call details about the DVI signal applied
to the AV7 socket with a menu.
Switch to the input AV7 - PC DVI with the AV
button.
Press
MENU
.
The TV menu is displayed.
Select the option “Settings” with
v
/
V
and
press
B
.
Select the option “AV7 – PC DVI” with
v
/
V
and press
B
.
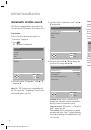
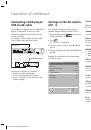
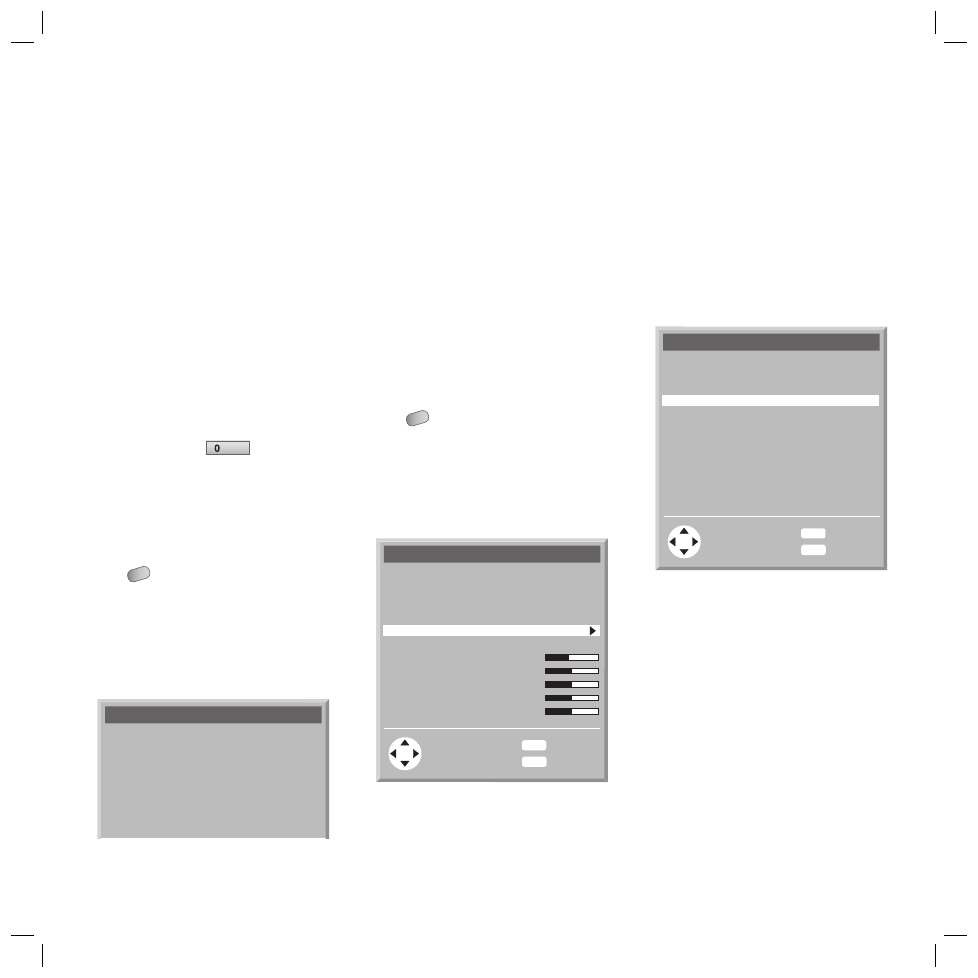
AV7 - PC DVI settings
???.? kHz
???.? Hz
???.? MHz
-/-
Horiz. frequency
Vert. frequency
Pixel clock
H/V polarisation
1.
2.
3.
4.
Analogue RGB mode (VGA)
If your external video source has an analogue
RGB-Video interface, please use the VGA-DVI
adapter cable provided.
The standards: VGA (640x480 @90Hz), XGA
(1024x768 @90Hz) or SVGA (800x600 @90Hz)
can be connected to the TV set (see page 22).
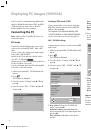
AV6 - PC RGB settings
Some parameters can be set for the analog RGB
video mode.
Switch to the input AV6 - PC RGB with the AV
button.
Press
MENU
.
The TV menu is displayed.
Select the option “Settings” with
v
/
V
and
press
B
.
Select the option “AV6 – PC RGB” with
v
/
V
and press
B
.
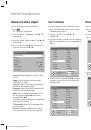
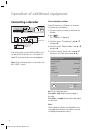
OK
MENU
END
AV6 - PC RGB settings
End
Back
???.? kHz
???.? Hz
???.? MHz
-/-
Horiz. frequency
Vert. frequency
Pixel clock
H/V polarisation
User values
Automatic adjust
Vert. position
Vert. size
Horiz. position
Horiz. size
Phase
User values
: Calls up the “PC RBG User
Values” menu with
B
.
Automatic adjust
: Optimally adapts the
picture automatically to the input signal after
pressing
OK
.
Vert. position
: Setting the vertical picture
position.
1.
2.
3.
4.
5.
Displaying PC images (DVI/VGA)
Vert. size
: Setting the vertical picture size.
Horiz. position
: Setting the horizontal picture
position.
Horiz. size
: Setting the horizontal picture size.
Phase
: Setting the phase position.
You can save the settings you made in up to
8 “value sets”. To do this, call the “PC RBG
User Values” menu under the “User Values”
menu item.
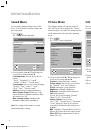
OK
MENU
END
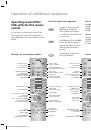
PC RGB user values
End
Back
Select value set
Recall selected value set
Save as selected value set
Delete all value sets
1
Select value set
: Selecting a value set.
Recall selected value set
: Activating the
selected value set.
Save as selected value set
: Saving the set-
tings in the value set specifi ed under “Select
value set”.
Delete all value sets
: Deleting all value sets.
Important
: Prolonged display of PC images
(longer than 10 minutes) should be avoided
because the image contours may remain visible
on the screen even after the device has been
switched off. See also page 6 “Please note”.
6.
7.
32241 Concept L42_Buch_GB.indd 17
32241 Concept L42_Buch_GB.indd 17
11.02.2005 14:09:38 Uhr
11.02.2005 14:09:38 Uhr