19
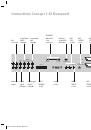
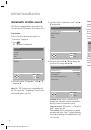
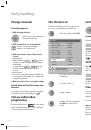
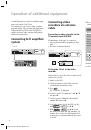
Connecting a DVD player/
VCR via AV cable
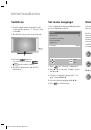
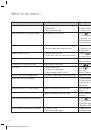
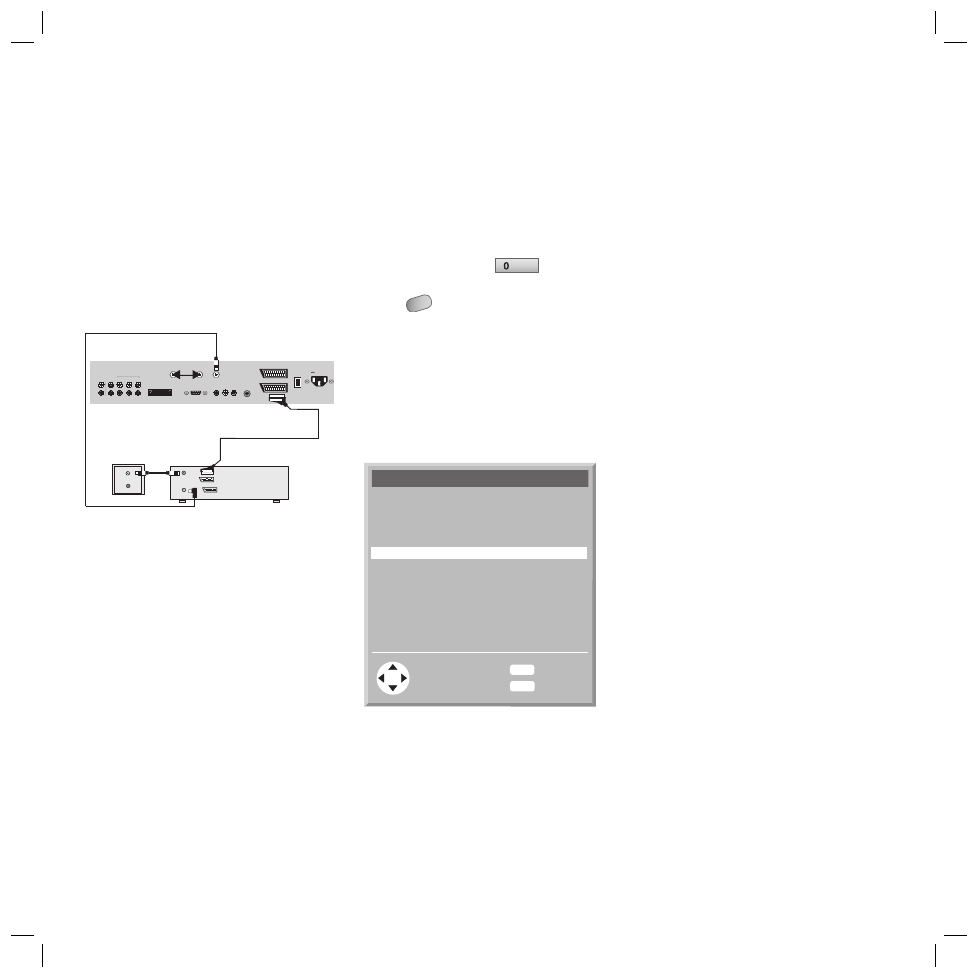
For playing video equipment such as VCRs, DVD
players or camcorders, the AV sockets AV-1 ...
AV5 are provided and the AV station slots al-
located accordingly.
For example, connect a VCR to the AV1 SCART
socket 1 with an AV cable (Scart cable).
120-240V
50/60Hz
SERVICE
RF OUT
Patch Cord
RF IN
AV6 / 7
L
LINE
OUT
AV4/5
NC
AV6/7
AV3
LINE IN
R
V
U
AV5
AV 2
RF-OUT
TV
RF-IN
VCR
Concept L 42
I
0
SUB
OUT
PC (RGB / DVI)
ANTENNA IN
AV 1
(RGB)
AV3
S-VIDEO
AV4
CVBS/Y
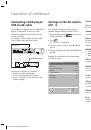
Advantages of this type of connection:
Better picture and sound quality.
Stereo sound reproduction is possible.
Sound 1 or Sound 2 can be selected for two-
sound recordings.
•
•
•
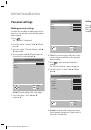
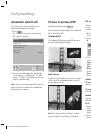
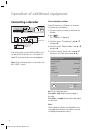
Settings at the AV sockets
AV1 - 5
You can make settings for the AV sockets to
optimally adapt the different signal sources.
By repeatedly pressing
AV
you go to the
desired socket AV1 ... AV5..
Press
MENU
.
The “TV menu” is displayed.
Select the option “Settings” with
v
/
V
and
press B.
Select the displayed AV socket with
v
/
V
and
press
B
.
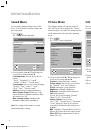
Example: You can make the following settings
for the AV1 socket:
OK
MENU
END
AV1 - SCART1 settings
End
Back
Standard
Allow switching voltage
RGB IN
VCR stabilisation
RGB Sync
Film Mode
Auto
Yes
SCART
On
On
Off
1.
2.
3.
4.
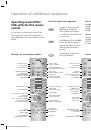
Selection options for AV sockets
Different options are available depending on the
AV socket.
Standard
: The standard recognized by the TV
set is displayed here.
Allow switching voltage:
If you select “Yes”
the signal applied at the AV socket is shown on
the screen when a switching voltage is activated
regardless of the selected station slot.
RGB IN
: You can choose the following:
“SCART“ for -“fast blank“ –for displays,
“Always” for permanent RGB signals
“Unused” - no RGB signal at the AV socket.
VCR stabilisation
: When setting “On” the
picture is stabilised in VCR playback.
RGB Sync
: For setting the picture synchronisa-
tion on all three colour channels in RGB mode,
e.g. in DVD players.
YC IN
: “Always” for S-Video mode or “Unused”
can be selected.
YUV progressive
: When setting “ON” it is
possible to display “progressive” video signals
(i.e. 50 full images/s).
Film Mode
: In the “Auto” setting the jolting of
movies is reduced (24 full images/s).
Note
:
See page 17 for the selection options for the AV
sockets AV6 and AV7.
•
•
•
Operation of additional
32241 Concept L42_Buch_GB.indd 19
32241 Concept L42_Buch_GB.indd 19
11.02.2005 14:09:41 Uhr
11.02.2005 14:09:41 Uhr