3 2
U s i n g t h e Pr i n t e r
www
.dell.com/suppl
ies | support.dell.com
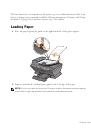
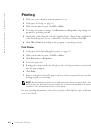
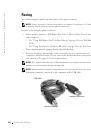
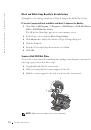
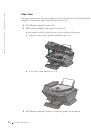
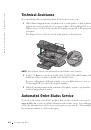
Printing
1
Make sure your computer and your printer are on.
2
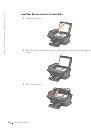
Load paper. For help, see page 25.
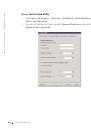
3
With your document open, click File
→
Print.
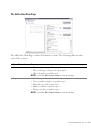
4
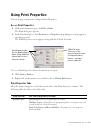
To change the printer settings, click Preferences or Properties (depending on the
program or operating system).
5
On the three tabs along the left side (Quality/Copies, Paper Setup, and Print Layout)
of the Print Properties screen, confirm the selections, and then click OK.
6
Click OK or Print (depending on the program or operating system).
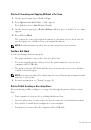
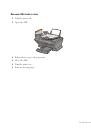
Print Photos
1
Load paper. For help loading photo paper, see page 25.
2
With your document open, click File
→
Print.
3
Click Preferences or Properties.
4
Select the paper size.
5
If using photo paper, make sure the glossy side is facing you when you insert the paper
into the paper support.
6
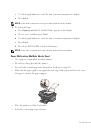
Click Print.
7
Remove your photos from the paper exit tray as they are printed to prevent them from
sticking together or smearing.
NOTE:
Before putting your prints in a nonadhesive photo album or framing them, allow
sufficient time for the prints to dry thoroughly (12 to 24 hours, depending on the ambient
conditions). This will maximize the life of your prints.
For more printing information, such as how to print collated photocopies and banners, see
your
User’s Guide
.
 1
1
 2
2
 3
3
 4
4
 5
5
 6
6
 7
7
 8
8
 9
9
 10
10
 11
11
 12
12
 13
13
 14
14
 15
15
 16
16
 17
17
 18
18
 19
19
 20
20
 21
21
 22
22
 23
23
 24
24
 25
25
 26
26
 27
27
 28
28
 29
29
 30
30
 31
31
 32
32
 33
33
 34
34
 35
35
 36
36
 37
37
 38
38
 39
39
 40
40
 41
41
 42
42
 43
43
 44
44
 45
45
 46
46
 47
47
 48
48
 49
49
 50
50
 51
51
 52
52
 53
53
 54
54
 55
55
 56
56
 57
57
 58
58
 59
59
 60
60
 61
61
 62
62
 63
63
 64
64
 65
65
 66
66
 67
67
 68
68
 69
69
 70
70
 71
71
 72
72
 73
73
 74
74
 75
75
 76
76
 77
77
 78
78
 79
79
 80
80
 81
81
 82
82
 83
83
 84
84
 85
85
 86
86
 87
87
 88
88
 89
89
 90
90
 91
91
 92
92
 93
93
 94
94
 95
95
 96
96
 97
97
 98
98
 99
99
 100
100
 101
101
 102
102
 103
103
 104
104
 105
105
 106
106
 107
107
 108
108
 109
109
 110
110
 111
111
 112
112
 113
113
 114
114
 115
115
 116
116
 117
117
 118
118
 119
119
 120
120
 121
121
Инструкции и руководства похожие на DELL A960