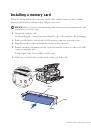
4 8
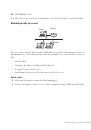
S e t t i n g u p f o r l o c a l p r i n t i n g
w
w
w
.
d
e
ll.
co
m/
su
p
p
l
i
e
s |
su
p
p
o
r
t
.
d
e
l
l.c
o
m
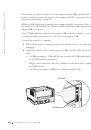
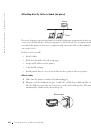
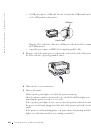
Using Windows 2000 with a USB or parallel cable
When you attached the cable and turned on the printer and computer, the Found New
Hardware Wizard screen appeared on your computer screen.
1
Insert the
Drivers and Utilities
CD, and then click Next.
2
Select Search for a suitable driver, and then click Next.
3
Select Specify a location
only
, and then click Next.
4
Browse to the location of the printer driver on the
Drivers and Utilities
CD.
D:\Drivers\Win_2000\
Replace D:\ with the letter of your CD-ROM drive (for example, type D:\ where
D
is
the drive letter of your CD).
5
Click Open, and then click OK.
6
Click Next to install the driver that is displayed.
7
Click Finish when the software is installed.
8
When the Dell Drivers and Utilities screen appears, choose Install the printer for Use
on this Computer only (Personal Installation) to install the additional software for
your printer.
When all the files are installed on your computer, the Congratulations screen appears.
9
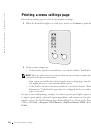
Click Print a Test Page to verify printer setup.
10
Click Finish when the test page prints successfully.
11
Close the
Drivers and Utilities
CD screen.
 1
1
 2
2
 3
3
 4
4
 5
5
 6
6
 7
7
 8
8
 9
9
 10
10
 11
11
 12
12
 13
13
 14
14
 15
15
 16
16
 17
17
 18
18
 19
19
 20
20
 21
21
 22
22
 23
23
 24
24
 25
25
 26
26
 27
27
 28
28
 29
29
 30
30
 31
31
 32
32
 33
33
 34
34
 35
35
 36
36
 37
37
 38
38
 39
39
 40
40
 41
41
 42
42
 43
43
 44
44
 45
45
 46
46
 47
47
 48
48
 49
49
 50
50
 51
51
 52
52
 53
53
 54
54
 55
55
 56
56
 57
57
 58
58
 59
59
 60
60
 61
61
 62
62
 63
63
 64
64
 65
65
 66
66
 67
67
 68
68
 69
69
 70
70
 71
71
 72
72
 73
73
 74
74
 75
75
 76
76
 77
77
 78
78
 79
79
 80
80
 81
81
 82
82
 83
83
 84
84
 85
85
 86
86
 87
87
 88
88
 89
89
 90
90
 91
91
 92
92
 93
93
 94
94
 95
95
 96
96
 97
97
 98
98
 99
99
 100
100
 101
101
 102
102
 103
103
 104
104
 105
105
 106
106
 107
107
 108
108
 109
109
 110
110
 111
111
 112
112
 113
113
 114
114
 115
115
 116
116
 117
117
 118
118
 119
119
 120
120
 121
121
 122
122
 123
123
 124
124
Инструкции и руководства похожие на DELL S2500, S2500n