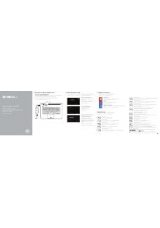
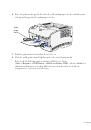
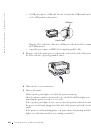
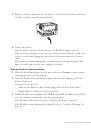
S e t t i n g u p f o r l o c a l p r i n t i n g
5 3
2
Browse to the location of the printer driver on the
Drivers and Utilities
CD, and then
click
OK
.
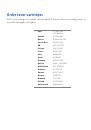
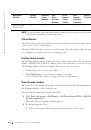
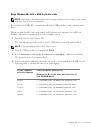
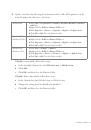
Use the following table to identify the driver for your language.
3
Highlight the appropriate driver, and then click Finish.
The Add Printer Wizard screen appears.
4
Use the default printer name (for example, Dell Laser Printer S2500), or type a unique
name for your printer.
5
Select whether or not to use this printer as the default printer.
6
Click Next.
7
Click Finish.
8
A test page will print automatically. Click YES when the test page prints successfully.
9
Click Finish to complete the installation. You are now ready to print.
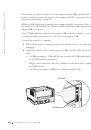
10
You are prompted to insert the
Drivers and Utilities
CD. Click OK.
A dialog box asks for the file “lexdrvin.exe”.
11
Browse to the appropriate folder on the
Drivers and Utilities
CD (for example,
D:\Drivers\Win_9x\English).
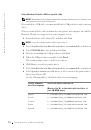
12
Click OK.
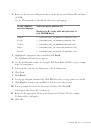
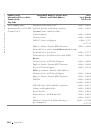
If your computer
uses this language
Select the driver from the list
(Replace the D:\ in the table with the letter of
your CD-ROM drive)
English
D:\DRIVERS\WIN_9X\ENGLISH\LMPCL5C.INF
French
D:\DRIVERS\WIN_9X\FRENCH\LMPCL5C.INF
German
D:\DRIVERS\WIN_9X\GERMAN\LMPCL5C.INF
Italian
D:\DRIVERS\WIN_9X\ITALIAN\LMPCL5C.INF
Spanish
D:\DRIVERS\WIN_9X\SPANISH\LMPCL5C.INF
 1
1
 2
2
 3
3
 4
4
 5
5
 6
6
 7
7
 8
8
 9
9
 10
10
 11
11
 12
12
 13
13
 14
14
 15
15
 16
16
 17
17
 18
18
 19
19
 20
20
 21
21
 22
22
 23
23
 24
24
 25
25
 26
26
 27
27
 28
28
 29
29
 30
30
 31
31
 32
32
 33
33
 34
34
 35
35
 36
36
 37
37
 38
38
 39
39
 40
40
 41
41
 42
42
 43
43
 44
44
 45
45
 46
46
 47
47
 48
48
 49
49
 50
50
 51
51
 52
52
 53
53
 54
54
 55
55
 56
56
 57
57
 58
58
 59
59
 60
60
 61
61
 62
62
 63
63
 64
64
 65
65
 66
66
 67
67
 68
68
 69
69
 70
70
 71
71
 72
72
 73
73
 74
74
 75
75
 76
76
 77
77
 78
78
 79
79
 80
80
 81
81
 82
82
 83
83
 84
84
 85
85
 86
86
 87
87
 88
88
 89
89
 90
90
 91
91
 92
92
 93
93
 94
94
 95
95
 96
96
 97
97
 98
98
 99
99
 100
100
 101
101
 102
102
 103
103
 104
104
 105
105
 106
106
 107
107
 108
108
 109
109
 110
110
 111
111
 112
112
 113
113
 114
114
 115
115
 116
116
 117
117
 118
118
 119
119
 120
120
 121
121
 122
122
 123
123
 124
124
Инструкции и руководства похожие на DELL S2500, S2500n