6 6
S e t t i n g u p f o r n e t w o r k p r i n t i n g
w
w
w
.
d
e
ll.
co
m/
su
p
p
l
i
e
s |
su
p
p
o
r
t
.
d
e
l
l.c
o
m
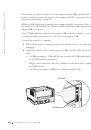
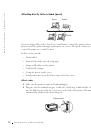
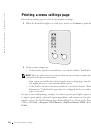
Verify the IP settings
1
Press and release the Continue button on the operator panel to print another network
setup page.
2
Look under the “TCP/IP” heading on the network setup page to make sure the IP
address, netmask, and gateway are what you expected.
3
Ping the printer and verify that it responds. For example, at a command prompt on a
network computer, type
ping
followed by the new printer IP address (for example,
192.168.0.11
):
ping xxx.xxx.xxx.xxx
If the printer is active on the network, you will receive a reply.
Install printer drivers
1
Insert the
Drivers and Utilities
CD.
2
Click Install the printer on the Network.
3
Click One or more Client computers that will use this printer.
4
Enter your Administrator user name and password.
5
Specify which client computers are allowed to print to the new Dell Laser Printer
S2500n.
Browse or type each client’s computer name or IP address. You can specify as many
clients as you wish. If you wish to print to this printer, enter your computer’s IP
address as well.
6
When you are finished adding clients, click Next.
7
Select the software and documentation you want your users to have access to.
8
Select TCP/IP, and then click Next.
If your network also uses NetWare, select NetWare Systems as well.
9
Set the Port Type to Network TCP/IP Port.
10
Specify a port name that is meaningful in your environment. The port name
establishes a logical link between the printer and each client.
11
Enter the printer IP address, for example,
192.168.0.11
.
12
Click Finish.
13
Print a test page to verify the driver is installed correctly.
 1
1
 2
2
 3
3
 4
4
 5
5
 6
6
 7
7
 8
8
 9
9
 10
10
 11
11
 12
12
 13
13
 14
14
 15
15
 16
16
 17
17
 18
18
 19
19
 20
20
 21
21
 22
22
 23
23
 24
24
 25
25
 26
26
 27
27
 28
28
 29
29
 30
30
 31
31
 32
32
 33
33
 34
34
 35
35
 36
36
 37
37
 38
38
 39
39
 40
40
 41
41
 42
42
 43
43
 44
44
 45
45
 46
46
 47
47
 48
48
 49
49
 50
50
 51
51
 52
52
 53
53
 54
54
 55
55
 56
56
 57
57
 58
58
 59
59
 60
60
 61
61
 62
62
 63
63
 64
64
 65
65
 66
66
 67
67
 68
68
 69
69
 70
70
 71
71
 72
72
 73
73
 74
74
 75
75
 76
76
 77
77
 78
78
 79
79
 80
80
 81
81
 82
82
 83
83
 84
84
 85
85
 86
86
 87
87
 88
88
 89
89
 90
90
 91
91
 92
92
 93
93
 94
94
 95
95
 96
96
 97
97
 98
98
 99
99
 100
100
 101
101
 102
102
 103
103
 104
104
 105
105
 106
106
 107
107
 108
108
 109
109
 110
110
 111
111
 112
112
 113
113
 114
114
 115
115
 116
116
 117
117
 118
118
 119
119
 120
120
 121
121
 122
122
 123
123
 124
124