20
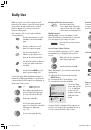
In these menus you can make the sound
settings for the radio mode as described for TV
mode on page 14.
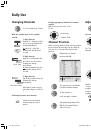
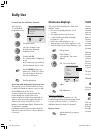
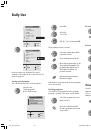
Sorting radio programs:
You can change the order of the programs.
Select the line
”Radio programs”
in the ”Radio menu“.
Reserving/inserting a program place:
Select a program number.
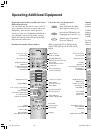
Press the yellow button to
reserve a place.
All following programs move
forward one place.
Deleting a program range:
Select a program number for
the range start.
The program number/name is
marked by pressing the
OK
button.
Select a program number for
the end of range.
The marked program range is
deleted
by pressing the
OK
button.
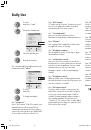
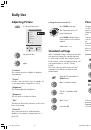
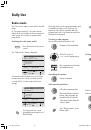
Timer functions
In radio mode you can also be reminded of an
appointment at a certain time by a signal tone
once or every day. You can also have the set
switched off at a certain time.
Call the ”Radio menu” in radio
mode with the
MENU
button
and then select the ”Timer
functions” line.
Select the appropriate function.
Operation: as described on
page 12.
Press
OK
.
Select the
”Sort” line.
Call the ”Sort” menu with
OK
.
The program preview is shown.
Select a program name which
you want to move.
Press the blue button briefly.
Move the program name to the
desired program number. The
program name which was at
this number is shifted one
position forward.
End moving by pressing the
blue button again.
Repeat these operating steps if other programs
are to be resorted.
Deleting programs:
You can delete a program from the program
preview, e.g. when it has been stored double.
Select the program name you
want to delete.
Press the red button briefly.
All other programs move back
one position.
O K
M
E
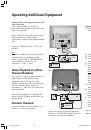
Radio menu
Back
End
Sound
Radio programs
Timer functions
Time and date
M
E
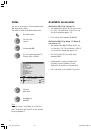
Sound menu
Sound via
Volume
Headph. vol.
Loudsp. sound
Headph. sound
Other ...
Back
End
Stereo Mono!
Listening mode
M
E
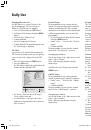
Sound menu
Other ...
AVC
Maximum volume
Treble
Bass
Balance
Back
End
50
AV audio sig.
Daily Use
OK
OK
OK
OK
OK
OK
OK
OK
OK
OK
OK
OK
OK
OK
MENU
LCD_023_RC4_GB
10.08.2004, 14:08 Uhr
20