20
21
English
RSX-1560 Surround Sound Receiver
20
21
English
RSX-1560 Surround Sound Receiver
Note:
Memorized settings and video labels are preserved
indefinitely, even if the unit is disconnected from AC power.
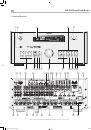
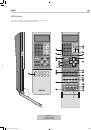
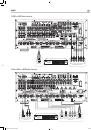
Master Power Switch
g
The large rocker switch on the rear panel is a master power switch.
When it is in the OFF position, power to the unit is completely off. When
it is in the ON position, the front panel STANDBY and remote control
ON/OFF buttons can be used to activate the unit or put it into standby
mode.
Note:
After all connections are completed, the rear panel master
power switch should be put in the ON position and usually left in
that position.
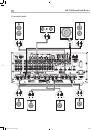
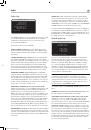
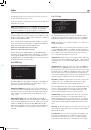
12V TRIGGER Connections
d
Many Rotel amplifiers offer the option of turning them on and off using
a 12 volt trigger. These six connections provide this 12 volt trigger signal
from the receiver. When the unit is activated, a 12 volt DC signal is sent
from these jacks to the amplifiers to turn them on. When the receiver
is put in STANDBY mode, the trigger signal is interrupted and the
amplifiers turn off.
To use the remote turn on feature, connect one of the receiver’s 12V
TRIG OUT jacks to the 12 volt trigger input of a Rotel amplifier, using a
cable with mono 3.5 mm mini-plugs on both ends. The +12 V DC signal
appears at the “tip” connector.
Note:
The 12V Trigger outputs are configured to turn on in
various combinations only when specific input sources are
activated. See the INPUT SETUP and ZONE 2–4 SETUP menus in
the Setup section of this manual for details.
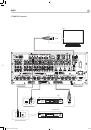
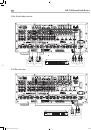
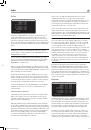
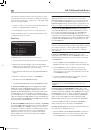
REM IN Jacks
s
Four 3.5 mm mini-jacks (labeled EXT, ZONE 2, ZONE 3, and ZONE
4) receive command codes from a third-party infrared receiver or Rotel
remote zone keypad, These remote IR inputs are used when the IR signals
from a hand held remote control cannot reach the front panel IR sensor.
EXT:
The EXT jack is used with an outboard IR receiver to duplicate the
front panel IR sensor. This feature is useful when the unit is installed in a
cabinet and the front panel sensor is blocked or when IR signals need to
be relayed to other components.
ZONE:
The ZONE 2, 3, or 4 jacks are used with IR repeater systems to
receive signals from IR control systems in remote locations. For example,
remote control signals sent to the ZONE 2 jack control the ZONE 2
features of the receiver and can be relayed to other components.
Consult your authorized Rotel dealer for information on external
receivers and the proper wiring of 3.5mm mini-plugs to fit the REM IN
jacks.
Note:
The RR-1061 remote control can be set to send individual
IR commands for each zone. Please refer to the setup manual
supplied with the RR-1061 to program this function.
Note:
The IR signals from the REM IN EXT and REM IN ZONE
2–4 jacks can be relayed to source components using external IR
emitters or hard-wired connections from the IR OUT jacks. See the
following section for additional information.
IR OUT Jacks
a
The IR OUT 1 & 2 jacks send IR signals received at the REM IN ZONE
2–4 jacks or the REM IN EXT jack to an infrared blaster or emitter
placed in front of a source component’s IR sensor. In addition, the IR OUT
can be hard-wired to Rotel CD players, DVD players, or tuners with a
compatible connector.
These outputs are used to allow IR signals from the three remote zones
to be sent to the source components, or to pass along IR signals from a
remote in the main room when the sensors on the source components are
blocked by installation in a cabinet.
See your authorized Rotel dealer for information on IR emitters and
repeater systems.
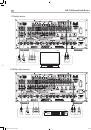
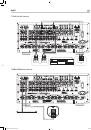
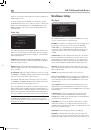
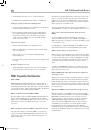
Computer I/O
\
This Rotel receiver can be operated from a computer with audio system
control software from third-party developers. This control is accomplished
by sending operating codes from the computer via a hard-wired RS-232
serial connection. In addition, the receiver can be updated using special
software from Rotel.
The COMPUTER I/O input provides the necessary network connections
on the rear panel. It accepts standard RJ-45 8-pin modular plugs, such
as those commonly used in 10-BaseT UTP Ethernet cabling.
For additional information on the connections, cabling, software, and
operating codes for computer control or updating of the unit, contact
your authorized Rotel dealer.
RSX-1560 English v2.indd 21
29/9/08 15:15:57