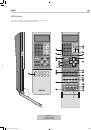
46
47
English
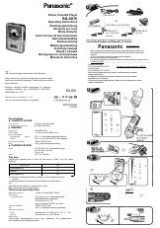
RSX-1560 Surround Sound Receiver
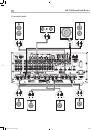
46
47
English
RSX-1560 Surround Sound Receiver
Note:
When a speaker is set to LARGE on the SPEAKER SETUP
menu or on this menu, the crossover setting is not available since,
by definition, a LARGE speaker plays full-range with no bass
redirection to the subwoofer and no crossover. Likewise, the OFF
setting for the subwoofer crossover is not available for SMALL
speakers, since SMALL means that the speaker will redirect its bass
below a given crossover point to the subwoofer. In addition, the
CROSSOVER setting is not available for the MULTI INPUT.
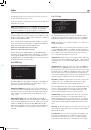
DOLBY (large/small/none):
Sets the current speaker (shown in the
first line) to LARGE, SMALL, or NONE, overriding the master setting from
the SPEAKER SETUP menu. This setting will ONLY take effect with Dolby
Digital or Dolby Pro Logic II decoding.
DTS (large/small/none):
The same options described for Dolby
above, except these settings ONLY take effect with DTS and DTS Neo:6
decoding.
STEREO (large/small/none):
The same options described for Dolby
above, except these settings ONLY take effect in STEREO surround mode.
DSP (large/small/none):
The same options described for Dolby
above, except these settings ONLY take effect with any of the DSP MUSIC
surround modes.
Note:
When the front speakers are set to use the master crossover
frequency on the Advanced Speaker Setup menu, the surround
mode specific “large/small/none” settings are not available for
the other speakers. These speakers will use the setting determined
in the basic Speaker Setup menu.
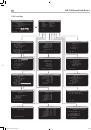
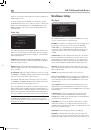
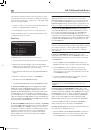
Subwoofer Setup
����������������������
�����������
���������������������
���������������������
������������������������������
���������������������
���������������������
���������������������
���������������������
������
�����������
The SUBWOOFER SETUP menu allows selection of the master subwoofer
crossover frequency and independent adjustment of subwoofer level for
each surround mode.
CROSSOVER (40Hz/60Hz/80Hz/100Hz/120Hz/150Hz/200Hz/
OFF):
This setting specifies a master low-pass filter for the subwoofer
and a corresponding high-pass filter for all SMALL speakers in the system
at the selected frequency. To adjust the crossover frequency, highlight
the CROSSOVER line using the UP/DOWN buttons. Then, use the
+/– buttons to choose the master crossover point. The 80Hz or 100Hz
crossover points are the most common in home theater systems and
should be used unless you have a specific reason to choose a different
crossover point based on your specific speakers.
The OFF setting sends a full-range signal to your subwoofer so that you
can use its built-in low-pass filter. With the OFF setting, a 100Hz high-
pass filter is activated for all SMALL speakers in the system.
Note:
The master crossover point can be overridden with a
custom crossover frequency for the front, center, surround, or
surround back speakers in the ADVANCED SPEAKER SETUP menu;
however, in most systems the single master crossover point should
work well
DOLBY DIGITAL:
DOLBY PLIIx:
DTS:
STEREO:
DSP:
MULTI INPUT:
These six lines allow you to override the master subwoofer level setting as
determined on the TEST TONE menu (see next section) for each specific
surround mode. When going to the SUBWOOFER SETUP menu from the
MAIN menu, the current surround mode is automatically highlighted.
Use the +/– buttons to adjust the subwoofer level for the current surround
mode. The options are OFF (which turns off the subwoofer for that mode)
and a range of adjustments from -9dB to +9dB and MAX (+10dB). A
setting of 0dB means that the specified surround mode will use the master
subwoofer level. Any other setting is an offset to the master setting. For
example, an adjustment of -2dB for a particular surround mode means
that the subwoofer level will be 2dB quieter than the master subwoofer
level when that surround mode is selected. Use these subwoofer level
settings to adjust the relative bass output of various surround modes.
Changing the master subwoofer level will increase or decrease the level
for all surround modes.
Note:
Only the current surround mode can be adjusted on this
menu. You will need to change surround modes using the front
panel or remote buttons to adjust a different mode.
We recommend starting with the settings for all surround modes at the
default 0dB setting during the test tone calibration of the system and
for a period of familiarization after that. As you listen to a variety of
source material over time, you may notice that certain surround modes
consistently produce too much or too little bass from the subwoofer. If
so, then use these menu settings to customize each surround mode. In
general, if the master subwoofer level is set properly (i.e. not too loud),
individual settings for each surround mode should not be necessary.
Note:
In Dolby Digital and DTS recordings, the LFE channel
is used to produce spectacular low bass effects, placing
considerable demands on your subwoofer system. If you hear
distortion or other signs of distress from your subwoofer at loud
listening levels, you may consider reducing the subwoofer level for
the Dolby Digital and/or DTS surround modes. In other surround
modes, there is no LFE channel and the subwoofer will only
reproduce redirected bass from the other channels, which is not as
likely to tax the subwoofer.
To return to the MAIN menu, press the ENTER button. Press the MENU/
OSD button on the remote to cancel the display and return to normal
operation.
RSX-1560 English v2.indd 46
29/9/08 15:16:16