21
21
4
4
TV – Recording Digital TV
TV – Recording Digital TV
4.1
Recording Digital TV with the AV 700 TV
4.1
Recording Digital TV with the AV 700 TV
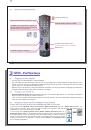
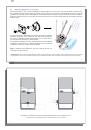
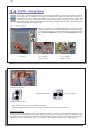
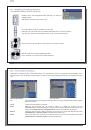
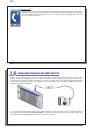
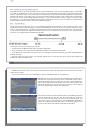
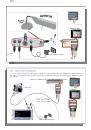
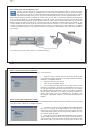
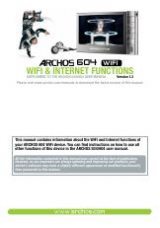
The AV 700 TV allows you to record your favorite TV programs very easily. While you’re watching TV, all
you have to do is select the Start Recording action icon and the AV 700 TV will instantly start recording
the program you’re watching. To stop the recording, simply select the Stop Recording action icon. Note
that while recording Digital TV, you will not be able to change channels.
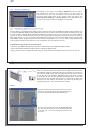
Where is the Recording Saved?
The default location for Digital TV recordings is the folder called Video. Files recorded from Digital TV are named
automatically from the program’s title. To view a recording, go to the main menu and select the Video icon. You
will see your recording here.
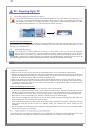
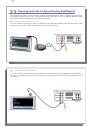
4.2
Setting the Scheduler
4.2
Setting the Scheduler
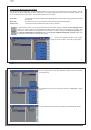
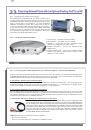
If you would like to make a Digital TV recording for a future date or time, you can use the scheduler.
You can fi nd it in the main menu. You can program up to twenty different recordings up to one month in
advance. Once you program your dates and times of recording, press the action button OK to set them.
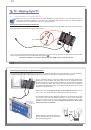
IMPORTANT: your AV 700 TV must be plugged in and powered by the adapter/charger. If left alone, the AV 700 TV will
go on standby itself after a few minutes. At the programmed time, it will turn on and make the recording.
22
22
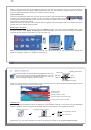
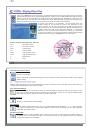
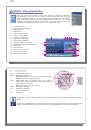
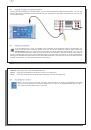
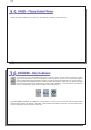
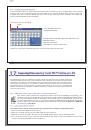
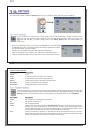
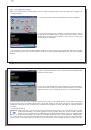
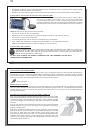
1. Click the Scheduler icon.
2. Select the line you want to edit using the UP and DOWN buttons, then press RIGHT to start editing.
3. Set each line with the desired date, time and channel. Make sure that the letter before the channel number is D
(D stands for Digital TV and A stands for Analog recording - see section 23.8 of the full manual about using the
scheduler for Analog recordings with the optional TV Docking Pod).
4. Click on the save icon to save the program. Click on the STOP/ESC button to return to the previous screen.
5. Make sure the adapter/charger is connected to the device. Set the AV 700 TV to Standby (red ‘standby’ button
on remote control) or go back to the main menu screen and allow it to automatically (after a couple minutes of
inactivity) go into standby mode.
Notes about setting the Scheduler:
• The scheduler automatically reorganizes the recording events chronologically.
• In order for a scheduled recording to start, you must leave the AV 700 TV in the main menu screen or set it to
standby mode (press Standby button on remote control). That is, if you are listening to music, watching a video,
or looking at photos on your AV 700 TV, it will not interrupt you in order to go make the scheduled recording.
• When the AV 700 TV user interface is in English, the Date format is set to Month/Day.
• If the end time is earlier than the start time, then it is assumed that you start recording on the start date, and
the recording ends on the following day at the end time.
• Once a scheduled recording has been made, or the date of a recording has been passed, without the recording
having been made (the AV 700 TV was not in Standby mode), the schedule entry will be erased from the
scheduler.
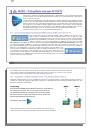
• Some recordings can create fi les that are larger than 2 gigabytes (GB) each. The AV 700 TV will create multiple
fi les in order to make long recordings.
4.3
Viewing Digital TV recordings on your computer
4.3
Viewing Digital TV recordings on your computer
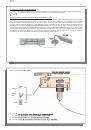
If you want to view your Digital TV recordings on your computer, you will have to install software that can read
videos in MPEG-2 TS format (.TS extension). One possibility is the VLC Player (www.videolan.org).