99
99
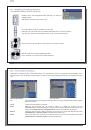
out which code works with your device. In the example screen, you see the code V009. If this code does not
work when doing the Test: channel select , advance it to the next code and then test to see if that next code
works.
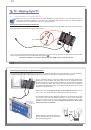
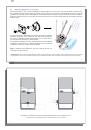
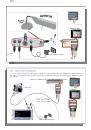
3. Test channel select: When you press the Test channel select button (highlight test channel select and press
ENTER), the AV 700 TV will send a signal through the docking pod to the infrared emitter and change the
channel on your tuner (VCR, cable box, or satellite receiver). If the Number of digits parameter is set to three, it
will try to select channel 123. If that parameter is set to 2, it will send the code for channel 12. If your tuner does
not change channels when you click on this test button, try the next code for your device (step 2 above).
4. Test ON/OFF: When you click on the Test On/Off button, the AV 700 TV will send a signal to the infrared emitter
and turn your device on or off. Click this test button again and your device should change from on to off or off to
on. If pressing this button does not turn your device on or off, try the next code for your device (step 2 above).
If none of the codes work, check that the infrared emitter is stuck directly over the infrared sensor on your tuner
device. Note: In some rare cases the ON/OFF functionality may not work.
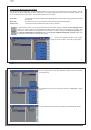
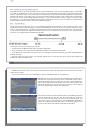
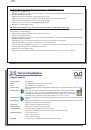
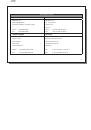
5. Tune channel select: These four parameters usually do not need to be set. Keep the default values to start
with. See the table below for an explanation of each.
Parameter
Description
Parameter
Description
Key: -/--
Set this to
On
if normally, you have to press this same key on your device’s remote control in order to select a channel.
Number of digits
Set the number of digits that your device can recognize for a channel.
Example: Set to 3 if you need to choose a
channel greater than channel 99.
Key: Enter
Set this to
On
if normally, you have to press the Enter key on your device’s remote control after you enter the channel
number.
Example: If you normally press 1, 3, Enter for channel 13, then you would need to set this parameter to On.
Key Delay
Change the delay between the emission of each digit of a channel. You may need to adjust this if the AV 700 seems
to send only half the digits of a channel or more digits of a channel.
Example: Adjust the key delay and retest channel
select if it sends channel 2 instead of 12 or sends 112 instead of 12.
100
100
2
24
4
Troubleshooting
Troubleshooting
24.1 USB Connection issues
24.1 USB
Connection
issues
Problem:
I cannot get my AV 700 TV to be recognized by the computer or it asks for a driver.
Solutions:
• If you are running an operating system other than Windows
®
XP (Service Pack 1 minimum) with Windows Media
®
Player 10 or higher, the USB Port setting should be set to ‘Hard Drive’. Go to
Setup > System > USB Port
and
set it to ‘
Hard Drive
’. Only Windows
®
XP (Service Pack 1 or higher) with Windows Media
®
Player 10 or higher
will allow for the USB Port ‘
Windows Device
’ setting.
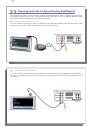
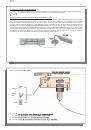
• Shut off and reboot the computer and the AV 700 TV and then try connecting again in the preferred order
mentioned in the chapter
Connecting/Disconnecting the AV 700 TV to/from your PC
.
• If using a USB hub, try connecting without using the hub (some hubs are not powered and may not work with
the AV 700 TV).
• If using a USB port in the front of your computer, try a USB port in the back. Front USB ports are often from
non-powered hubs.
• Do not connect to a USB port repeated through a keyboard.
• If using a laptop computer and a docking station, try connecting without the docking station.
• Macintosh
®
users must update to OS 10.2.4 or higher.
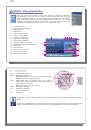
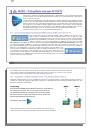
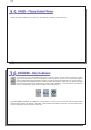
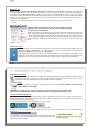
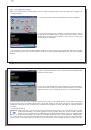
• (Hard Drive mode) If the Files Allocation Table (FAT) gets corrupted, the AV 700 TV may not show up in
Windows XP for over one minute, and then it comes up as
local drive
. Use DOS Utility
ChkDsk
as shown
below.
• (Hard Drive Mode) Windows
®
XP may recognize the AV 700 TV hard drive but yet not assign a drive letter to
it. Right click on
My Computer
and select
Manage
. Then select
Storage
, then
Disk Management
. Within this
window you may see the hard drive and be able to assign a drive letter by right-clicking on the hard drive, and
selecting the option
Change drive letter and paths
…