81
81
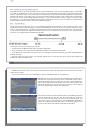
• You should be able to use your television system as you normally do. The TV docking pod is merely passing
through the video and audio to your television.
• Europe: If you don’t see the video, check to make sure you used the correct SCART IN and OUT adapters.
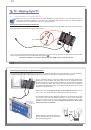
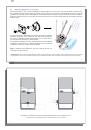
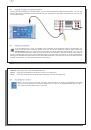
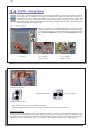
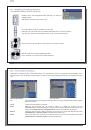
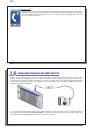
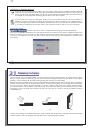
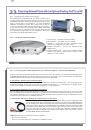
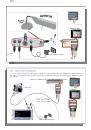
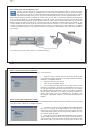
4) Connection: Connect the AV 700 TV to the TV Docking Pod
Connect your AV 700 TV to the docking pod as shown. The AV 700 TV
can be on or off when you connect it. If it is off, the act of connecting
it to the docking will turn it on. If the AV 700 TV is lying fl at next to the
docking pod, there is a good chance that you will not be able to control it
with the remote control. Thus, you should always set it up on its stand.
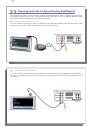
TEST IT:
Test now to verify that it works as desired.
• Turn on the AV 700 TV and your television.
• Hold down on the TV/LCD button for 2 seconds (button located on top of the AV 700 TV).
• The screen on your AV should go black.
• You should see the AV 700 TV screen now displaying to your television.
• If not, switch your television to auxiliary input (often called L1 or L2 just below channel 1)
• Hold the TV/LCD button again to return to viewing on your AV 700 TV.
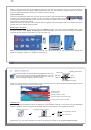
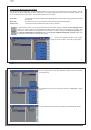
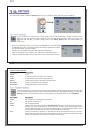
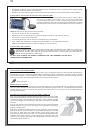
5) Connection: the S-Video In
If you would like to get a higher quality video recording, and your video recorder, cable box or other video
device has an S-video output, you can connect a standard S-video cable from it to your TV docking pod.
This will carry only the video signal to the pod and your AV 700 TV, not the audio. The video pass thru
feature is not supported for S-Video input.
DO NOT PLUG IN BOTH THE S-VIDEO CONNECTOR AND THE STANDARD YELLOW AV IN
CONNECTOR AT THE SAME TIME.
82
82
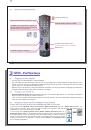
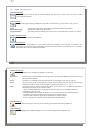
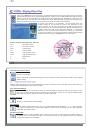
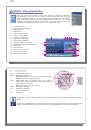
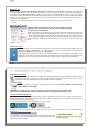
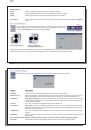
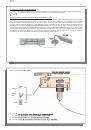
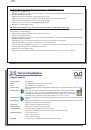
6) Connection: the Infrared Emitter
This is an optional connection. You will need to use this if you would like to change TV channels with the ARCHOS
™
remote control or if you want to be able to make scheduled recordings. This emitter, once stuck on to your cable
box, satellite receiver, or video cassette recorder, will be able to turn that device on and off and select channels
while you are away. The emitter acts like the remote control for that device.
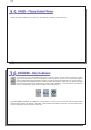
Infrared (IR) Emitter
Which device to control?
You will affi x the IR Emitter to the device you normally change your TV channels with. Do you change TV channels
with your video cassette recorder remote control, your cable box remote control, or your satellite receiver remote
control? Which ever one of these devices changes the channel that you view, then it is on this device that you
will affi x the IR Emitter.
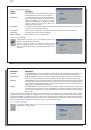
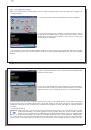
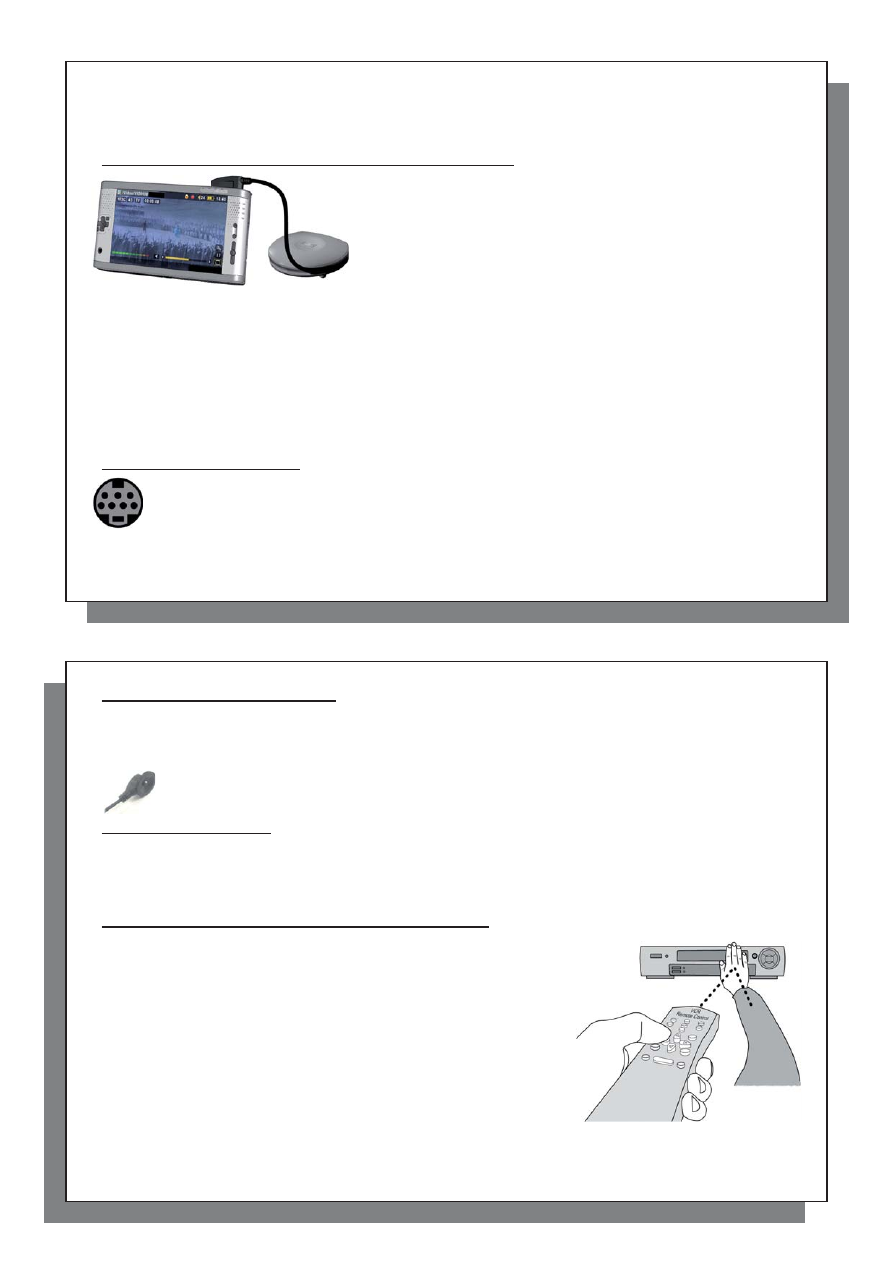
Locating the Infrared Receptor on your VCR or Cable box
First, you must locate the infrared detector on the device. This is the small
dark window (looks black or deep red actually) which you point your remote
control at to change the channels. We will use a video cassette recorder
(vcr) as an example, but the following is true also for a cable box or satellite
receiver.
Look in your device’s user manual to see if it shows you where the infrared
detector window is. If you fi nd it, then jump to the next step “Connecting it
to the TV docking pod”.
One way to locate the infrared receptor on your VCR is to cover up various
parts of the face of your VCR with your hand while changing the channels
and notice at what point your VCR’s remote control stops working. By
covering up various parts of the face, you will stop the infrared beam from
reaching the infrared receptor. Keep changing the channels with your
remote control, moving your hand over various areas until you have found
where the infrared receptor is.