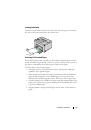
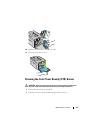
Maintaining Your Printer
127
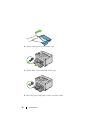
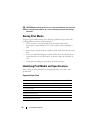
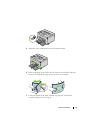
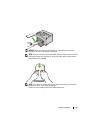
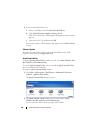
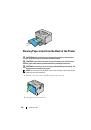
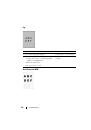
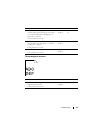
Performing Auto Correct
Auto Correct
on the
Tool Box
allows you to correct the color registration
automatically.
NOTE:
1
Click
Start
All Programs
Dell Printers
Dell 1250c Color Printer
Tool Box
.
NOTE:
The Select Printer window appears in this step, when multiple printer
drivers are installed on your computer. In this case, click the name of Dell
1250c Color Printer listed in Printer Name, and then click OK.
The
Tool Box
opens.
2
Click the
Printer Maintenance
tab.
3
Select
Color Registration Adjustment
from the list at the left side of the
page.
The
Color Registration Adjustment
page is displayed.
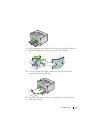
4
Uncheck the check box next to
On
.
5
Click the
Start
button next to
Auto Correct
.
The color registration is corrected automatically.
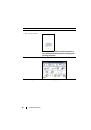
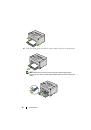
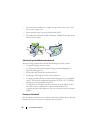
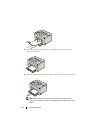
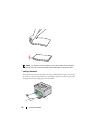
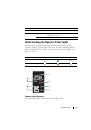
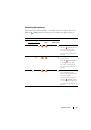
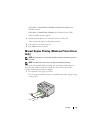
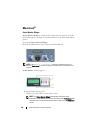
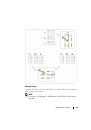
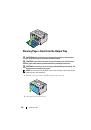
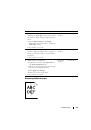
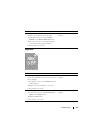
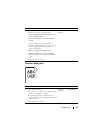
Printing the Color Registration Chart
NOTE:
1
Click
Start
All Programs
Dell Printers
Dell 1250c Color Printer
Tool Box
.
NOTE:
The Select Printer window appears in this step, when multiple printer
drivers are installed on your computer. In this case, click the name of Dell
1250c Color Printer listed in Printer Name, and then click OK.
The
Tool Box
opens.
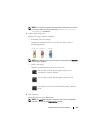
2
Click the
Color Printer Maintenance
tab.
3
Select
Color Registration Adjustment
from the list at the left side of the
page.
The
Registration Adjustment
page is displayed.
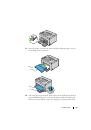
4
Click the
Start
button next to
Color Regi Chart
.
 1
1
 2
2
 3
3
 4
4
 5
5
 6
6
 7
7
 8
8
 9
9
 10
10
 11
11
 12
12
 13
13
 14
14
 15
15
 16
16
 17
17
 18
18
 19
19
 20
20
 21
21
 22
22
 23
23
 24
24
 25
25
 26
26
 27
27
 28
28
 29
29
 30
30
 31
31
 32
32
 33
33
 34
34
 35
35
 36
36
 37
37
 38
38
 39
39
 40
40
 41
41
 42
42
 43
43
 44
44
 45
45
 46
46
 47
47
 48
48
 49
49
 50
50
 51
51
 52
52
 53
53
 54
54
 55
55
 56
56
 57
57
 58
58
 59
59
 60
60
 61
61
 62
62
 63
63
 64
64
 65
65
 66
66
 67
67
 68
68
 69
69
 70
70
 71
71
 72
72
 73
73
 74
74
 75
75
 76
76
 77
77
 78
78
 79
79
 80
80
 81
81
 82
82
 83
83
 84
84
 85
85
 86
86
 87
87
 88
88
 89
89
 90
90
 91
91
 92
92
 93
93
 94
94
 95
95
 96
96
 97
97
 98
98
 99
99
 100
100
 101
101
 102
102
 103
103
 104
104
 105
105
 106
106
 107
107
 108
108
 109
109
 110
110
 111
111
 112
112
 113
113
 114
114
 115
115
 116
116
 117
117
 118
118
 119
119
 120
120
 121
121
 122
122
 123
123
 124
124
 125
125
 126
126
 127
127
 128
128
 129
129
 130
130
 131
131
 132
132
 133
133
 134
134
 135
135
 136
136
 137
137
 138
138
 139
139
 140
140
 141
141
 142
142
 143
143
 144
144
 145
145
 146
146
 147
147
 148
148
 149
149
 150
150
 151
151
 152
152
 153
153
 154
154
 155
155
 156
156
 157
157
 158
158
 159
159
 160
160
 161
161
 162
162
 163
163
 164
164
 165
165
 166
166
 167
167
 168
168
 169
169
 170
170
 171
171
 172
172
 173
173
 174
174
Инструкции и руководства похожие на DELL 1250c