English-11
English
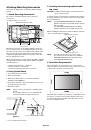
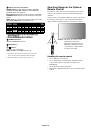
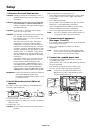
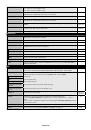
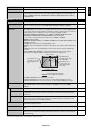
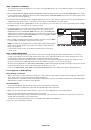
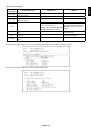
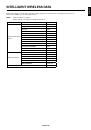
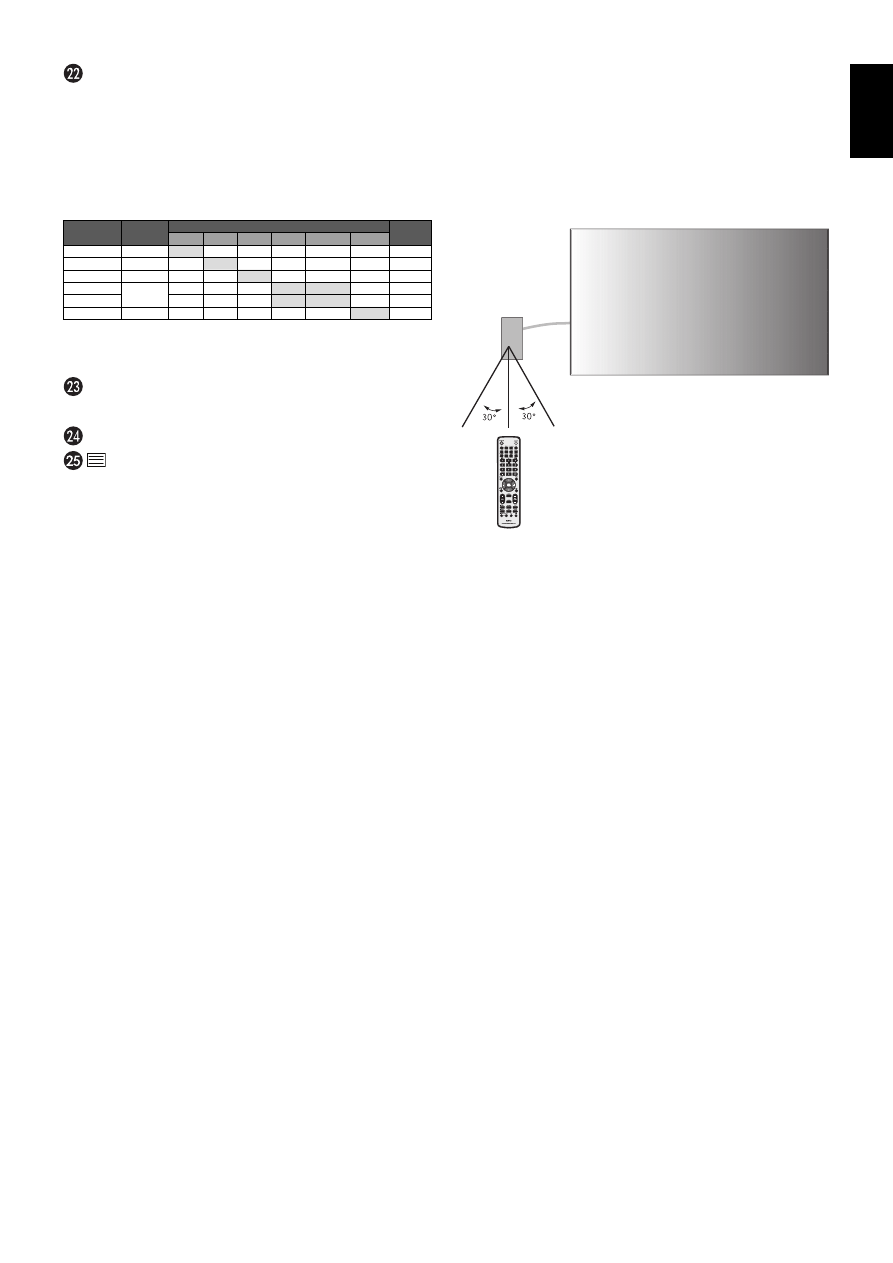
Operating Range for the Optional
Remote Control
Point the top of the remote control toward the sensor unit’s
remote control sensor in optional control kit during button
operation.
Use the remote control within a distance of about 7 m (23 ft.)
from remote control sensor or at a horizontal and vertical
angle of within 30° within a distance of about 3.5 m (10 ft.).
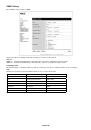
Caution:
Important, the remote control
system may not function
when direct sunlight or strong
illumination strikes the remote
control sensor or when there is
an object in the path.
Handling the remote control
•
Do not subject to strong shock.
•
Do not allow water or other liquid to splash the remote
control. If the remote control gets wet, wipe it dry
immediately.
•
Avoid exposure to heat and steam.
•
Other than to install the batteries, do not open the remote
control.
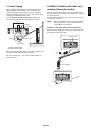
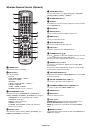
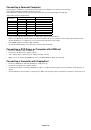
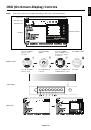
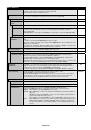
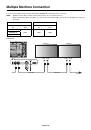
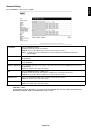
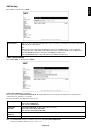
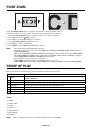
PIP (Picture In Picture) button
ON/OFF button:
Toggle switches between PIP, POP,
PICTURE BY PICTURE-ASPECT and PICTURE BY
PICTURE-FULL. See page 22.
INPUT button:
Selects the “picture in picture” input signal.
CHANGE button:
Replaces to the main picture and sub
picture.
NOTE:
Enable to change the sub picture size by pressing
SET/POINT ZOOM button during PIP mode.
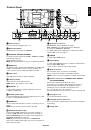
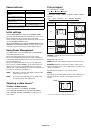
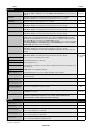
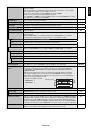
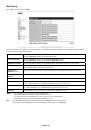
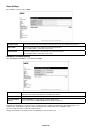
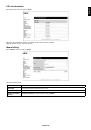
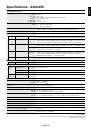
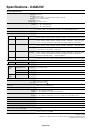
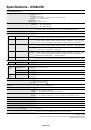
Main picture Connector
Sub picture
DP Out*
5
DPORT*
DPORT*
3
DVI
DVI
HDMI
HDMI
VGA
VGA
Y/Pb/Pr
Y/Pb/Pr
OPTION
OPTION
DPORT
DPORT
DisplayPort
DisplayPort
No
No
Yes
Yes
Yes
Yes
Yes
Yes
Yes
Yes
Yes
Yes
DPORT
DPORT
DVI
DVI
DVI-D
DVI-D
Yes
Yes
No
No
Yes
Yes
Yes
Yes
Yes
Yes
Yes
Yes
DVI
DVI
HDMI
HDMI
HDMI
HDMI
Yes
Yes
Yes
Yes
No
No
Yes
Yes
Yes
Yes
Yes
Yes
HDMI
HDMI
VGA
VGA
D-Sub*
D-Sub*
4
Yes
Yes
Yes
Yes
Yes
Yes
No
No
No
No
Yes
Yes
-
Y/Pb/Pr
Y/Pb/Pr
Yes
Yes
Yes
Yes
Yes
Yes
No
No
No
No
Yes
Yes
-
OPTION
OPTION
Option
Option
Yes
Yes
Yes
Yes
Yes
Yes
Yes
Yes
Yes
Yes
No
No
OPTION
OPTION
*3: When VIDEO OUT SETTING is ON, DPORT cannot be selected as the sub picture.
*3: When VIDEO OUT SETTING is ON, DPORT cannot be selected as the sub picture.
*4: If VGA or Y/Pb/Pr is selected as the main picture, DP out is disabled even when
*4: If VGA or Y/Pb/Pr is selected as the main picture, DP out is disabled even when
VIDEO OUT SETTING is ON.
VIDEO OUT SETTING is ON.
*5: DP out can output signal only when VIDEO OUT SETTING is ON.
*5: DP out can output signal only when VIDEO OUT SETTING is ON.
REMOTE ID button
Activates REMOTE ID function.
MTS button*
1
button*
1
Activates closed captioning.
NOTE:
VIDEO*
2
, S-VIDEO*
2
inputs only.
*1: This button’s action depends on which option board you use.
Refer to the option board’s manual for further information.
*2: This function depends on which option board you use.