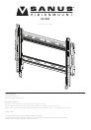
Sanus Systems
2221 Hwy 36 West,
Saint Paul, MN 55113 USA
Customer Service
Americas: 800-359-5520 • 651-484-7988 • info@sanus.com
Europe, Middle East, and Africa: 31 (0) 40 26 68 619 • sanus.europe@sanus.com
Asia Pacific: 86 755 8996 9226 • 800 999 6688 (mainland China only) • sanus.ap@milestone.com
sanus.com
©2009 Milestone AV Technologies, a Duchossois Group Company.
All rights reserved. Sanus is a division of Milestone. All other brand names or marks are used for identification
purposes and are trademarks of their respective owners.
®
(6901-170199 <05>)
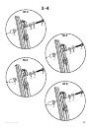
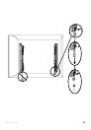
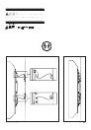
LL22