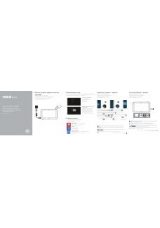
3. Insert the
Drivers and Utilities
CD into your computer.
4. Click
Personal Installation
.
5. Click
Install
. The
Found New Hardware Wizard
appears.
6. Click
Next
. The wizard automatically finds and installs the corresponding printer driver.
7. When the
Complete the Found New Hardware Wizard
screen appears, click
Finish
.
8. Select either the
Typical Installation
or
Custom Installation
checkbox, and then click
Next
. If you select
Custom
Installation
, you can select the specific software you want to install.
9. When the
Congratulations!
screen appears, in Windows 2000, Windows XP, and Server 2003, click
Printer Test
Page
. Click
Finish
.
10. Click
Cancel
.
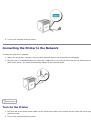
Windows 95 and NT 4.0
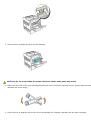
1. Connect your printer to your computer.
2. Insert the
Drivers and Utilities
CD into your computer.
3. Click
Personal Installation
.
4. On the
Add Printer
screen, select the port name from the
Port Name
combo box, and then set the printer's options
under
Printer Configuration
. Click
Next
.
5. Select either the
Typical Installation
or
Custom Installation
checkbox, and then click
Next
. If you select
Custom
Installation
, you can select the specific software you want to install.
6. When the
Congratulations!
screen appears, click
Finish
.
7. Click
Cancel
.
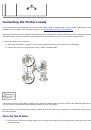
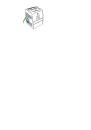
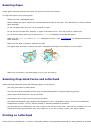
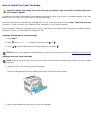
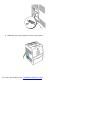
USB Printing
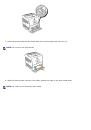
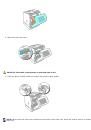
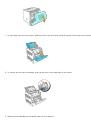
A local printer is a printer attached to your computer or a print server using a USB or parallel cable.
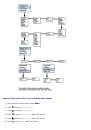
Installing Printer Drivers
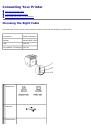
Connecting the Printer to the Computer Before Inserting the Drivers and Utilities CD
Windows 98, Me, 2000, XP, and Server 2003
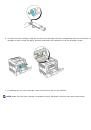
1. Connect your printer to your computer.
2. When the
Found New Hardware Wizard
appears, click
Cancel
.
3. Insert the
Drivers and Utilities
CD into your computer.
4. Click
Personal Installation
.
5. Click
Install
. The
Found New Hardware Wizard
appears.
6. Click
Next
. The wizard automatically finds and installs the corresponding printer driver.
7. When the
Complete the Found New Hardware Wizard
screen appears, click
Finish
.
8. Select either the
Typical Installation
or
Custom Installation
checkbox, and then click
Next
. If you select
Custom
Installation
, you can select the specific software you want to install.
 1
1
 2
2
 3
3
 4
4
 5
5
 6
6
 7
7
 8
8
 9
9
 10
10
 11
11
 12
12
 13
13
 14
14
 15
15
 16
16
 17
17
 18
18
 19
19
 20
20
 21
21
 22
22
 23
23
 24
24
 25
25
 26
26
 27
27
 28
28
 29
29
 30
30
 31
31
 32
32
 33
33
 34
34
 35
35
 36
36
 37
37
 38
38
 39
39
 40
40
 41
41
 42
42
 43
43
 44
44
 45
45
 46
46
 47
47
 48
48
 49
49
 50
50
 51
51
 52
52
 53
53
 54
54
 55
55
 56
56
 57
57
 58
58
 59
59
 60
60
 61
61
 62
62
 63
63
 64
64
 65
65
 66
66
 67
67
 68
68
 69
69
 70
70
 71
71
 72
72
 73
73
 74
74
 75
75
 76
76
 77
77
 78
78
 79
79
 80
80
 81
81
 82
82
 83
83
 84
84
 85
85
 86
86
 87
87
 88
88
 89
89
 90
90
 91
91
 92
92
 93
93
 94
94
 95
95
 96
96
 97
97
 98
98
 99
99
 100
100
 101
101
 102
102
 103
103
 104
104
 105
105
 106
106
 107
107
 108
108
 109
109
 110
110
 111
111
 112
112
 113
113
 114
114
 115
115
 116
116
 117
117
 118
118
 119
119
 120
120
 121
121
 122
122
 123
123
 124
124
 125
125
 126
126
 127
127
 128
128
 129
129
 130
130
 131
131
 132
132
 133
133
 134
134
 135
135
 136
136
 137
137
 138
138
 139
139
 140
140
 141
141
 142
142
 143
143
 144
144
 145
145
 146
146
 147
147
 148
148
 149
149
 150
150
 151
151
 152
152
 153
153
 154
154
 155
155
 156
156
 157
157
 158
158
 159
159
 160
160
 161
161
 162
162
 163
163
 164
164
 165
165
 166
166
 167
167
 168
168
 169
169
 170
170
 171
171
 172
172
 173
173
 174
174
 175
175
 176
176
 177
177
 178
178
 179
179
 180
180
 181
181
 182
182
 183
183
 184
184
 185
185
 186
186
 187
187
 188
188
 189
189
 190
190
 191
191
 192
192
 193
193
 194
194