EPSON Stylus Pro GS6000
User’s Guide
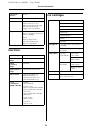
The Control Panel
23
M/W ADJUSTMENT
(Micro Weave
Adjustment)
LOW A to B
You can improve the print quality by adjusting the print
mode you have set.
❏
LOW A, B:
The effect of M/W Adjustment function will be
minimized. If obvious white lines or uneven print
density appear on printed paper in
LOW A
, set to
LOW B
.
❏
MEDIUM A, B, C, D:
The printing joint between two head passes will
have a wave form. If obvious white lines or uneven
print density appear on printed paper in
MEDIUM A
,
print samples using the other settings and select the
best print result from
MEDIUM B
to
MEDIUM D
.
❏
HIGH A, B, C, D:
Perform printing at a slow speed compared with
"MEDIUM". Set up this menu when improving the
print quality compared with "MEDIUM". If obvious
white lines or uneven print density appear on
printed paper in
HIGH A
, change the setting to the
one with the best print result in
HIGH B
to
HIGH D
.
❏
EXTRA HIGH A:
Performs "MEDIUM" printing using half of the nozzles
of the print head. Since only a half of the nozzles is
used, printing speed becomes half of
MEDIUM A
to
MEDIUM D
. Set up this menu when improving the print
quality compared with
HIGH A
to
HIGH D
.
❏
EXTRA HIGH B:
Performs "MEDIUM" printing using the other half of
the nozzles of the print head that is used for
EXTRA
HIGH A
. Since only a half of the nozzles is used,
printing speed becomes half of
MEDIUM A
to
MEDIUM D
. Set up this menu when improving the print
quality compared with
HIGH A
to
HIGH D
.
MEDIUM A to D
HIGH A to D
EXTRA HIGH A to B
PAPER SUCTION
HIGH
You can set the suction pressure used to feed the
printed paper.
LOW
DRYING TIME
0.0sec to 10.0sec
You can set the ink drying time for each print head
pass. The range is 0 to 10 seconds. Depending on the
ink density, paper type or printing speed, the ink does
not dry soon. In this case, set the drying time longer.
Note:
When you set the drying time longer, missing dots might
occur in the printing.
CARRIAGE
MOVEMENT
DATA WIDTH
You can set the range that the print head moves while
printing.
❏
DATA WIDTH:
The print head moves between the print data
width. This improves the print speed since
decreasing the transferring range of the print head.
❏
PRINTER FULL WIDTH:
The print head moves from origin to the maximum
paper width. This keeps printing quality the same
even though the printing size (width) differs.
PRINTER FULL WIDTH
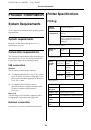
Item
Parameter
Explanation