EPSON Stylus Pro GS6000
User’s Guide
Adjust Printing
48
C
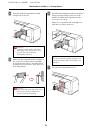
Select a print mode.
1. Press the
button to enter the Menu
mode.
2. Press the
/
button to display
PAPER
SETUP
, and then press the
button.
3. Press the
/
button to display
PAPER
SETUP
, and then press the
button.
4. Press the
/
button to select the
paper number, and then press the
button.
5. Press the
/
button to display
MODE
, and then press the
button.
6. Press the
/
button to select the
print mode, and then press the
button.
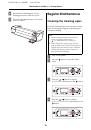
D
Display
HEAD ALIGNMENT
on the LCD panel.
1. Press the
button.
2. Press the
/
button to display
HEAD
ALIGNMENT
, and then press the
button.
3. Press the
/
button to select the
BI-D
ALL
, and then press the
button.
E
Press the
button to print a confirmation
pattern for quality adjustment.
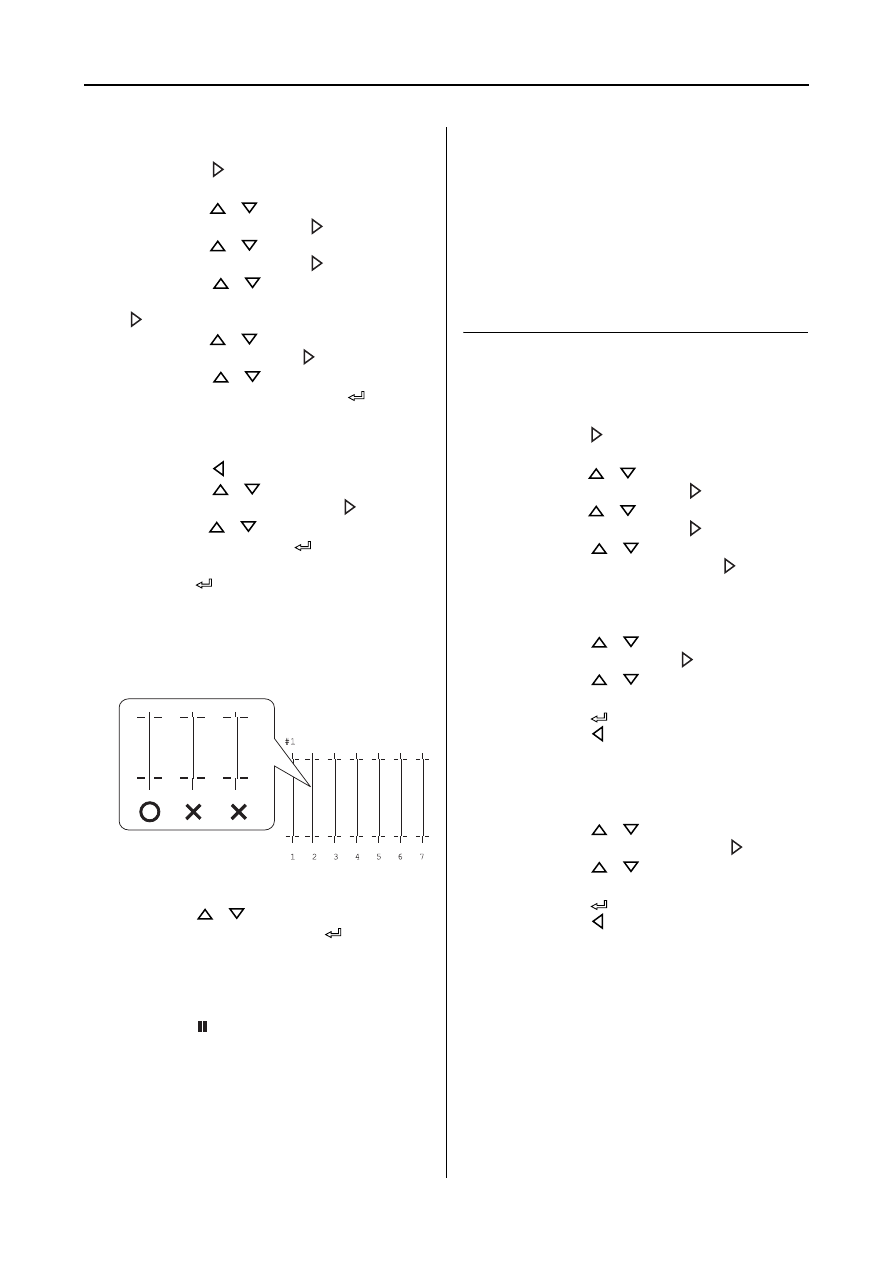
F
Check the pattern and select the set number
that has the smallest gaps.
G
When
BI-D #1
appears on the LCD panel,
press the
/
button to select the
number, and then press the
button.
Take the same procedure to set the number
for #2 to #3.
H
Press the
button to return to the READY
state.
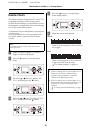
Adjusting Paper Feed
This section explains how to adjust paper feed.
The feeding length depends on the paper type. If
the printed images are overlapped or white lines
are printed on images, adjust the paper feed
value.
How to adjust paper feed
A
Select a paper type to use.
1. Press the
button to enter the Menu
mode.
2. Press the
/
button to display
PAPER
SETUP
, and then press the
button.
3. Press the
/
button to display
PAPER
SETUP
, and then press the
button.
4. Press the
/
button to select the
paper type, and then press the
button.
B
Select a print mode.
1. Press the
/
button to select
MODE
, and then press the
button.
2. Press the
/
button to select a
suitable setting for the paper.
3. Press the
button.
4. Press the
button to go back to the
previous menu.
C
Select the M/W ADJUSTMENT setting.
1. Press the
/
button to select
M/W
ADJUSTMENT
, and then press the
button.
2. Press the
/
button to select a
suitable setting.
3. Press the
button.
4. Press the
button to go back to the
previous menu.