6
SERIES
SERIES
lnstallation Guide
3
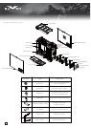
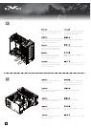
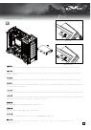
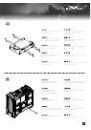
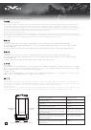
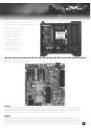
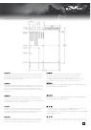
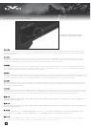
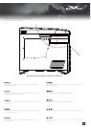
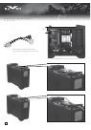
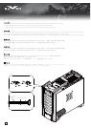
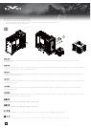
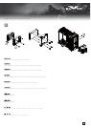
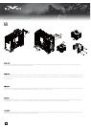
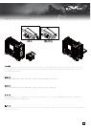
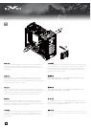
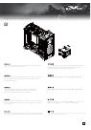
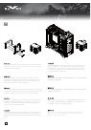
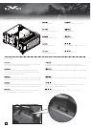
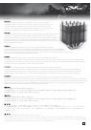
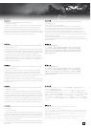
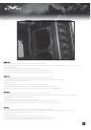
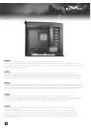
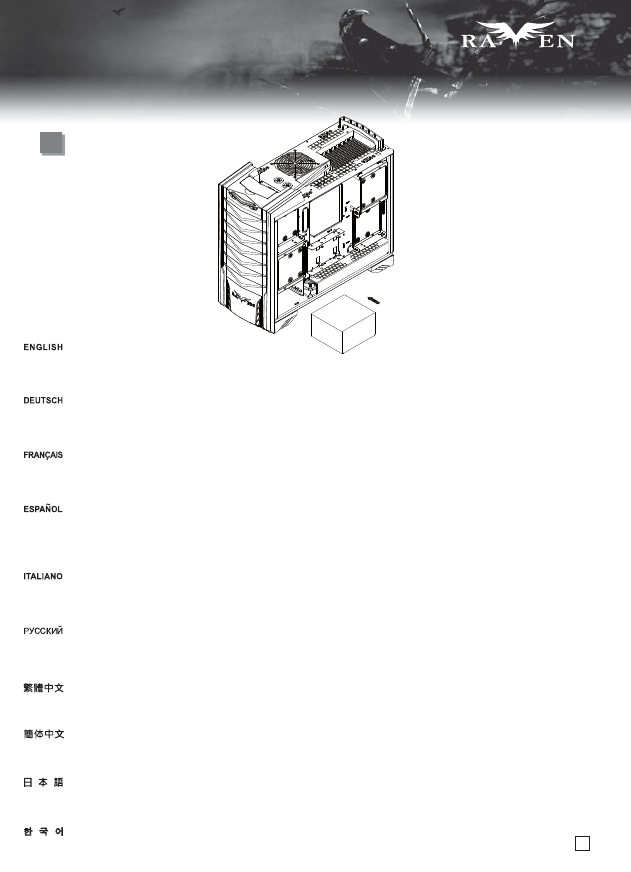
Insert the power supply from the right side of the chassis. Since the 5.25” drive bay is located directly above the power supply cage,
we designed the mounting holes for power supply to fit only one direction. Please double check the mounting holes before installation.
Normally a power supply with 120mm fan or larger will have its fan pointing down when installed.
Установите блок питания с правой стороны корпуса. Так как отсек для 5,25-дюймовых приводов расположен непосредственно над кронштейном
блока питания, монтажные отверстия позволяют установить блок питания только в одном направлении. Перед установкой дважды проверьте
монтажные отверстия. Обычно блок питания со 120-мм или более крупным вентилятором после установки будет расположен вентилятором вниз.
Setzen Sie das Netzteil von der rechten Seite des Gehäuses ein. Da sich der 5,25 Zoll-Laufwerkseinschub direkt oberhalb des Netzteilkäfigs befindet,
gestalteten wir die Montagelöcher des Netzteils so, dass es nur in eine Richtung passt. Prüfen Sie die Montagelöcher vor der Installation genau.
Üblicherweise wird ein Netzteil mit einem mindestens 120 mm großen Lüfter so installiert, dass dieser bei der Installation nach unten zeigt.
Insérez l’alimentation par le côté droit du boîtier. Depuis que la baie 5.25” est situé directement au-dessus de la cage de l'alimentation, nous avons placés
les trous de montage pour qu'on puisse seulement la monter dans un sens. Veuillez bien vérifier les trous de montage avant l'installation. Normalement une
alimentation ayant un ventilateur de 120mm ou plus aura son ventilateur vers le bas lorsqu'elle sera installée.
Inserte la fuente de alimentación desde el lado derecho del chasis. Ya que la bahía para dispositivos de 5,25” está localizada justo sobre la carcasa de la
fuente de alimentación, diseñamos los agujeros del montaje de la fuente de alimentación para que pudieran usarse sólo desde una dirección. Por favor,
asegúrese de que los agujeros están en el lugar correcto antes de proceder a la instalación. Lo normal es que una fuente de alimentación con un ventilador
de 120mm ó mayor tendrá su ventilador hacia abajo cuando sea instalado.
Inserire l’alimentatore dalla parte destra dello chassis. Dal momento che i bay da 5,25” sono posti direttamente al disopra della struttura di ritenzione della
PSU, i fori di fissaggio sono stati disegnati per accettare l’alimentatore in una sola direzione. Controllare bene i fori di fissaggio prima del montaggio dell’unità
di alimentazione. Normalmente un alimentatore dotato di una ventola da 120mm o più grande avrà la ventola posta in basso una volta installato.
전원을 우측에서 케이스로 들여보냅니다. 전원 상방이
5.25” 장치 슬롯이기 때문에, 정반 설치로 설계하지 않았습니다. 먼저 나사
잠금 위치를 확인한 후 설치하십시오. 일반적으로
12cm 이상 팬의 전원은 팬이 아래로 향합니다.
將電源由右側塞入機殼,請注意
, 由於電源上方就是5.25”槽, 所以我們沒有設計正反裝, 請先確認好螺絲鎖固孔位再塞入,一般使用12cm以上風扇的電源而言,
風扇朝下。
将电源由右侧塞入机壳,请注意
, 由于电源上方就是5.25”槽, 所以我们没有设计正反装, 请先确认好螺丝锁固孔位再塞入,一般使用12cm以上风扇的电源而言,
风扇朝下。
電源はケースの右側から入れます。
5.25インチドライブベイが電源ケージのすぐ上に位置するので、取り付け用穴は電源が一つの方向にのみ適合するように
設計されています。インストール前に取り付け穴を確認してください。通常、
120mm以上のファンを備える電源は、インストール時にファンは下向きとなります。
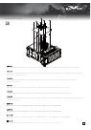
PSU