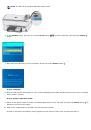
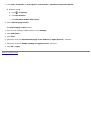
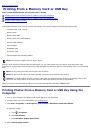
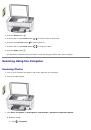
Check the placement of the printer and router.
Ensure the correct placement of the printer and router to optimize the Wi-Fi signal strength.
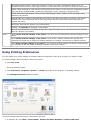
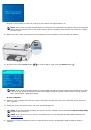
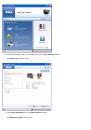
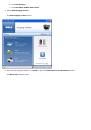
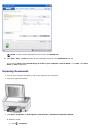
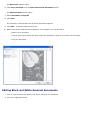
Ensure that your computer is connected to a wireless network.
1. Click
Start
®
Control Panel
.
2. Double-click
Network Connections
.
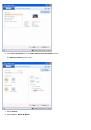
The Wireless Network Connection icon should state that is connected with a valid IP address.
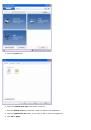
If the Wireless Network Connection icon states that it is connected with an invalid IP address or not connected, go to
Dell Wireless Support Center
for
assistance or troubleshooting your wireless network.
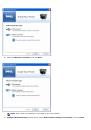
Check that you are connected to correct network.
Ensure that the SSID of the printer and the computer are same. To verify, print a Network Configuration Settings page from the printer with the following
steps and verify that the SSID is the same as in the computer.
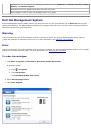
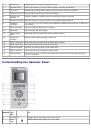
Check the Network Status
1. Press the
Menu
button
.
2. Press the down
Arrow
button
to scroll to Network.
3. Press the
Select
button
.
4. Scroll to
Status
and then press the
Select
button
to view the network details.
Ensure that the Firewall is turned off.
Ensure that the firewall is disabled for printing through wireless. This is because the firewall might interfere when printing through wireless. See your
Windows® help for disabling the firewall.
Wi-Fi LED is blinking.
This indicates that the printer is searching for Wi-Fi network.
Ensure that the Access Point is on.
Ensure that the network devices, such as the wireless router, are turned on for an infrastructure network. For more information on the wireless router, see
the documentation that came with your wireless router.
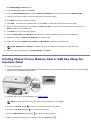
Check the distance between the printer and the Access Point.
To establish a good signal between the printer and the Access Point, ensure that:
The Access Point and the printer are not too far away.
There is no large metal object, for example metal cabinet or refrigerator, in the transmission path.
There is no other equipment, for example microwave or cordless phone, which emits radio signals (2.4 GHz).
Ensure that only three computers are connected to Printer.
You can configure a maximum of three wireless connections to your printer. If a fourth connection is attempted, then a computer gets disconnected.
Ensure that the WiFi Radio is turned on.
If the Wi-Fi radio is turned off, then follow the below steps to turn it on.
1. Press the
Menu
button
.
2. Press the down
Arrow
button
to scroll to Network.
3. Press the
Select
button
.
4. Press the down
Arrow
button
to scroll to WiFi Radio.
5. Press the right
Arrow
button
to turn on the Wi-Fi network.
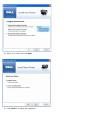
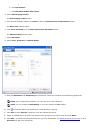
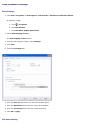
Check the Access Point setting.
If the wireless SSID broadcast is not enabled, see the user guide that was shipped with your Wireless Router. Also, check the Wireless Router settings.
Alternatively, you can manually configure in the Wireless Setup wizard. Type the network name (SSID) in the Add Network Manually dialog box.
 1
1
 2
2
 3
3
 4
4
 5
5
 6
6
 7
7
 8
8
 9
9
 10
10
 11
11
 12
12
 13
13
 14
14
 15
15
 16
16
 17
17
 18
18
 19
19
 20
20
 21
21
 22
22
 23
23
 24
24
 25
25
 26
26
 27
27
 28
28
 29
29
 30
30
 31
31
 32
32
 33
33
 34
34
 35
35
 36
36
 37
37
 38
38
 39
39
 40
40
 41
41
 42
42
 43
43
 44
44
 45
45
 46
46
 47
47
 48
48
 49
49
 50
50
 51
51
 52
52
 53
53
 54
54
 55
55
 56
56
 57
57
 58
58
 59
59
 60
60
 61
61
 62
62
 63
63
 64
64
 65
65
 66
66
 67
67
 68
68
 69
69
 70
70
 71
71
 72
72
 73
73
 74
74
 75
75
 76
76
 77
77
 78
78
 79
79
 80
80
 81
81
 82
82
 83
83
 84
84
 85
85
 86
86
 87
87
 88
88
 89
89
 90
90
 91
91
 92
92
 93
93
 94
94
 95
95
 96
96
 97
97
 98
98
 99
99
 100
100
 101
101
 102
102
 103
103
 104
104
 105
105
Инструкции и руководства похожие на DELL P703w