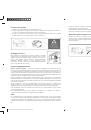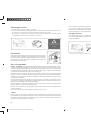
1. Mount side brush.
2. Slide the main switch on the side of the robotic cleaner into the position ON – prepared mode.
3. If the battery shows “empty” status, fi rst of all recharge the robot.
The fi rst three recharging cycles must
take at least 12 hours to ensure the further correct functioning of the battery and the robotic cleaner! On
fi rst recharging we recommend using connection to the mains directly via an adaptor.
4. Upon use of the recharging console, check that the FULL – GO function is not activated,
in order
to ensure that the robot does not automatically begin cleaning without you running it. Ensure that
the cable from the recharging console is not lying freely on the fl oor.
5. Press Start button on the control panel of the cleaner, and cleaning begins!
The robot will clean automatically until the battery runs down, after which it parks itself back on the
recharging console or indicates an empty battery status by bleeping (according to the recharging
method). To interrupt cleaning press the Start button again.
Every fl at and space is diff erent, and for this reason we recommend that upon fi rst use the robotic cleaner is not left
unsupervised, but that you observe precisely how the cleaner will work in your home. You can then easily check any
potential problem areas and avoid any inconsistencies. The robotic cleaner is not perfect and must fi rst of all “get to
know” its new environment, so that it can subsequently serve you reliably and for many years.
Situations which may occur on fi rst use, and solutions:
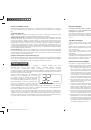
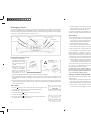
If you have underfl oor heating (convectors)
The robotic cleaner may run onto the grille of a convector during cleaning, and if the grille is wide, the front wheel
may stick in the grille, preventing the robot from continuing in cleaning.
solution:
Place a virtual wall or stable mechanical barrier before the grille in order to ensure that the robot cannot
run onto the grille.
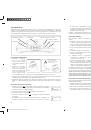
If you have door stoppers in your home
The robotic cleaner may run onto low door stoppers and become caught.
solution:
Secure the door stoppers in order to ensure the robot cannot run directly onto them.
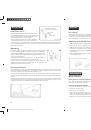
If you have a thick and deep pile carpet (over 1 cm)
The robotic cleaner may have problems running on a deep pile carpet.
solution:
The robot will attempt to resolve the situation itself, by beginning to reverse and avoiding the obstacle
(carpet). Otherwise it may be necessary to place the robot manually back on a smooth fl oor. We then recommend
that you do not leave the robot to vacuum such a carpet on its own. Place the robot on the carpet and navigate it
for cleaning over the carpet using the arrow buttons on the remote control.
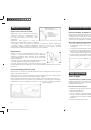
If you have carpets with tassels
If your carpet has long tassels at the edges, these may become caught in the rotating brush.
solution:
We recommend that you fold the tassels under the carpet before cleaning or prevent the robot from
approaching this carpet.
If the space underneath the furniture is too low
It may occur that the space under your furniture is the same height as that of the cleaner. In this case it is possible
that the robot shall become stuck in an attempt to clean under the furniture and will be unable to get back out. It
may similarly be caught under a radiator suspended on the wall.
solution:
We recommend that you measure the height of the spaces under your furniture in advance in order to
avoid such a situation. The cleaner should be at least 1 cm lower than the space being cleaned.
If you have free lying cables from appliances or a computer in your home
Please be careful to ensure that the cleaner does not come into contact with free lying cables during cleaning. The
cable may be caught in the cleaner, potentially causing damage or fall of the connected appliance. Thin cables are
especially vulnerable.
solution:
Before starting cleaning, remove cables from the fl oor or cover them well.
If you have a transition from tiling to carpet without a transition strip
In such a case the robot may get caught in a deeper crack in the tiling.
solution:
We recommend connecting the transition between the tiling and the carpet with a transition strip.
If direct sunlight shines into your room
If direct sunlight shines into your room, the sensors may pick up on this as an obstacle, interrupting cleaning.
solution:
Ensure the room is shaded.
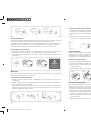
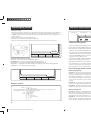
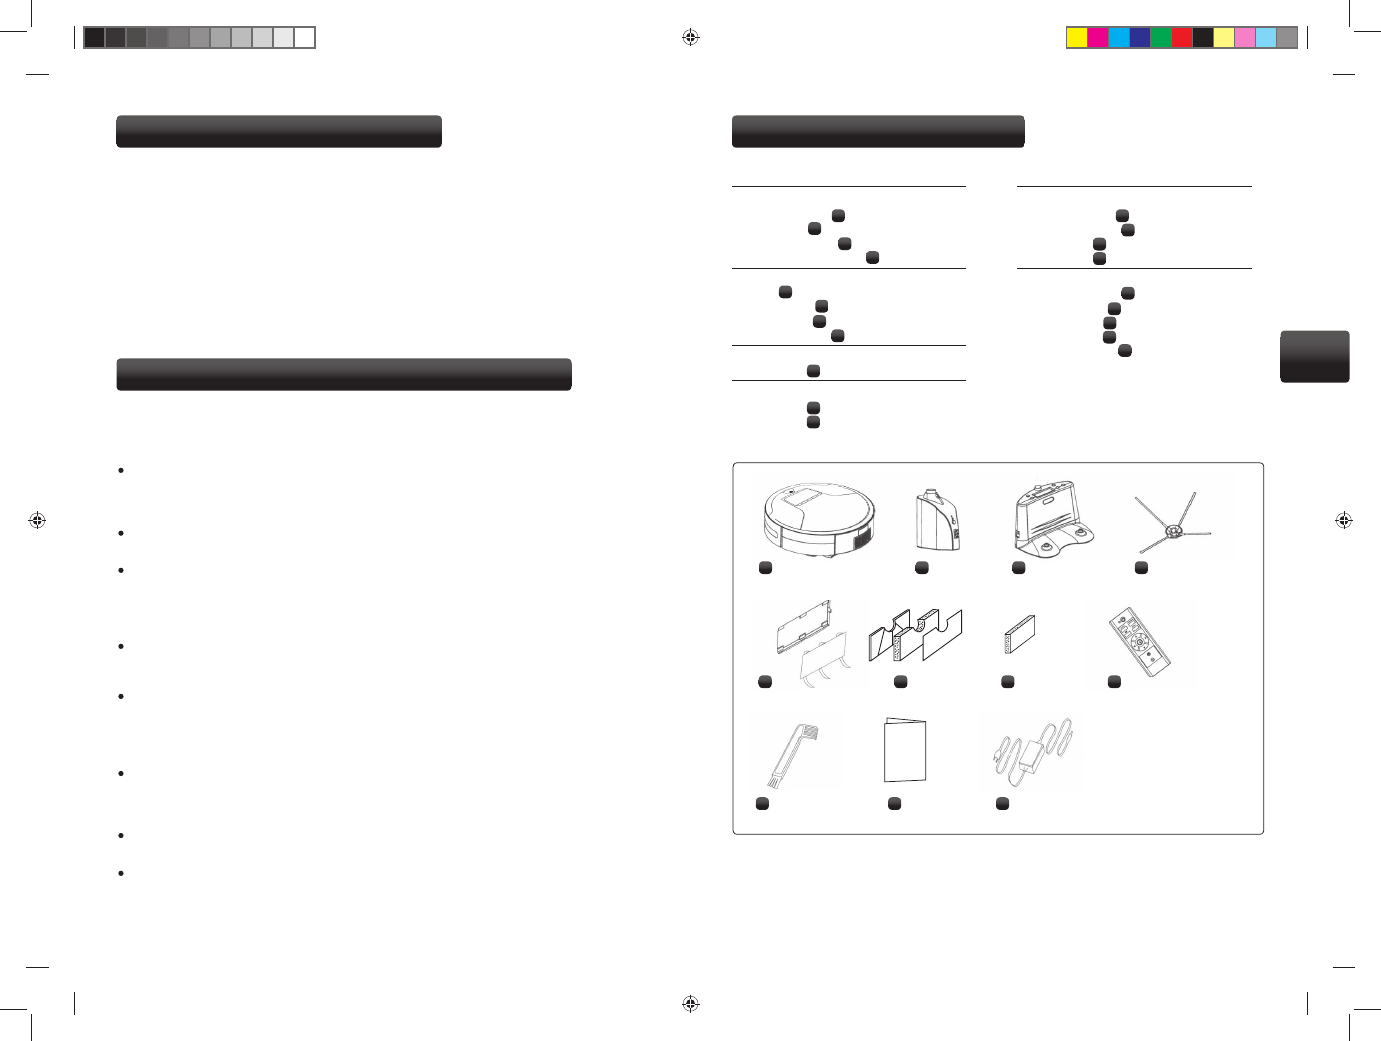
First cleaning – quick instructions
Recommendations and information on fi rst use
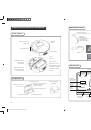
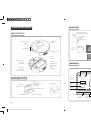
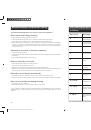
Roomy Gold
Placed inside polystyrene packaging
Automatic cleaner
Virtual wall 2x
Recharging console
Side brush Blue eff ect 1x
Placed on outside of polystyrene packaging
Mop set
Remote control
Cleaning brush
Instruction manual
Placed outside waste collection container
Mains adaptor
components of appliance
Inlet fi ltration
Outlet fi lter
Roomy Silver
Placed inside polystyrene packaging
Automatic cleaner
Recharging console
Side brush 2x
Mains adaptor
Placed on outside of polystyrene packaging
Spare inlet fi ltration
Spare outlet fi lter
Remote control
Cleaning brush
Instruction manual
Components of basic package
1
1
1
2
2
3
3
3
4
4
5
5
8
6
6
6
7
7
7
8
8
9
9
9
10
10
10
11
11
11
4
22
23
EN
Robzone_Roomy_navod_2010_RU_EN.indd Odd1:24-Odd1:25
Robzone_Roomy_navod_2010_RU_EN.indd Odd1:24-Odd1:25
10/25/10 9:26:09 PM
10/25/10 9:26:09 PM