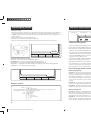
Инструкция для RobZone Roomy

(скачивание инструкции бесплатно)
Формат файла: PDF
Доступность: Бесплатно как и все руководства на сайте. Без регистрации и SMS.
Дополнительно: Чтение инструкции онлайн
background image

Recharging

WALL FOLLOW cleaning mode


Short program for cleaning along walls or furniture. The entire program lasts approximately 10 minu-
tes. After completing the program the cleaner does not automatically park itself on the recharging 
console.

Other optional functions

DOCK - 

Automatic recharging program, in which the cleaner begins to seek the recharging console, 

parks itself and automatically starts recharging. 
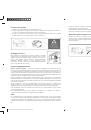
UV disinfection

 - During cleaning the UV light disinfects the fl oor covering from microbes and bacteria 

which breed in dust. The function of the UV lamp can be switched on only if the cleaner is switched 
on. Never look directly at the lamp. Disinfection with UV light is a highly eff ective, safe and economical 
technology, which thanks to its high intensity enables rapid killing of bacteria and viruses. The inte-
raction of the UV light and air creates a certain type of ozone with strong oxidising properties, which 
eff ectively kills dangerous viruses, bacteria, protozoans and additionally disinfects the product. Disin-
fection with UV light is a physical disinfection method without secondary pollution.

FULL-GO program  

- This program is activated directly on the recharging console and ensures cleaning 

continues always after complete charging of the battery. It is suitable for larger areas or more heavily 
soiled surfaces which require more than one cleaning cycle to attain quality cleaning.

Dirt seeking function

In order to improve the overall result of cleaning, this robotic cleaner is equipped with an automatic 
dirt seeking function. In the case that the cleaner comes upon an area with an increased amount of 
dirt during cleaning, the dirt seeking indicator “DIRTY” lights up on the display and the cleaner devotes 
increased work to this area, until the surface is completely clean.

You can either charge the cleaner directly, using a charger, or by using the recharging console.

If you detach the network cable during charging, whether directly or using the recharging conso-
le, the robot automatically switches to 
“Ready” mode.

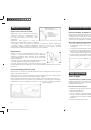
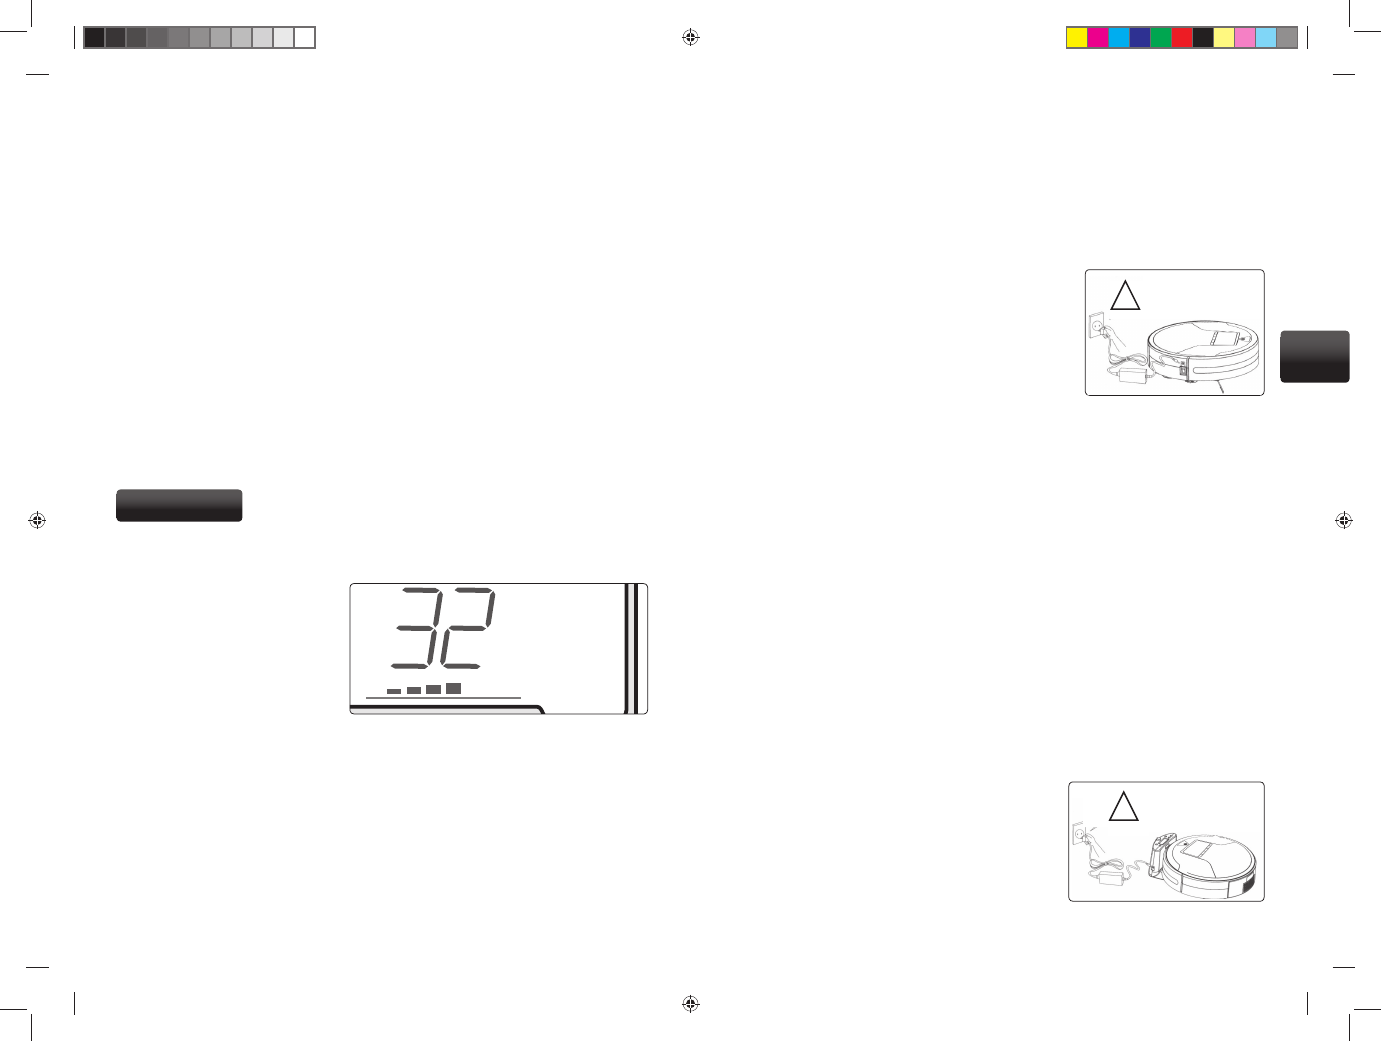
When the battery is fully charged the red 
fi eld is lit steadily on the display, indica-
ting the battery capacity. During charging 
the red fi eld fl ashes.

The display provides information on how 
long the cleaner has been charging.

The actual charging time for the robot is 
equal to ten times the value indicated on 
the display during charging (8 means 80 
minutes of charging). If the recharging connectors are disconnected or recharging is interrupted, the 
charging time on the display begins again from “0”.

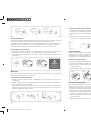
If the robot is parked on the recharging console, you can activate it by pressing the AUTO button on the 
remote control. The robot leaves the console, goes approximately one meter forward and then starts 
working in the AUTO 01 program. If the battery is completely discharged the console may not recogni-
se the robot. In this case recharge the robot manually via an adaptor.

The best and naturally the easiest method is to leave the cleaner constantly connected to the rechar-
ging console after cleaning. It shall thus be constantly prepared for use and the battery shall be pro-
tected against loss of capacity upon complete discharging. If you do not use the timer, after complete 
recharging you can switch off  the main switch on the robot. The battery remains charged and ready 
for further use.

CHARGING

First charging

During the fi rst three charging cycles it is essential for the charging time to be longer than 12 hours! 

Try to discharge the battery completely before each of the fi rst three chargings.
During the fi rst charging of all we recommend that you use direct connection to the mains network 
via an adapter.
The time for ordinary full charging of the battery is within the range of 3-4 hours.
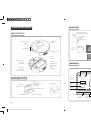
Manual charging

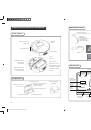
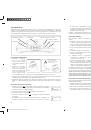
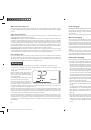
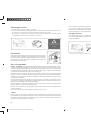
You can charge the cleaner directly using a mains adaptor.
Connect the adaptor to the electricity network and place the connector 
in the socket from the side of the cleaner (see fi g.).
Manual charging is recommended upon fi rst charging or if you have not 
used the cleaner for a longer period and the battery is discharged.
Do not leave the cleaner connected via an adaptor for more than 4 
hours after the full charging of the battery, this could lead to irreparable 
damage.
If the cleaner is connected to an adaptor and is not at the same time 
connected to the electricity mains, the battery discharges itself.
If you charge the battery manually, it does not begin to respond to the 
buttons until the adaptor has been disconnected.
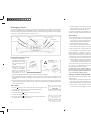
Automatic charging 

After completing the selected cleaning programs the robotic cleaner equipped with a recharging console automati-
cally seeks the console, parks itself and begins recharging.

1.  The cleaner automatically starts to seek the recharging console if the battery power decreases to less than 15% of 

full capacity during cleaning. When seeking the recharging console the cleaner does not perform cleaning, i.e. the 
brushes are not in motion and the suction power is not active. The cleaner registers the signal of the recharging 
console within a zone of approximately 1.5 m from the console and at an angle of 90° before the infra-red naviga-
tion. In the case that the battery capacity decreases beneath 8% during the search for the recharging console, the 
robot interrupts its search for the console and switches to parking mode, during which it parks itself on a clean and 
clear area, and sends out a “bleeping” signal every 30 seconds.

You can also place the cleaner on the recharging console manually, in which case it is necessary to take care to 
ensure the contacts between the contact surfaces for correct charging.

Another possibility for selecting automatic recharging is the function of the DOCK button located directly beneath 
the main display on the cleaner for correct charging.

2.  If the charging contacts are not properly connected upon automatic parking, the cleaner reverses and attempts to 

park again, selecting a better direction.

3.  After correct parking the cleaner immediately begins recharging and the main display shows current informa-

tion. The battery capacity is displayed by charging level lines, which repeatedly light up in red in an ascending 
direction.

The charging time is indicated by large numbers on the display. The number shown is always one tenth of the 
actual information, i.e. 8 = 80 minutes of charging.

4.  After completion of recharging the display shows all the red co-

loured charging level lines and the data on the charging time 
disappears.

5.  When the battery of the robot is weak, the recharging console may 

not be able to detect its presence. In such a case place the robot ma-
nually on the console and press the “+” button to start recharging.

If the contact surfaces are disconnected during charging on the 
recharging console, the charging time on the display begins again 
from “0”.


HIGH VOLTAGE!
Danger of injury by electric 
shock. Never plug into socket if 
you have wet hands!

!

!

28

29

HIGH VOLTAGE!
Danger of injury by electric 
shock. Never plug into socket if 
you have wet hands!

EN

Robzone_Roomy_navod_2010_RU_EN.indd   Odd1:30-Odd1:31

Robzone_Roomy_navod_2010_RU_EN.indd   Odd1:30-Odd1:31

10/25/10   9:26:10 PM

10/25/10   9:26:10 PM

1
2
3
4
5
6
7
8
9
10
11
12
13
14
15
16
17
18
19
20
21
22
23
Оглавление инструкции
  • Страница 1 из 24
    Robzone_Roomy_navod_2010_RU_EN.indd 1 10/25/10 9:26:07 PM
  • Страница 2 из 24
    РУ РУ Содержание Содержание 1 Первая уборка - короткая инструкция 2 Рекомендации при первом использовании 2 Комплект поставки 3 Схематическое описание элементов 4 Управление роботом-пылесосом 6 Функции и программы 7 Способы зарядки 8 Виртуальная стена 12 Комплект - чистящaя салфетка 13 Уход за
  • Страница 3 из 24
    1. Установите боковую щетку. 2. Нажатием кнопки на боку роботa-пылесосa переведите выключатель питания во включенное положение ON. Pоботпылесос включен. 3. Если аккумуляторная батарея разряжена, ее нужно зарядить. Время первых трех циклов зарядки должно длиться мин. 12 часов! Робот-пылесос должен
  • Страница 4 из 24
    Схематическое описание элементов Виртуальная стена Индикатор. Выключатель/ включатель питания. Переключатель уровня дистанции. Передний бампер Инфракрасный датчик рис.1 LED дисплей рис.2 РУ Робот-пылесос Крышка отсека батареек Противоскользящие подкладки. Излучатель ИК-сигнала Излучатель
  • Страница 5 из 24
    Функции и программы Включение и выключение пылесоса 1. Переведите выключатель питания в положение ON (см. рисунок ниже), включится дисплей. В течение 3-х секунд будет мигать окно дисплея, зазвучит активизирующий сигнал. Все функции готовы к работе и указатели мигают красным цветом. 2. Если на
  • Страница 6 из 24
    Первая зарядка Короткая программа для уборки вдоль стен и мебели. Целая программа длится 10 минут. По окончании программы уборки робот-пылесос автоматически не возвращается на зарядную базу. В течении первых трех циклов зарядки необходимо чтобы длительность зарядки батареи была более 12 часов.
  • Страница 7 из 24
    Подключите адаптер питания к зарядной базе и подключите к электрической сети. Потом нажмите кнопку «включить/выключить» на зарядной базе, тем самым приведете ее в действие. Зарядная база проведет проверку дисплея и на нем изобразится все содержимое базы. При программировании зарядной базы
  • Страница 8 из 24
    Излучатель ИК-сигнала Излучатель виртуальной стены Подготовка к использованию Виртуальная стена это устройство, посылающее специальные ИК-сигналы, запрещающие роботупылесосу пересекать определенную зону. Т.е. устройство действует как стена, только виртуальная. Индикатор. Выключатель/ выключатель
  • Страница 9 из 24
    Замена/Чистка выходного фильтра 1. Фильтр находится под решеткой на внешней стороне пылесборника. 2. Возьмитесь за дно решетки и потяните на себя. Извлеките решетку. 3. Затем вытащите фильтр. Фильтр можно промыть водой. Высушенный фильтр верните на место. РУ 4. Фильтр вставьте в выходное отверстие,
  • Страница 10 из 24
    Если робот-пылесос подключен к адаптеру, но при этом не подключен к электрической сети, аккумуляторная батарея разрядится. 1. Очищайте сенсоры ватными палочками или мягкой тканью. 2. Сенсоры с функцией чистки вдоль стен находятся на передней части буфера робота-пылесоса, а сенсоры пола находятся
  • Страница 11 из 24
    Вы сэкономите свое время и деньги, если перед обращением в сервисную службу самостоятельно выполните проверки. Робот-пылесос во время уборки остановился 1. Проверьте заданное время уборки. Если на LED дисплее изобразится сообщение с кодом ошибки, предлагаем вам таблицу с решениями возникших
  • Страница 12 из 24
    Технические параметры ROOMY GOLD, ROOMY SILVER диаметр 35 см, высота 11 см. 3,5 кг 23 см/сек. 3-4 ч 40-80 мин. 65 дБ 24 В /650 мА 45 Вт Инструкция по технике безопасности Content EN Модель Размеры Вес Скорость Время зарядки Время уборки Уровень шума Напряжение Мощность EN Нарушение мер безопасности
  • Страница 13 из 24
    1. Mount side brush. 2. Slide the main switch on the side of the robotic cleaner into the position ON – prepared mode. 3. If the battery shows “empty” status, first of all recharge the robot. The first three recharging cycles must take at least 12 hours to ensure the further correct functioning of
  • Страница 14 из 24
    Schematic description Virtual wall Anti-slip stoppers Guide signal transmitter Virtual wall signal transmitter Robotic cleaner Control light Button on/off Distance switch Front bumper guard Infra-red ray receiver Fig. 1 LED display Fig. 2 Bottom cover 0-4 m 4-7 m over 7 m Fig. 3 Control buttons EN
  • Страница 15 из 24
    Operating the cleaner Functions and programs Switching on and off 1. Place the main switch in ON position (see fig. below), which lights up the display, the screen flickers for 3 seconds and the activation signal sounds. All functions are prepared and their indicators flash in red. 2. If “READY”
  • Страница 16 из 24
    WALL FOLLOW cleaning mode First charging Short program for cleaning along walls or furniture. The entire program lasts approximately 10 minutes. After completing the program the cleaner does not automatically park itself on the recharging console. During the first three charging cycles it is
  • Страница 17 из 24
    Recharging console Connect the adaptor to the recharging console and connect this to the electricity mains socket. Then press the “on/off ” button on the recharging console, launching it into operation. The console shall perform a test of the display, which shall show all possible content. During
  • Страница 18 из 24
    Virtual wall Guide signal transmitter Virtual wall signal transmitter Preparation for use After activation the virtual wall transmits infra-red rays, preventing the cleaner from accessing areas where you do not wish it to go. This is called a virtual wall, because it represents the function of a
  • Страница 19 из 24
    Changing/cleaning the filter of the outlet hole 4. The filter is placed under the grille on the outer side of the waste container. 5. Grip the grille on the underside and press it towards yourself. The grille is released and can be easily removed. 6. Then remove the filter from the grille, the
  • Страница 20 из 24
    Do not leave the cleaner disconnected from the electrical mains network with the adaptor connected to the connector of the cleaner, this may lead to discharging of the battery. Cleaning the sensors 1. Clean the sensors using cotton buds or a soft cloth. 2. The sensors for the function of cleaning
  • Страница 21 из 24
    Recommendations and problems solving If the LED displays an error message, the solutions are as follows: Try out the following tips before you request a repair of your appliance Meaning Solution 0 Foreign object in left wheel, overload, jacking up of robot Check left wheel and remove foreign
  • Страница 22 из 24
    Technical parameters Model Dimensions Weight Speed Charging time Operating time Noise Voltage Power input ROOMY GOLD, ROOMY SILVER Diameter 35 cm, Height 11 cm 3.5 kg 23cm/second 3-4 h 40-80 min. 65 dB 24C/650mA 45W Safety prescriptions Failure to abide by safety prescriptions may result in injury,
  • Страница 23 из 24
    Distributor: RobZone GmbH 1010 Wien, Reichsratsstraβe 11, Austria info@robzone.com Made in China www.robzone.ru www.robzone.com Li -ion Robzone_Roomy_navod_2010_RU_EN.indd Odd1:44 10/25/10 9:26:11 PM
  • Страница 24 из 24