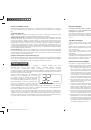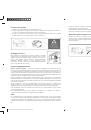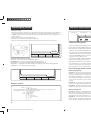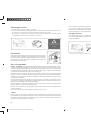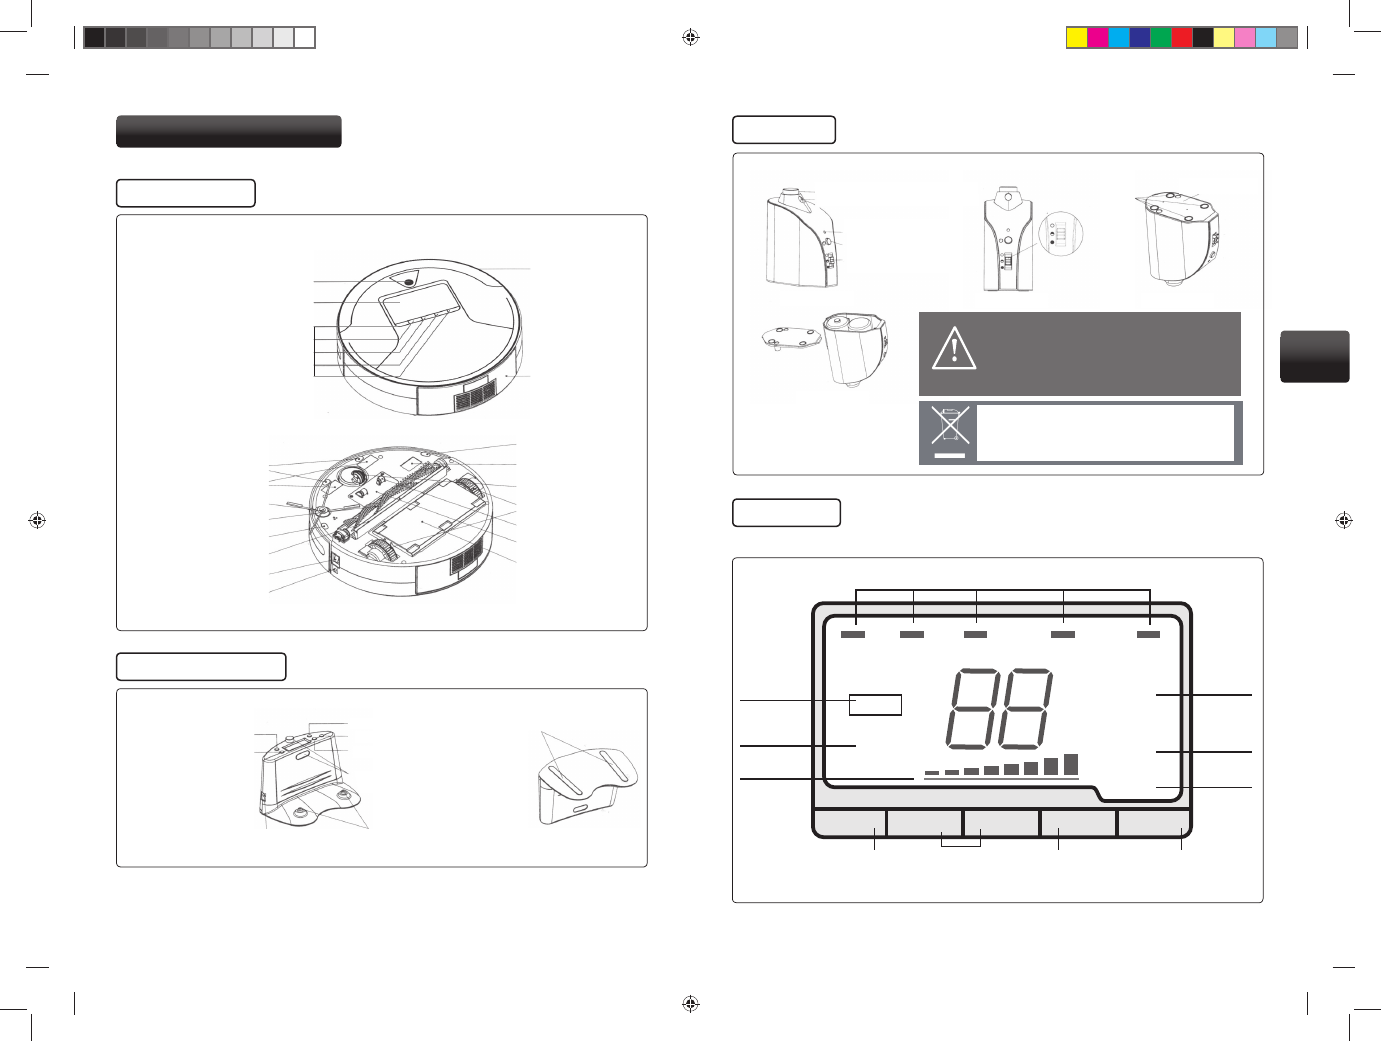
Control light
Button
on/off
Distance switch
Bottom cover
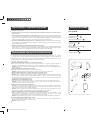
Fig. 1
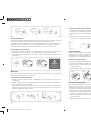
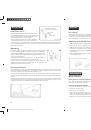
Fig. 3
Fig. 4
1. Take out the battery before disposing of the robot.
2. Always remember to cut off the power before removing
the battery.
3. Recycle or dispose of the battery properly.
4. To avoid explosion, never throw it into fire!
1. Before liquidating the robot, take out battery.
2. Before removing battery ensure that the robot is not switched on or connec-
ted to mains.
3. Recycle or liquidate battery according to prescriptions.
4. Contact of battery with fi re may cause explosion.
1. To open the bottom cover of the virtual wall you will
need a screwdriver (Fig. 3)
2. Pay attention to fi g. 4 in order to avoid wrong polarity of
batteries, which could damage the virtual wall. Insert both
batteries in the same direction according to the indication
on the outside.
Anti-slip stoppers
Fig. 2
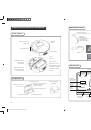
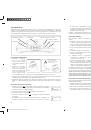
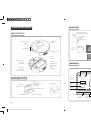
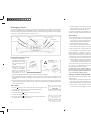
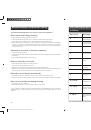
0-4 m
4-7 m
over 7 m
Guide signal transmitter
Virtual wall signal transmitter
Robotic cleaner
Recharging console
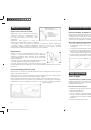
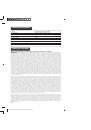
Schematic description
Infra-red ray receiver
LED display
Control buttons
Front bumper
guard
Waste container
Charging electrodes
Side brush
Main brush
Silicon wiper
Main switch
Socket for recharging
Sensor
UV lamp
Front wheel
Left/Right wheel
Auxiliary wheels
Battery
Mop holder
Main switch
Button „FULL GO“
Mains cable socket
Current time setting
Value setting
Timer setting
Infra-red ray transmitter
Anti-slip strips
Contacts for recharging
Control buttons
Virtual wall
LED Display
UV
TROUBLE NR.
MIN. CLEANING
CHARGING
READY
CAPACITY
DIRT
AUTO SPOT WALL
FOLOW
DOCK
UV PROGRAM MODE DOCK START
24
25
Program activation indicators
Larger dirt
indicator
UV
disinfection
Selection of cleaning
modes and programs
Selection for
automatic recharging
Start cleaning
Error
signal
Cleaning
taking place
in minutes
Charging
Ready
for use
Battery
capacity
EN
Robzone_Roomy_navod_2010_RU_EN.indd Odd1:26-Odd1:27
Robzone_Roomy_navod_2010_RU_EN.indd Odd1:26-Odd1:27
10/25/10 9:26:09 PM
10/25/10 9:26:09 PM