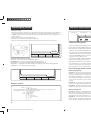
Try out the following tips before you request a repair of your appliance
Robot shuts down during cleaning
Check that the set cleaning time has not elapsed.
1.
Check whether the display shows an error status and read instructions for solution.
2.
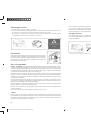
Check that the robotic cleaner is not in direct sunlight. Ensure shade in the room.
3.
Glass (transparent) or black surfaces – with regard to the principle of functioning of the infra-red
4.
sensors, it is necessary to be aware that the sensors may not function correctly on these surfaces.
Because such surfaces as standard do not refl ect IR rays, the robot senses them as an empty space
= step or raised area.
Cleaner does not work, or function is impaired
1. Check the state of the battery.
2. Check whether the waste container and inlet fi lter are cleaned, and if applicable if the side brush is
functioning.
3. Check whether the main switch is in on position.
Remote control does not work
Check the state of the battery in the remote control.
1.
Check the state of the battery in the cleaner.
2.
Wipe the cover of infra-red ray transmitter on the control with a fi ne cloth.
3.
Maintain the correct distance between the remote control and the robot, and then control the robot
4.
with the remote control aimed directly at the infra-red ray sensor on the robot.
Robot does not recharge automatically
Check whether the mains adaptor is correctly connected to the recharging console.
1.
Check the state of the battery and if it is low, recharge the robot manually using the mains adaptor.
2.
Robot is excessively noisy during cleaning
Clean waste container and fi lters.
1.
Check that the brushes are not excessively soiled. If so, clean them.
2.
If you are unable to rectify the defect by following the above recommendations, please contact our
authorised service centre by telephone or e-mail. Our team will be very happy to help you solve all
problems.
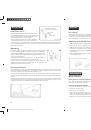
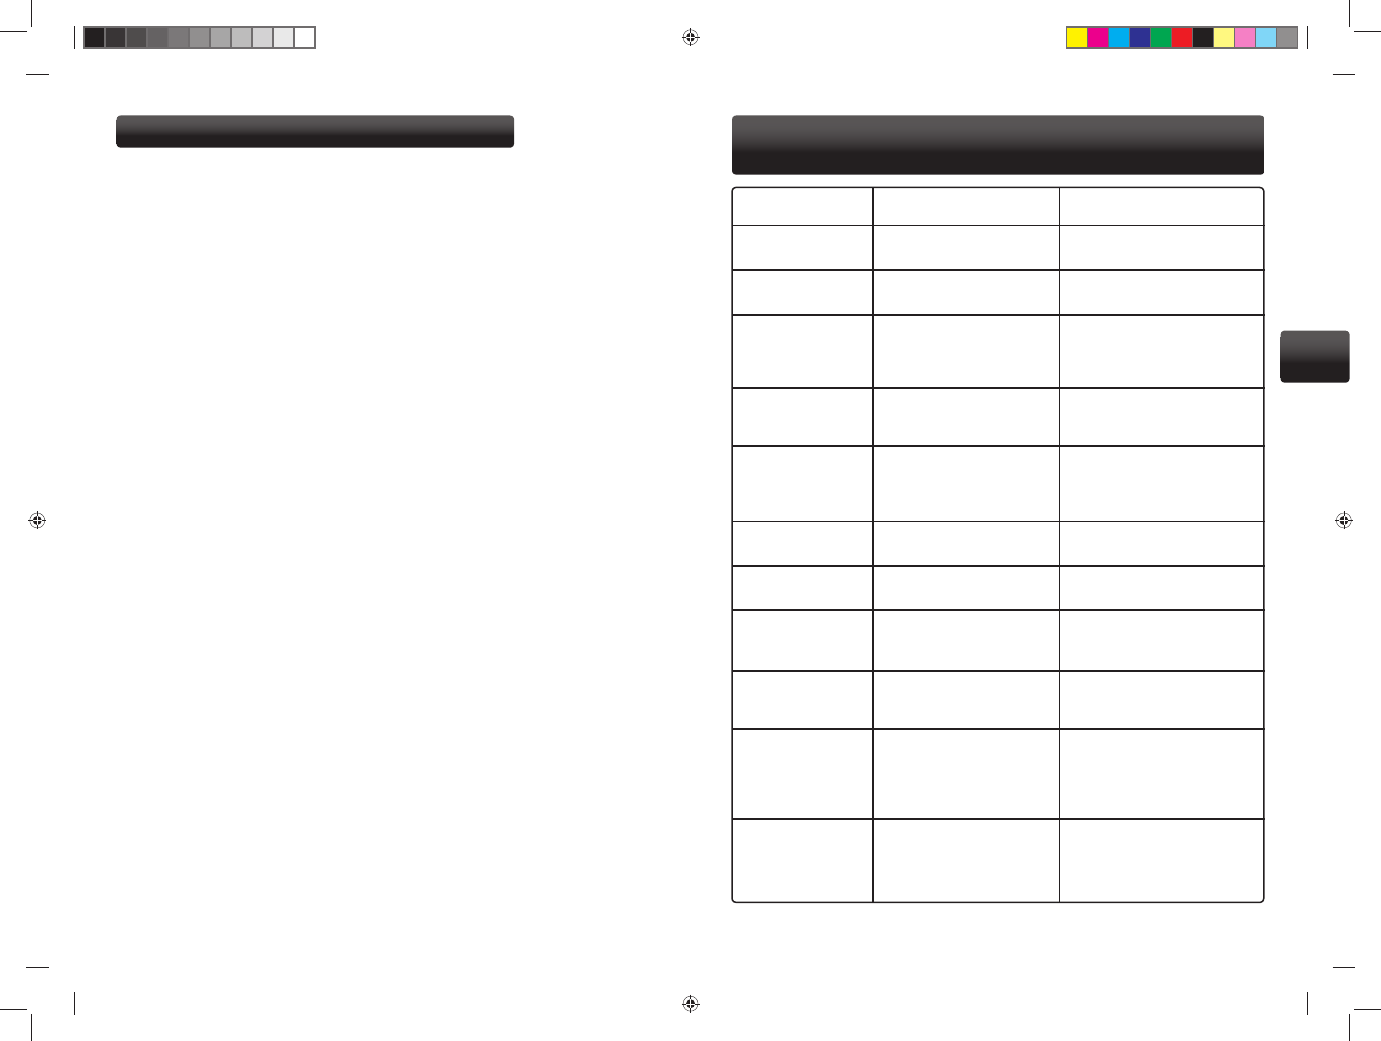
Recommendations and problems solving
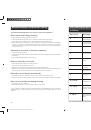
Error Code
Meaning
Solution
0
1
2
3
4
5
6
9
E, F, 10-16
17, 18, 19
5, 1D, 1E
If the LED displays an error message, the solutions are
as follows:
Foreign object in left wheel, over-
load, jacking up of robot
Foreign object in right wheel,
overload, jacking up of robot
Overload on main brush
Front wheel blocked
Disorder of ground detection
sensors
Disorder of sensors on front bum-
per guard
Blocked bumper guard
Charging error
Cleaner stuck on stairs, or unex-
pectedly raised.
Front bumper guard blocked, or
cleaner stuck in narrow space and
unable to continue cleaning
Excessively high temperature of
wheel motors or on motor of main
brush.
Check left wheel and remove foreign
objects.
Check right wheel and remove
foreign objects.
Check main brush and remove
foreign objects. This robot is not
designed for long pile carpets.
Check front wheel and if applicable
remove foreign objects or dirt.
Clean dirt off sensors. This may
occur when cleaner runs into direct
sunlight!
Clean dirt off sensors
Check free movement of bumper
guard, remove obstacle.
Check connection of robot or restart
with main switch
Check whether cleaner is blocked by
any object. Clean sensors.
Check front section and remove
foreign objects. Remove cleaner from
narrow space and leave to continue
cleaning.
Check whether left or right wheel
is blocked by a foreign objects or
whether fi bres are entangled in main
brush.
Note: Cleaner will not run onto a black carpet!
38
39
EN
Robzone_Roomy_navod_2010_RU_EN.indd Odd1:40-Odd1:41
Robzone_Roomy_navod_2010_RU_EN.indd Odd1:40-Odd1:41
10/25/10 9:26:11 PM
10/25/10 9:26:11 PM