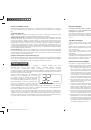
Preparation for use
After activation the virtual wall transmits infra-red rays,
preventing the cleaner from accessing areas where you
do not wish it to go. This is called a virtual wall, because
it represents the function of a classic wall.
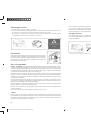
This is connected using two D – MONO – R20P batte-
ries inserted beneath the cover on the underside, clo-
sed using screws (pay attention to the correct polarity of the batteries). Leaving discharged batteries
in the equipment may lead to leakage of acid and corrosion inside the virtual wall. Batteries are not
included in the package.
Operating
Press and hold (3-5 seconds) the on/off button on the virtual wall, then
the green indicator light fl ashes. If the battery capacity is suffi
cient, the
indicator light will fl ash at long intervals. The lower the battery capaci-
ty, the faster the indicator light will fl ash, notifying you that it is neces-
sary to change the batteries.
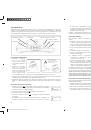
According to requirement select the distance for which you wish the
virtual wall to function using the distance switch (see fi g.).
It applies that the lower the power output, the lower the energy con-
sumption shall be and thus the longer battery life. To select the power
output always begin at the lowest level.
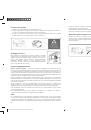
Placing virtual wall
The virtual wall works on the basis of transmitting infra-red rays. The dispersion of the rays is within the
range of 15 degrees. After switching on you should place the virtual wall before the entrance to the
room or the area where you do not want the cleaner to go to.
As a rule the virtual wall should be placed on the rear side of the door of the room which you do not
want the robot to clean. However you can use it in any other location as a barrier which the robot will
not pass.
When placing the virtual wall ensure that it is not blocked by any obstacles which could prevent its
proper functioning. We do not recommend placing the wall close to the recharging console, so as to
ensure that the devices do not mutually interfere with the other’s functions.
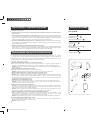
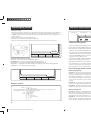
Virtual wall
0-4 m
4-7 m
Over 7 m
Guide signal transmitter
Virtual wall signal transmitter
Indicator light
On/off
button
Distance switch
Fig.1
Fig.2
Fig.3
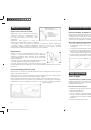
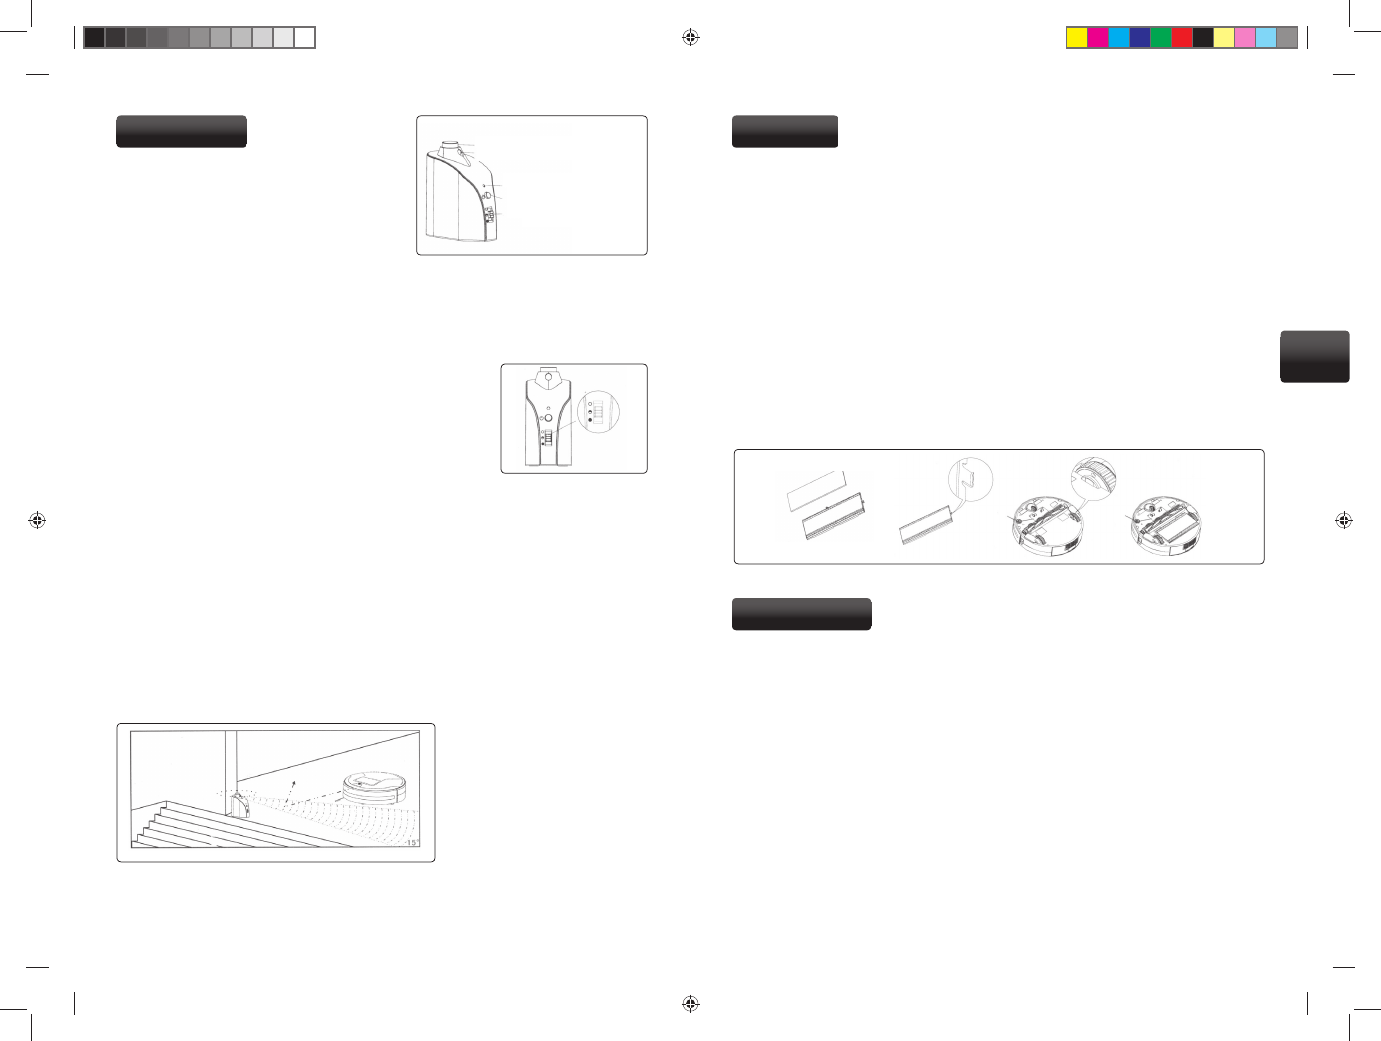
Use of mop
The anti-static micro-fi bre mop is designated exclusively for dry cleaning of smooth fl oors. During va-
cuuming the mop wipes fi ne dust and small dirt from the smooth surface. When using the cleaner on
carpets never forget to remove the mop set beforehand. The mop set is designed in order to supple-
ment the other functions of the robot and its use is not essentially necessary.
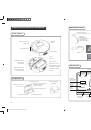
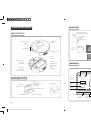
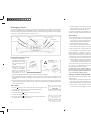
Attaching and removal of mop set
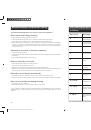
Affi
x the plastic module by sliding the side catches (Fig. 1) into the holes on the inner side of the
1.
wheels (Fig. 2), and press lightly to ensure proper locking.
Affi
x the anti-static mop to the module using the Velcro.
2.
After attaching the mop set (Fig. 3) the robot is able to wipe up fi ne dust as well as vacuuming and
3.
sweeping, thus improving the resulting eff ect of the cleaning. Before using do not dampen the mop,
use it only dry!
After using the mop set detach it and remove the trapped dust. The anti-static mop can be washed
4.
in a washing machine.
Mop set
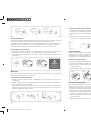
Waste container
Empty the waste container regularly after each cleaning.
After using the robot always empty the waste container. Never upturn the robot with a full container, it
is necessary to empty the container fi rst.
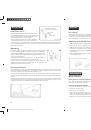
How to clean the waste container
Press the silver button on the waste container (or lightly press in container a downward direction).
1.
The waste container opens.
2.
Now you can easily remove it.
3.
First of all open the dust fl ap, empty the container of dust and collected waste. Clean the container
4.
with a cleaning brush or wipe with a dry cloth, or thoroughly vacuum with a classic vacuum cleaner.
Never rinse out the container with water or perform any damp cleaning.
Return the container to its place by pressing lightly.
5.
Maintenance
32
33
EN
Robzone_Roomy_navod_2010_RU_EN.indd Odd1:34-Odd1:35
Robzone_Roomy_navod_2010_RU_EN.indd Odd1:34-Odd1:35
10/25/10 9:26:10 PM
10/25/10 9:26:10 PM