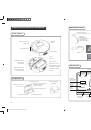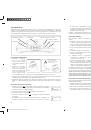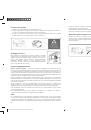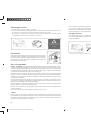
Side brush
The side brush is an essential tool for thorough sweeping of dust from corners, along walls and furni-
ture. Upon frequent use of the robot the brush becomes worn over time and must be replaced with a
new brush.
Check that long hairs and animal fur is not caught up in the brush. If necessary extricate them or remo-
ve them using a knife.
By regular cleaning you can prevent possible damage to the brush motor.
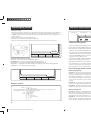
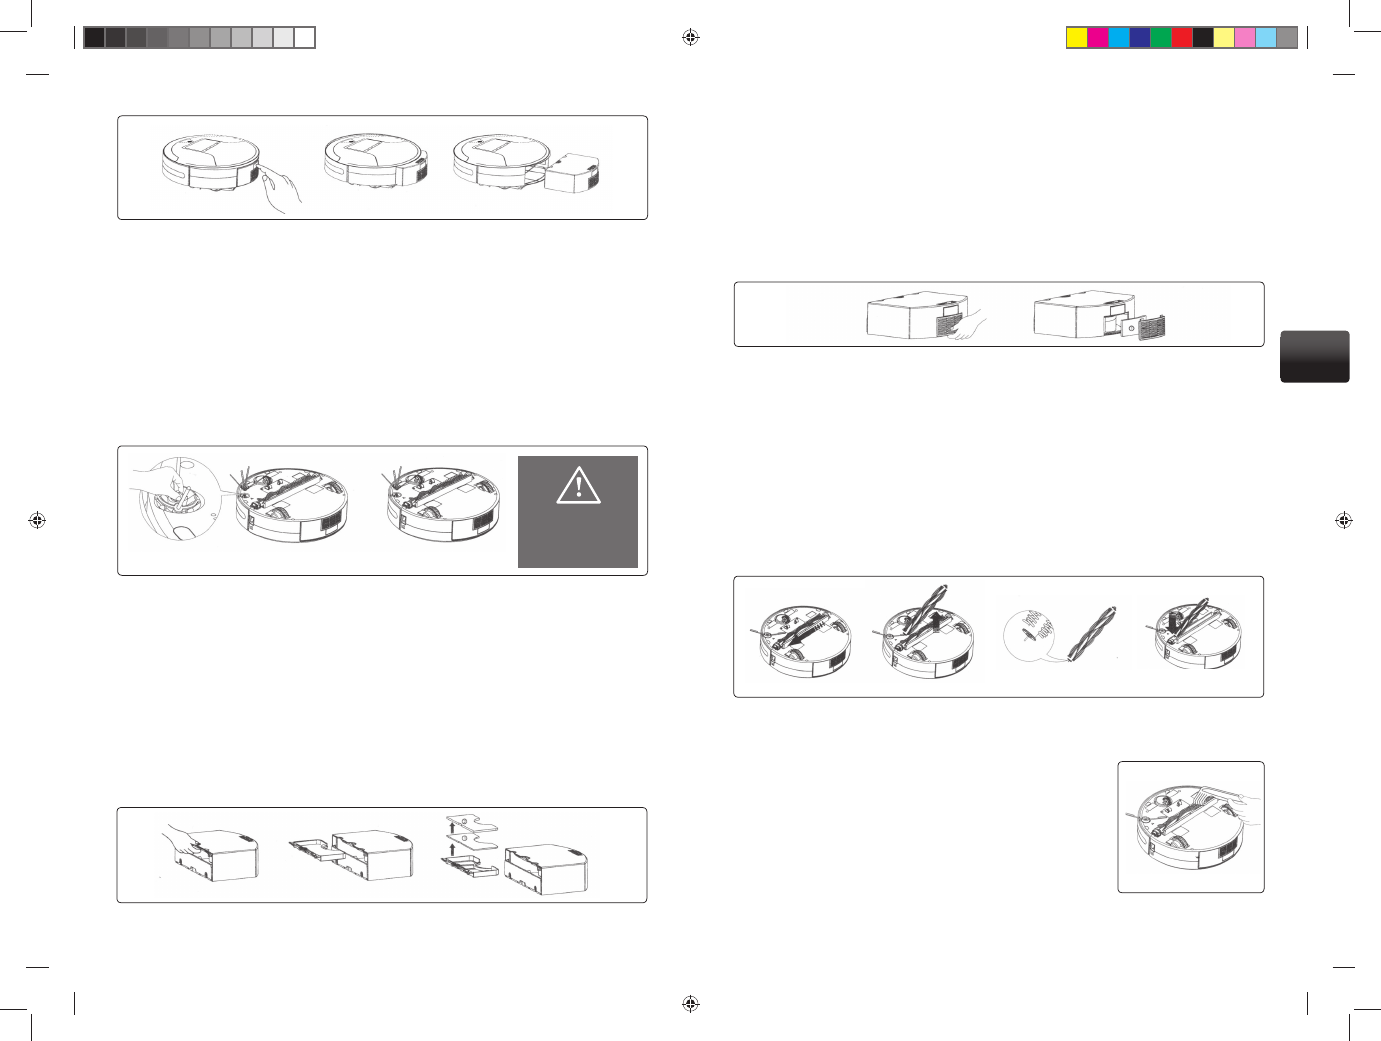
How to change the side brush
Press the catch on the upper side of the brush holder together with one hand, and pull out the side
1.
brush in an upwards direction. With the other hand remove the side brush (see fi g.).
To reinsert the brush level the two brushes and press down to secure the brush.
2.
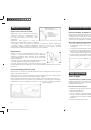
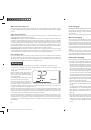
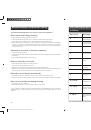
Filters
The fi lters must be cleaned regularly. We recommend replacing the fi lters upon frequent use of the
cleaner at least 1x per 3 months.
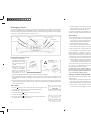
Changing/cleaning the fi lter of the inlet hole
Pull out the plastic holder of the fi lter located in the upper section of the waste container.
1.
Remove the fi lters and thoroughly beat the dust out of them or vacuum them with a classic vacuum
2.
cleaner, or replace fi lters with new fi lters.
To return the fi lters to the cleaner, place them back in the plastic holder (always in the same order as
3.
they were originally placed) and then insert the holder back into the waste container.
When operating the
robotic cleaner the side
brush must always be
fi tted
Changing/cleaning the fi lter of the outlet hole
4. The fi lter is placed under the grille on the outer side of the waste container.
5. Grip the grille on the underside and press it towards yourself. The grille is released and can be easily
removed.
6. Then remove the fi lter from the grille, the fi lter may be washed in water and after drying returned to
its place.
7. To return the fi lter to the cleaner, fi rst insert the fi lter into the outlet grille, then insert the upper
section of the grille into the holes and secure by pressing on the lower section of the grille.
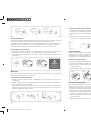
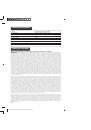
Main brush
It is necessary to clean entangled dirt, dust and hair from the main rotating brush in order to ensure its
proper functioning. Dirt may also be caught in the switch spindles of the brush, as a result it is necessa-
ry to check and clean them regularly. Upon regular use of the robot the brush becomes worn over time
and must be replaced with a new brush.
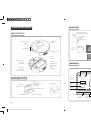
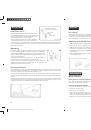
How to remove the main brush
Grip the brush and lightly press it to the left (Fig. 1).
1.
Then remove the brush, clean it or replace it.
2.
Insert the brush back into the robot. First slide the end from which the spindle points into the body
3.
of the cleaner and lightly press it in (Fig. 2).
Then slide the brush into the second part of the body of the cleaner (Fig. 3).
4.
How to clean the main brush
For better cleaning results, please regularly remove hairs and trapped dirt
from the bristles and switch spindles of the brush, particularly if you
have household pets or if family members have long hair. Pay regular
attention to this part of maintenance in order to prevent damage to
the robot.
Remove dust and fi ne particles from the main brush using a cleaning
1.
brush.
Cut out entangled hair, fi bres and similar waste using scissors and
2.
disentangle them by lightly winding the main brush.
Carefully remove entangled hair and dust also from the switch
3.
spindles of the brush.
Fig. 1
Fig. 2
Fig. 3
34
35
EN
Robzone_Roomy_navod_2010_RU_EN.indd Odd1:36-Odd1:37
Robzone_Roomy_navod_2010_RU_EN.indd Odd1:36-Odd1:37
10/25/10 9:26:10 PM
10/25/10 9:26:10 PM