Editing Recorded MDs
45
EN
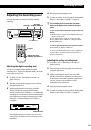
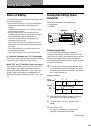
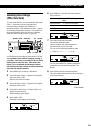
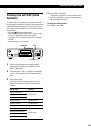
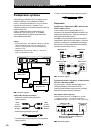
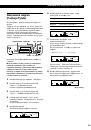
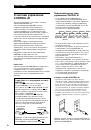
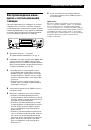
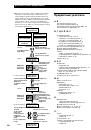
Labeling Recordings
(Title Function)
You can create titles for your recorded MDs and tracks.
Titles — which may consist of uppercase and
lowercase letters, numbers and symbols for a
maximum of about 1,700 characters per disc — appear
in the display during MD operation. You can also use
the remote to label a track or an MD (see “Labeling
tracks and MDs with the remote” on page 47).
Use the following procedure to label a track or an MD.
You can label a track while it is playing, pausing or
recording. If the track is recording, be sure to finish
labeling before the track ends. If the track ends
before you’ve completed the labeling procedure,
the characters already entered are not recorded and
the track will remain unlabeled.
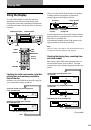
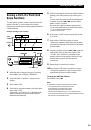
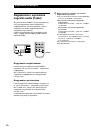
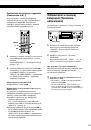
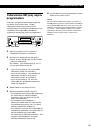
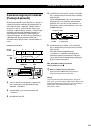
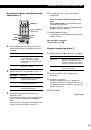
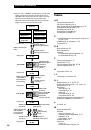
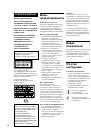
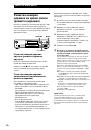
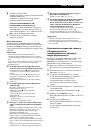
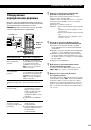
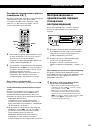
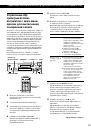
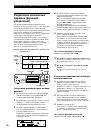
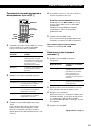
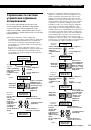
1
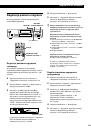
Press MENU/NO to display “Edit Menu”.
2
Turn AMS until “Name ?” appears in the display
and press AMS or YES.
Skip this step while recording.
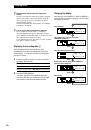
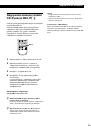
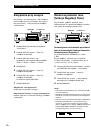
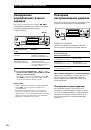
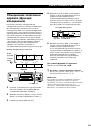
3
Turn AMS until “Nm In ?” appears in the display,
then press AMS or YES.
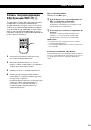
4
Turn AMS to select “Disc” to label an MD, or to
specify the track to label.
While recording, go to Step 6.
5
Press AMS or YES.
A flashing cursor appears in the display.
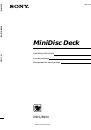
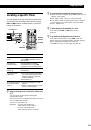
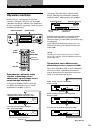
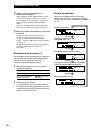
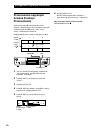
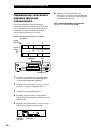
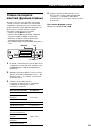
6
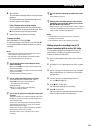
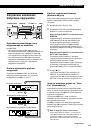
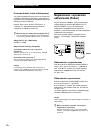
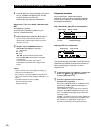
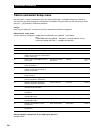
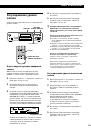
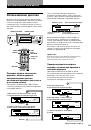
Press DISPLAY/CHAR to select the character
type as follows:
To select
Press DISPLAY/CHAR repeatedly
until
Uppercase letters
“A” appears in the display
Lowercase letters
“a” appears in the display
Numbers
“0” appears in the display
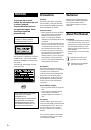
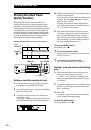
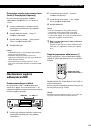
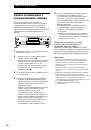
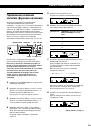
7
Turn AMS to select the character.
The selected character flashes.
Letters, numbers, and symbols appear in
sequential order as you turn AMS.
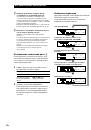
You can use the following symbols in titles:
! ” # $ % & ’ ( ) * + , – . / : ; < = > ? @ _ `
You can press DISPLAY/CHAR to change the
character type at any time during Step 7 (see
Step 6).
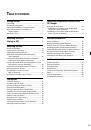
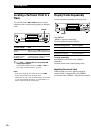
8
Press AMS to enter the selected character.
The cursor shifts rightward and waits for the input
of the next character.
(Continued)
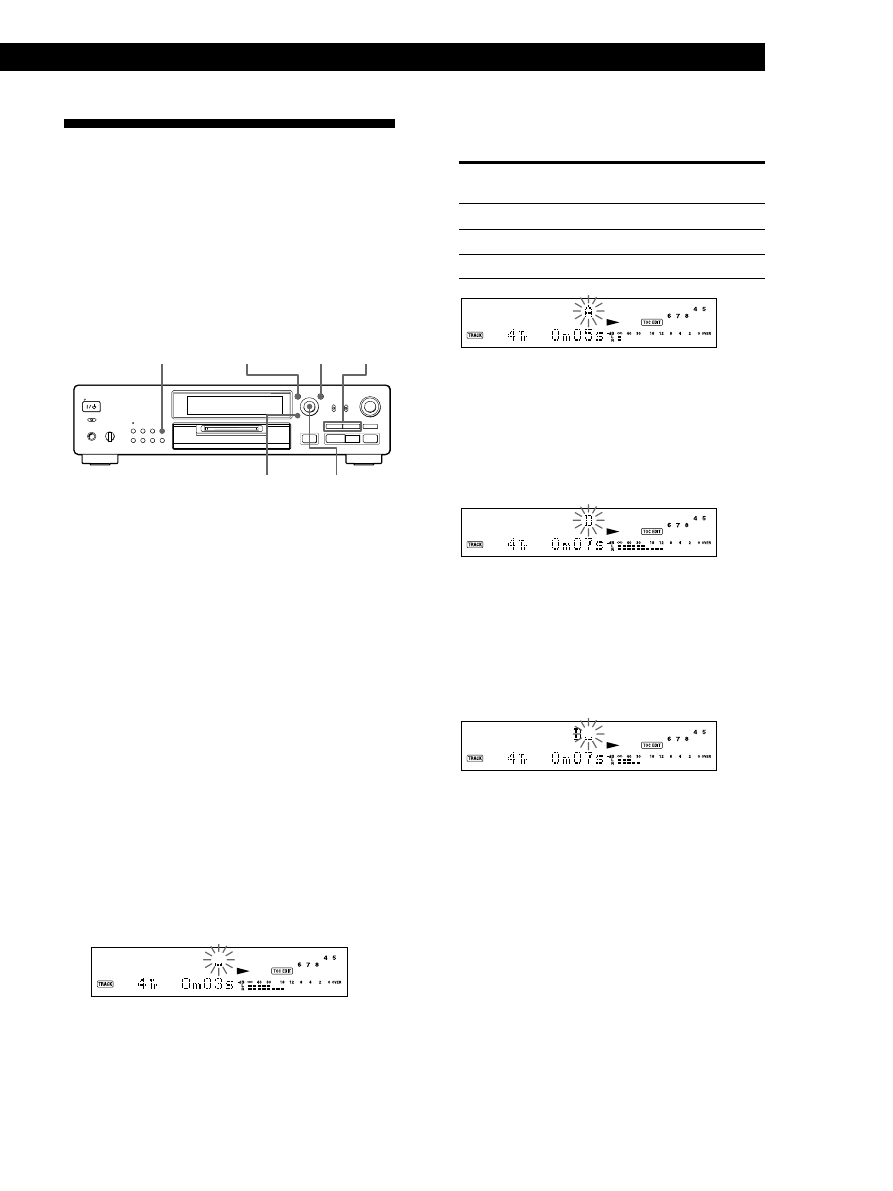
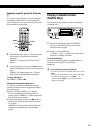
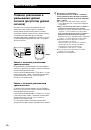
P
p
0
)
r
§
·
≠
AMS
±
0/)
MENU/NO
DISPLAY/CHAR
YES
CLEAR
 1
1
 2
2
 3
3
 4
4
 5
5
 6
6
 7
7
 8
8
 9
9
 10
10
 11
11
 12
12
 13
13
 14
14
 15
15
 16
16
 17
17
 18
18
 19
19
 20
20
 21
21
 22
22
 23
23
 24
24
 25
25
 26
26
 27
27
 28
28
 29
29
 30
30
 31
31
 32
32
 33
33
 34
34
 35
35
 36
36
 37
37
 38
38
 39
39
 40
40
 41
41
 42
42
 43
43
 44
44
 45
45
 46
46
 47
47
 48
48
 49
49
 50
50
 51
51
 52
52
 53
53
 54
54
 55
55
 56
56
 57
57
 58
58
 59
59
 60
60
 61
61
 62
62
 63
63
 64
64
 65
65
 66
66
 67
67
 68
68
 69
69
 70
70
 71
71
 72
72
 73
73
 74
74
 75
75
 76
76
 77
77
 78
78
 79
79
 80
80
 81
81
 82
82
 83
83
 84
84
 85
85
 86
86
 87
87
 88
88
 89
89
 90
90
 91
91
 92
92
 93
93
 94
94
 95
95
 96
96
 97
97
 98
98
 99
99
 100
100
 101
101
 102
102
 103
103
 104
104
 105
105
 106
106
 107
107
 108
108
 109
109
 110
110
 111
111
 112
112
 113
113
 114
114
 115
115
 116
116
 117
117
 118
118
 119
119
 120
120
 121
121
 122
122
 123
123
 124
124
 125
125
 126
126
 127
127
 128
128
 129
129
 130
130
 131
131
 132
132
 133
133
 134
134
 135
135
 136
136
 137
137
 138
138
 139
139
 140
140
 141
141
 142
142
 143
143
 144
144
 145
145
 146
146
 147
147
 148
148
 149
149
 150
150
 151
151
 152
152
 153
153
 154
154
 155
155
 156
156
 157
157
 158
158
 159
159
 160
160
 161
161
 162
162
 163
163
 164
164
 165
165
 166
166
 167
167
 168
168
 169
169
 170
170
 171
171
 172
172