211
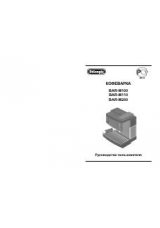
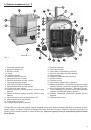
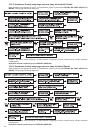
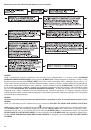
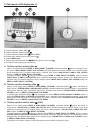
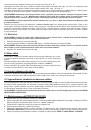
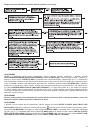
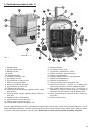
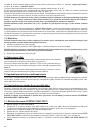
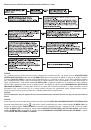
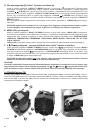
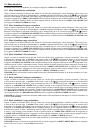
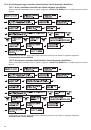
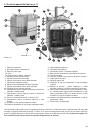
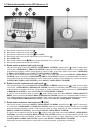
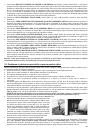
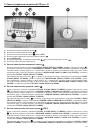
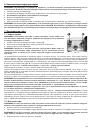
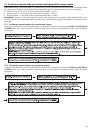
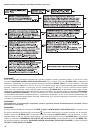
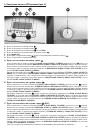
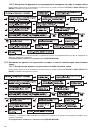
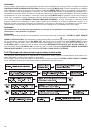
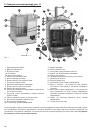
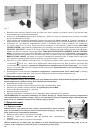
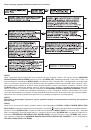
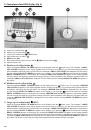
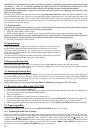
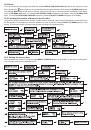
Fig. 7
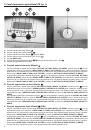
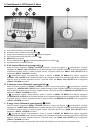
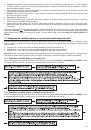
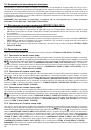
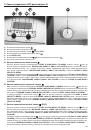
Plug in the appliance. Set the switch
●
(2)
in the position
I.
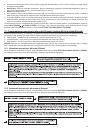
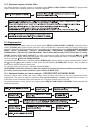
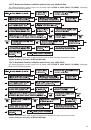
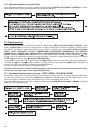
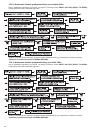
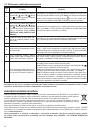
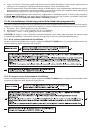
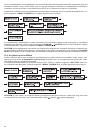
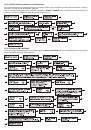
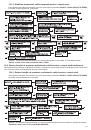
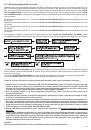
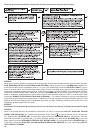
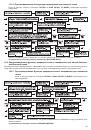
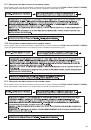
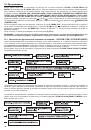
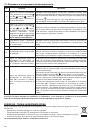
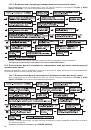
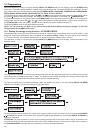
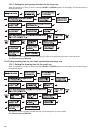
Due to the fact that the default language is English, all mes-
sages on the display will be displayed in this language. After switching the coffee maker on the message
WELCOME
will appear on the display and after a while the appliance will start the testing procedure. The message
SELF-TEST
will
appear on the LCD – see
section 11
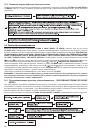
. If for any reasons the user forgets to
fi
ll the tank
(3)
with water, the message
FILL
THE TANK WITH FRESH WATER
will immediately appear on the display and the appliance will stop the testing proc-
ess. Proceed according to
chapter 6
and the appliance will automatically
fi
nish the test. After the end of the testing proc-
ess, the message
READY TO BREW
will appear on the display which indicates that the coffee maker is ready for further
operation. At this point the user may change the language settings according to the instructions in
section 16.2
.
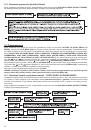
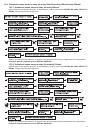
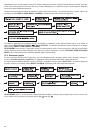
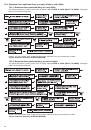
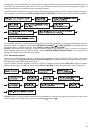
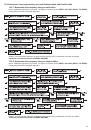
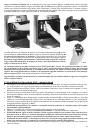
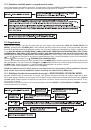
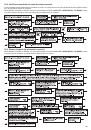
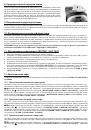
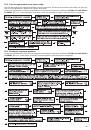
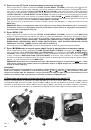
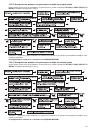
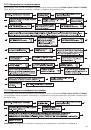
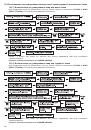
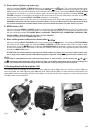
Place a container under the steam/hot water nozzle
●
(16)
and not pressing any buttons turn the knob
(13)
to the position
for about 30 s. Hot water will come out of the nozzle
(16).
Next, set the knob
(13)
in the
OFF
position and perform
the
“brewing process with the use of only fresh water twice”
proceeding according to
section 12.1
or
12.2
or
12.3
with the use of ground coffee.
Remember not to use ground coffee in this process.
It is recommended to perform
the
“brewing process with the use of only fresh water twice”
in case of using the appliance the next day in order to
clean it and remove the coffee remains.
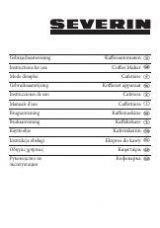
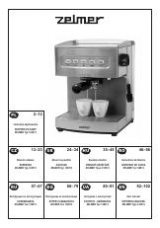
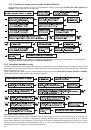
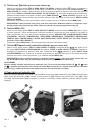
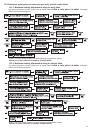
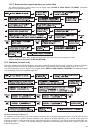
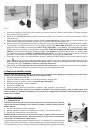
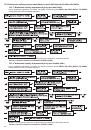
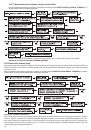
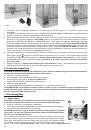
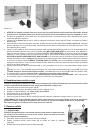
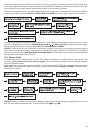
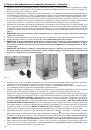
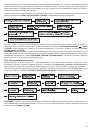
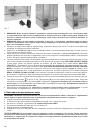
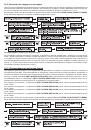
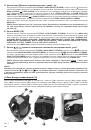
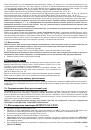
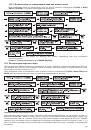
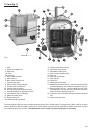
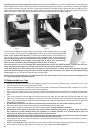
6. Filling the water tank
CAUTION! Fill the water tank (3) only if the appliance is unplugged. A built-in valve in the lower part of the water
tank prevents the water from leaking.
Open the water tank lid
●
(5)
.
Pull the handle upwards to take out the water tank
●
(3)
.
Fill the water tank with fresh, cold water;
●
do not exceed the MAX level
.
Put the tank
●
(3)
back and lock it into place.
Close the water tank lid
●
(5)
.
The water tank can also be
fi
lled without the necessity of taking it out of the coffee maker, e.g. by pouring water from a jug.
●
WARNING! Do not use the coffee maker with an empty water tank (3). Make sure there is water in the tank (3) be-
fore starting the coffee brewing process. Never
fi
ll the water tank (3) with hot water. For hygienic reasons never
leave cold water in the water tank for a longer period of time.
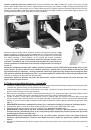
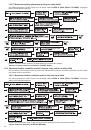
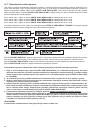
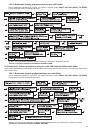
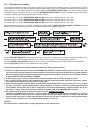
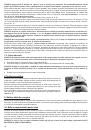
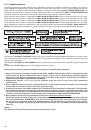
7. Dosing coff ee
7.1. Bean coffee
CAUTION! The bean coffee container can only be
fi
lled with coffee beans. Never
fi
ll
the bean coffee container with any other products, as it may cause damage to the
appliance.
Open the bean coffee container lid
●
(6).
Fill the coffee bean container
●
(4)
with coffee beans (a moderate amount).
Close the bean coffee container lid
●
(6).
ATTENTION! Make sure the coffee beans are fresh. It is recommended to use only
espresso roast coffee and to store the coffee in a tight container in a cool and dry
place.
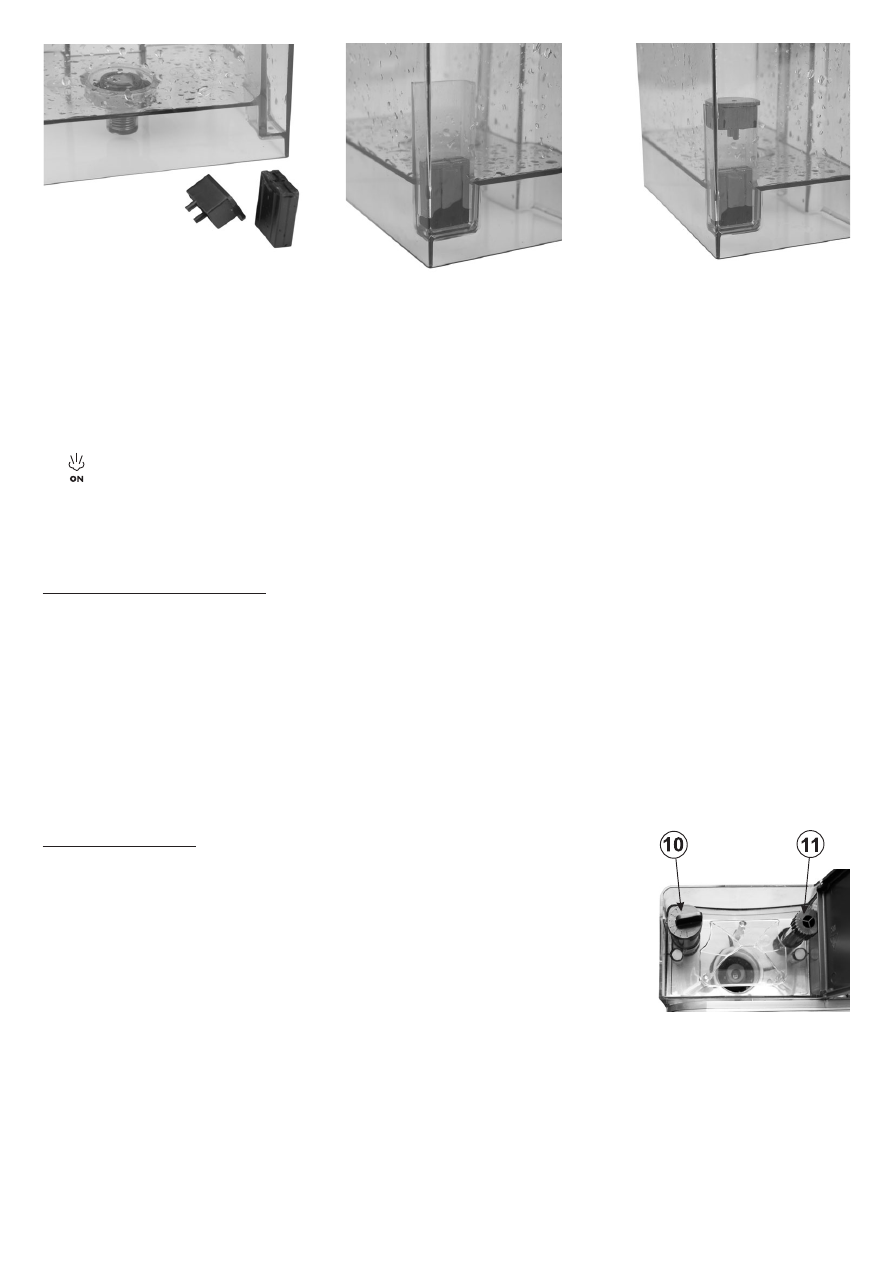
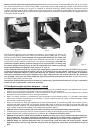
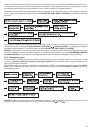
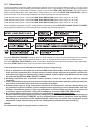
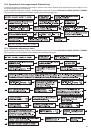
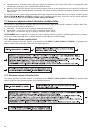
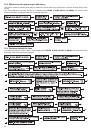
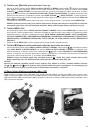
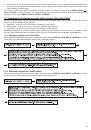
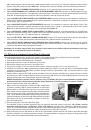
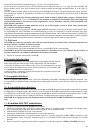
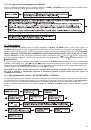
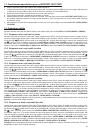
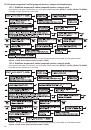
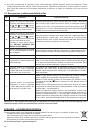
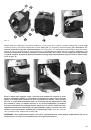
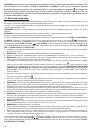
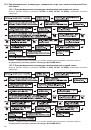
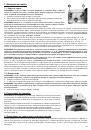
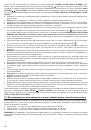
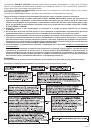
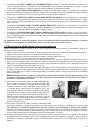
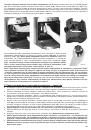
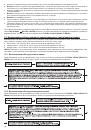
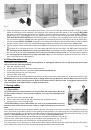
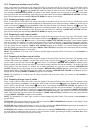
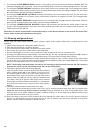
If the espresso
fl
ows too quickly during the brewing process, the beans are ground too coarsely; if the espresso
fl
ows too
slowly, the beans are ground too
fi
nely. Set the grinding level according to your taste using the initial
(10)
and precise
(11)
adjustment knob (
fi
g. 8
). The adjustment knob
(10)
is equipped with the bean coffee grinding level scale. Number
“1”
indi-
cates the
“
fi
nest grinding level”,
the number
“8”
indicates
“coarsest grinding level”.
The coffee grinding level setting recommended by the manufacturer is between
“4”
and
“5”
.
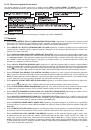
However, if the coffee
fl
ows too quickly, set knob
(10)
to a
fi
ner grinding level e.g.
“3”
or
“4”
.
If the coffee
fl
ows too slowly, set knob
(10)
to a coarser grinding level e.g.
“6”
or
“7”
.
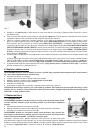
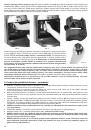
You can precisely set the grinding level using the knob
(11)
. Always perform the precise adjustment after the initial adjust-
ment. Adjustments made using those 2 knobs will change the taste of the brewed coffee.
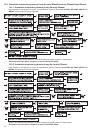
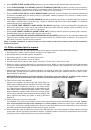
Fig. 8
 1
1
 2
2
 3
3
 4
4
 5
5
 6
6
 7
7
 8
8
 9
9
 10
10
 11
11
 12
12
 13
13
 14
14
 15
15
 16
16
 17
17
 18
18
 19
19
 20
20
 21
21
 22
22
 23
23
 24
24
 25
25
 26
26
 27
27
 28
28
 29
29
 30
30
 31
31
 32
32
 33
33
 34
34
 35
35
 36
36
 37
37
 38
38
 39
39
 40
40
 41
41
 42
42
 43
43
 44
44
 45
45
 46
46
 47
47
 48
48
 49
49
 50
50
 51
51
 52
52
 53
53
 54
54
 55
55
 56
56
 57
57
 58
58
 59
59
 60
60
 61
61
 62
62
 63
63
 64
64
 65
65
 66
66
 67
67
 68
68
 69
69
 70
70
 71
71
 72
72
 73
73
 74
74
 75
75
 76
76
 77
77
 78
78
 79
79
 80
80
 81
81
 82
82
 83
83
 84
84
 85
85
 86
86
 87
87
 88
88
 89
89
 90
90
 91
91
 92
92
 93
93
 94
94
 95
95
 96
96
 97
97
 98
98
 99
99
 100
100
 101
101
 102
102
 103
103
 104
104
 105
105
 106
106
 107
107
 108
108
 109
109
 110
110
 111
111
 112
112
 113
113
 114
114
 115
115
 116
116
 117
117
 118
118
 119
119
 120
120
 121
121
 122
122
 123
123
 124
124
 125
125
 126
126
 127
127
 128
128
 129
129
 130
130
 131
131
 132
132
 133
133
 134
134
 135
135
 136
136
 137
137
 138
138
 139
139
 140
140
 141
141
 142
142
 143
143
 144
144
 145
145
 146
146
 147
147
 148
148
 149
149
 150
150
 151
151
 152
152
 153
153
 154
154
 155
155
 156
156
 157
157
 158
158
 159
159
 160
160
 161
161
 162
162
 163
163
 164
164
 165
165
 166
166
 167
167
 168
168
 169
169
 170
170
 171
171
 172
172
 173
173
 174
174
 175
175
 176
176
 177
177
 178
178
 179
179
 180
180
 181
181
 182
182
 183
183
 184
184
 185
185
 186
186
 187
187
 188
188
 189
189
 190
190
 191
191
 192
192
 193
193
 194
194
 195
195
 196
196
 197
197
 198
198
 199
199
 200
200
 201
201
 202
202
 203
203
 204
204
 205
205
 206
206
 207
207
 208
208
 209
209
 210
210
 211
211
 212
212
 213
213
 214
214
 215
215
 216
216
 217
217
 218
218
 219
219
 220
220
 221
221
 222
222
 223
223
 224
224
 225
225
 226
226
 227
227
 228
228