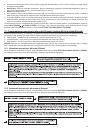
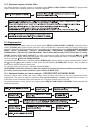
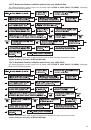
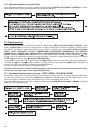
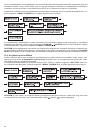
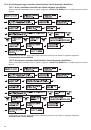
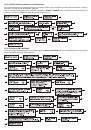
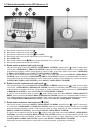
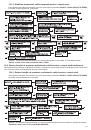
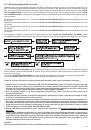
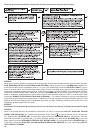
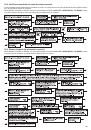
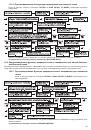
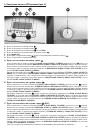
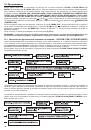
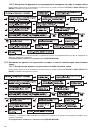
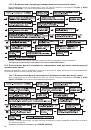
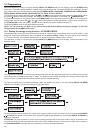
226
The message
o.
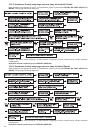
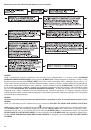
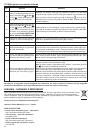
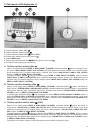
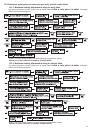
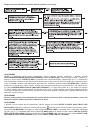
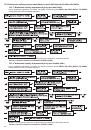
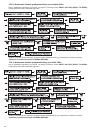
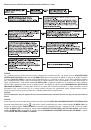
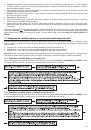
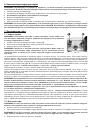
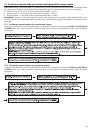
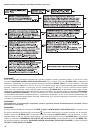
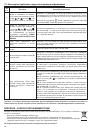
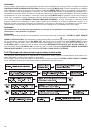
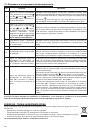
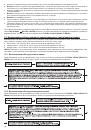
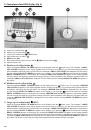
CLOCK MEMORY MISS
indicates no time setting. Set the current time according to
section 16.9.
This
message disappears after 5 seconds. The lack of time settings does not affect the coffee brewing process in any way.
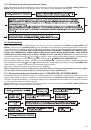
The message
p.
COFFEE ABSENCE
indicates the lack of bean coffee in the container
(4).
This message may appear
while starting the coffee brewing process. Fill the container
(4)
with bean coffee (according to
section 7.1
)
and restart
the coffee brewing process according to
section 12.
The message
q.
PUMP WATER TOO MUCH
indicates that probably too much hot water was used. The hot water func-
tion will not be available for 30 minutes, as the coffee maker needs time to prepare hot water. This message disap-
pears after 5 seconds.
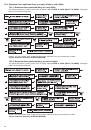
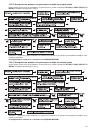
The message
r.
INSERT BREW UNIT
indicates that there is no brewing head unit
(14)
inside the coffee maker. Insert the
brewing head unit
(14)
properly in the coffee maker according to
section 4.
The message
s.
GRINDING MOTOR BLOCKED
indicates that something has blocked the coffee grinder. Clean the
grinder. If the message appears many times even after cleaning the grinder, there is a problem with the grinder. The
coffee maker must be repaired.
Remember: If a failure appears that is not described above or the above solutions do not remove the cause of the
failure, please contact an authorized service point.
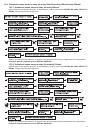
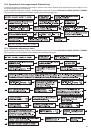
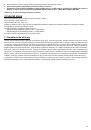
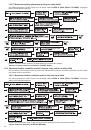
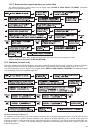
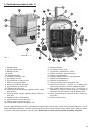
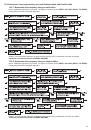
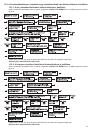
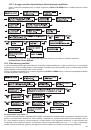
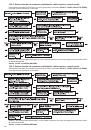
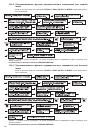
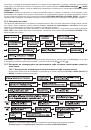
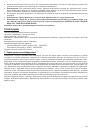
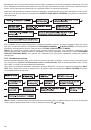
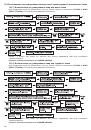
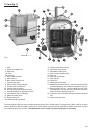
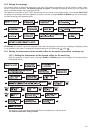
18. Cleaning and general care
Always keep the coffee maker clean to ensure a proper quality of the brewed coffee and to prolong the life of the
appliance.
Switch off and unplug the coffee maker before cleaning.
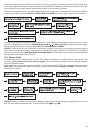
1.
Allow the coffee maker to cool before cleaning.
2.
Do not immerse the coffee maker into water or any other liquids.
3.
Do not wash any parts of the coffee maker in the dishwasher.
4.
Dry the cleaned parts in free air or using a cloth, do not dry the parts in the oven or microwave oven.
5.
The dregs box
6.
(22)
should be emptied daily. The water tank
(3)
, the drip tray
(19)
and the dregs box
(22)
should be
cleaned using mild cleaning agents e.g. dishwashing liquids. Dry these parts thoroughly after cleaning.
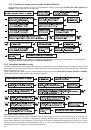
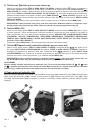
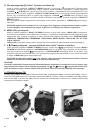
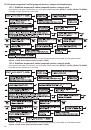
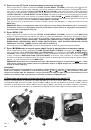
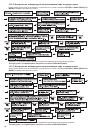
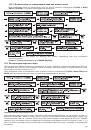
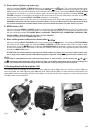
The brewing head unit
7.
(14)
should be cleaned regularly after brewing 25 cups of coffee. Switch off the coffee maker
and open the service door
(15)
. Take out the brewing head unit
(14)
and holding the handle
(14a)
wash it thoroughly
under running warm water. Do not use cleaning agents.
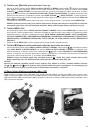
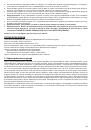
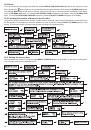
NOTE: The brewing head mechanism (14) may be (for cleaning purposes) turned using the key (25). Section 4
presents the way to turn the mechanism and to set it in the start position.
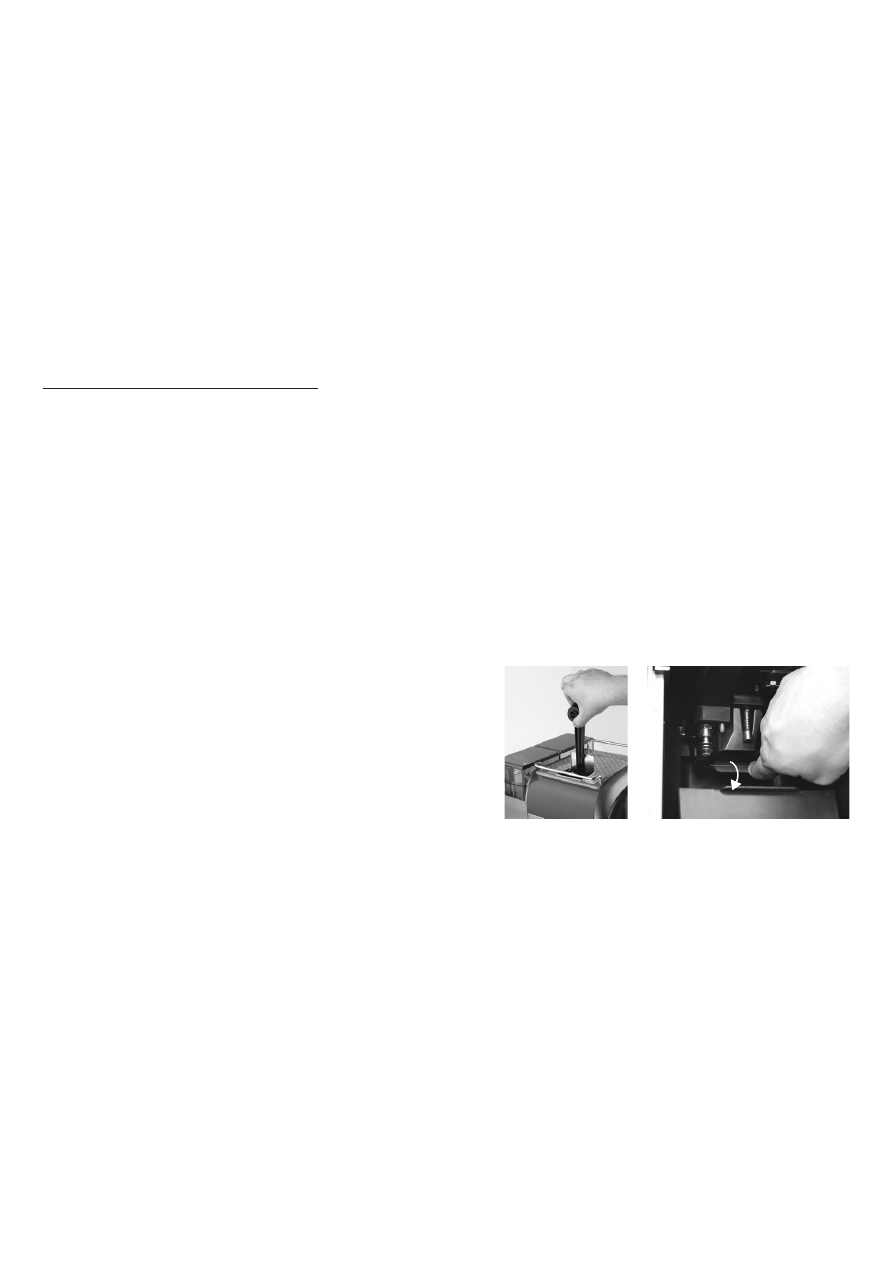
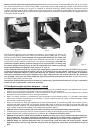
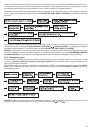
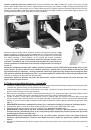
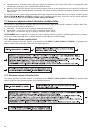
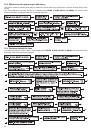
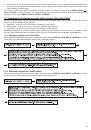
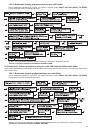
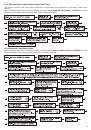
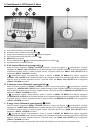
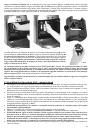
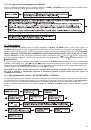
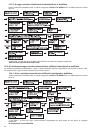
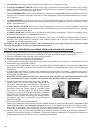
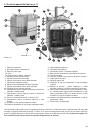
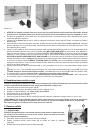
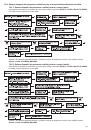
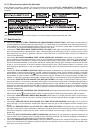
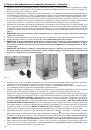
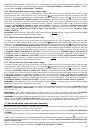
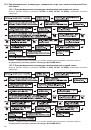
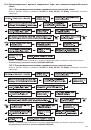
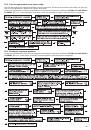
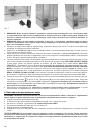
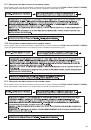
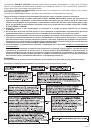
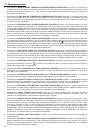
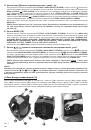
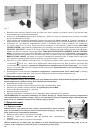
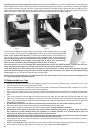
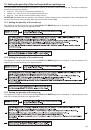
Cleaning the ground coffee inlet channel
8.
(
fi
g. 10).
Open the ground coffee container lid
(9)
. Insert the measuring
spoon cleaning brush
(24)
to the channel of the ground cof-
fee container
(9a)
to remove the coffee lumps which may be
accumulated inside. Open the service door
(15)
, take out the
brewing head unit
(14)
and pull the partition backwards with
your
fi
nger. This way all ground coffee lumps will be removed
from the ground coffee container channel
(9)
. It is recommend-
ed to clean this element once a month or when weak coffee is
brewed.
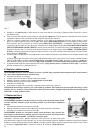
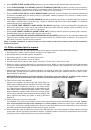
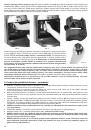
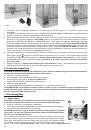
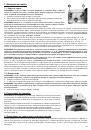
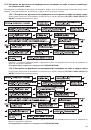
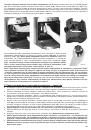
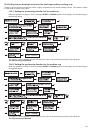
Cleaning the steam nozzle with the metal cover
9.
(16).
It is recommended to dismantle the steam nozzle unit (16) for cleaning purposes each time after you prepare froth
(Note: the steel cover may be hot, handle it carefully).
Remove the metal cover, twist off the plastic nozzle. If the
nozzle is stuck, use a needle. Replace the plastic nozzle by twisting it on to the metal casing attached to the service
door
(15)
. Attach the metal cover to the nozzle.
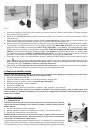
Never pour water to the bean coffee container
10.
(4).
It may damage the coffee maker. Use only the brush to clean the
grinder. The grinder does not require regular service. In case of problems with the proper operation of the grinder,
please contact a quali
fi
ed employee of the service point.
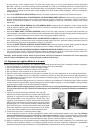
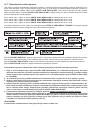
Fig. 10
 1
1
 2
2
 3
3
 4
4
 5
5
 6
6
 7
7
 8
8
 9
9
 10
10
 11
11
 12
12
 13
13
 14
14
 15
15
 16
16
 17
17
 18
18
 19
19
 20
20
 21
21
 22
22
 23
23
 24
24
 25
25
 26
26
 27
27
 28
28
 29
29
 30
30
 31
31
 32
32
 33
33
 34
34
 35
35
 36
36
 37
37
 38
38
 39
39
 40
40
 41
41
 42
42
 43
43
 44
44
 45
45
 46
46
 47
47
 48
48
 49
49
 50
50
 51
51
 52
52
 53
53
 54
54
 55
55
 56
56
 57
57
 58
58
 59
59
 60
60
 61
61
 62
62
 63
63
 64
64
 65
65
 66
66
 67
67
 68
68
 69
69
 70
70
 71
71
 72
72
 73
73
 74
74
 75
75
 76
76
 77
77
 78
78
 79
79
 80
80
 81
81
 82
82
 83
83
 84
84
 85
85
 86
86
 87
87
 88
88
 89
89
 90
90
 91
91
 92
92
 93
93
 94
94
 95
95
 96
96
 97
97
 98
98
 99
99
 100
100
 101
101
 102
102
 103
103
 104
104
 105
105
 106
106
 107
107
 108
108
 109
109
 110
110
 111
111
 112
112
 113
113
 114
114
 115
115
 116
116
 117
117
 118
118
 119
119
 120
120
 121
121
 122
122
 123
123
 124
124
 125
125
 126
126
 127
127
 128
128
 129
129
 130
130
 131
131
 132
132
 133
133
 134
134
 135
135
 136
136
 137
137
 138
138
 139
139
 140
140
 141
141
 142
142
 143
143
 144
144
 145
145
 146
146
 147
147
 148
148
 149
149
 150
150
 151
151
 152
152
 153
153
 154
154
 155
155
 156
156
 157
157
 158
158
 159
159
 160
160
 161
161
 162
162
 163
163
 164
164
 165
165
 166
166
 167
167
 168
168
 169
169
 170
170
 171
171
 172
172
 173
173
 174
174
 175
175
 176
176
 177
177
 178
178
 179
179
 180
180
 181
181
 182
182
 183
183
 184
184
 185
185
 186
186
 187
187
 188
188
 189
189
 190
190
 191
191
 192
192
 193
193
 194
194
 195
195
 196
196
 197
197
 198
198
 199
199
 200
200
 201
201
 202
202
 203
203
 204
204
 205
205
 206
206
 207
207
 208
208
 209
209
 210
210
 211
211
 212
212
 213
213
 214
214
 215
215
 216
216
 217
217
 218
218
 219
219
 220
220
 221
221
 222
222
 223
223
 224
224
 225
225
 226
226
 227
227
 228
228