65
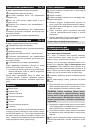
Description
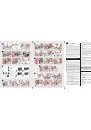
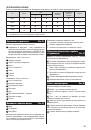
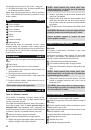
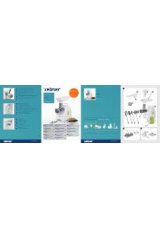
(Fig. A)
The meat mincer consists of:
1
Drive unit – each drive of the machine is adjusted to the
assembly of each of the mincing set and the shredder
produced by ZELMER. There are ventilation inlets inside
of the rear cavity of the 886 mo-tor compartment.
Mincing set, which consists of:
2
Mincing chamber
3
Feed screw with assembled coupling
4
Cutter knife
5
Screen with 4mm holes
6
ring collar
7
Food tray
8
Pusher
Equipment, which includes:
9
Screen with 8 mm holes
10
Sausage stuffer
11
Separator
12
Aperture plate
13
Disc
14
Noodles sieve
15
Vermicelli sieve
16
Pusher
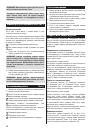
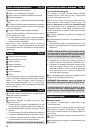
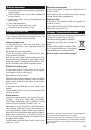
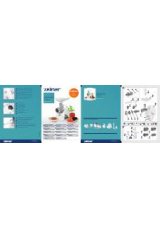
Mechanical safety device for the motor (Fig. B)
1
Scroll
2
Clutch
3
Screw M5x20
The meat mincer is equipped with mechanical protection,
which secures the motor against any damage – teeth of
the coupling break, when the meat mincer is overloaded
(f. ex. when bones have entered into the mincing chamber).
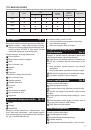
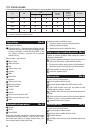
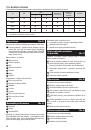
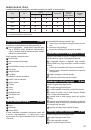
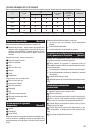
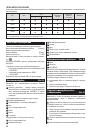
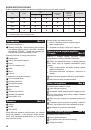
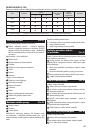
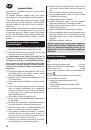
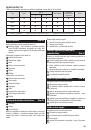
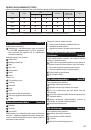
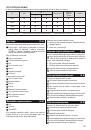
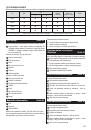
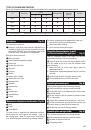
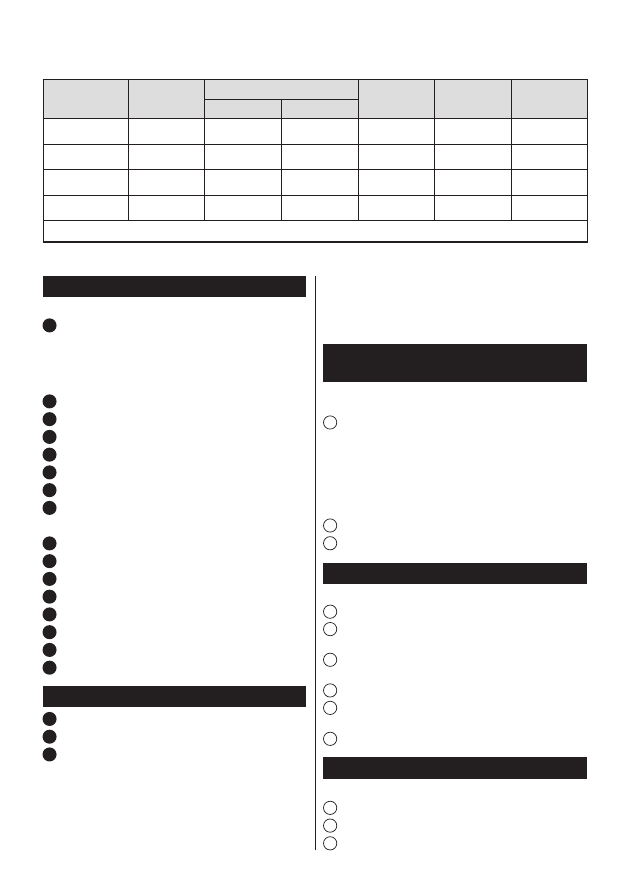
TYPES OF ZELMER MEAT MINCERS
Below, you can see an assortment of equipment anticipated for the meat mincers, which the user manual refers to.
Typ
Cutter knife
Screen
Sausage stuffer
Pasta and
pastry set
Shredder
4
8
886.5
●
●
●
●
●
○
886.54
●
●
●
●
○
●
886.8
●
●
●
●
–
○
886.84
●
●
●
●
–
●
●
– basic accessories,
○
– additional equipment, which can be bought in shops, household appliances stores,
–
– unavailable accessories
The broken coupling should be replaced with a new one:
unscrew the coupling from the feed screw,
●
remove the broken coupling,
●
put on the new coupling and screw it.
●
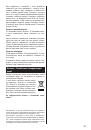
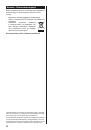
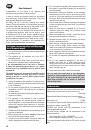
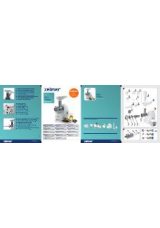
Preparing the meat mincer to work
and the actuation of the appliance
(Fig. C)
Take out a sufficient length of the supply cord and the
appropriate accessories from the compartment.
1
Place the drive unit close to the power network socket,
on a firm surface so as not to cover the ventilation holes
within the casing.
Before the first use of the meat mincer, wash the
●
equipment elements.
Assemble the appropriate equipment and join it with the
●
drive unit.
2
Put the power cord into the supply network socket.
3
Turn the meat mincer on with the main switch.
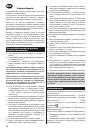
Operating the mincing set
(Fig. D)
Put the following elements into the mincing chamber:
1
Feed screw with the coupling towards the middle.
2
Put the cutter knife on the feed screw end, with the sharp
edges facing outside.
3
Put the screen so that the chamber’s protrusion enters
the rut of the screen.
4
Tighten all the elements of the mincing set – until home.
5
Put the assembled unit onto the drive unit and turn into
the position, when you hear click of the safety lock.
6
Put the food tray onto the mincing chamber.
Operating the sausage stuffer
(Fig. G)
Put the following elements into the mincing chamber:
1
Feed screw with the coupling towards the middle.
2
Separator on the feed screw end.
3
The sausage stuffer.