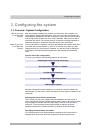
Tool window - labSens
22
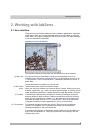
takes the shape of a small square. The small arrows next to the
square indicate that you can move the handle. This is how you
change the size of the image object.
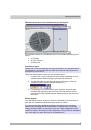
If you want to change the properties of the image object, doubleclick
on the image object. The
Drawing Object Properties
dialog box
opens. Here you can change the color, for example.
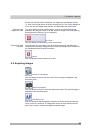
Delete selected drawing or measurement
Click this button to delete the selected object from the image.
Show or hide drawings and measurements
Click this button to display or hide the drawn objects.
Drawings
Draw a free hand polygon
Click this button to draw an image object in the shape you need.
1. Click
the
Draw a free hand polygon
button.
The software switches to drawing mode. You can see that the
software is in drawing mode by the handles.
2. Press and hold the mouse button and draw the image object.
You can still change an image object's position and shape later.
3. If you're satisfied with the position and shape of the image object, click
the
Select a drawing or measurement object
button.
Your software then switches off drawing mode.
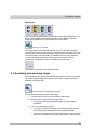
Draw an arrow
Click this button to draw an arrow.
1. Click
the
Draw an arrow
button.
The software switches to drawing mode. You can see that the
software is in drawing mode by the handles.
2. Click on the image to set the start point of the arrow.
3. Press and hold the mouse button and set the arrow.
The start point and end point are both indicated by a handle.
You can still change the arrow's length and position later.