Acquiring specific images
30
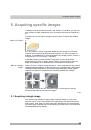
4. Search out the required position in the sample.
5. Activate
the
Process Manager
tool window.
6. Select
the
Automatic Processes
option.
7. Click
the
Z-Stack
button.
The button will appear clicked. You can recognize this status by the
button's colored background.
The
[
Z
] group
will be automatically displayed in the tool window.
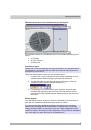
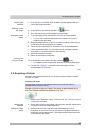
9. Select
the
Range
entry in the
Define
list.
10. Enter the Z-range you want, in the
Range
field. In this example, enter a
little more than the sample's thickness (= 50 µm), e.g., the value 60.
11. In the
Step Size
field, enter the required Z-distance, e.g., the value 2, for
a Z-distance of 2 µm.
In
the
Z-Slices
field you will then be shown how many frames are to
be acquired. In this example 31 frames will be acquired.
12. Find the segment of the sample that interests you and focus on it. To do
this, use the arrow buttons in the [
Z
] group. The buttons with a double
arrow move the stage in larger steps.
13. Click the
Start
button.
Your software now moves the Z-drive of the microscope stage to the
start position. The starting positions lies half of the Z-range deeper
than the stage's current Z-position.
The acquisition of the Z-stack will begin as soon as the starting
position has been reached. The microscope stage moves upwards
step by step and acquires an image at each new Z-position.
The
Start Process
button changes into the
Pause
button. A click
on this button will interrupt the acquisition process.
The
Stop
button will become active. A click on this button will
stop the acquisition process. The Z-stack as acquired up till then, will
be preserved.
The acquisition has been completed when you can once more see
the
Start
button in the
Process Manager
tool window, and the
progress bar has been faded out.
You can see the acquired Z-stack in the image window. Use the
navigation bar located in the image window to view the Z-stack.
Further information on the navigation bar is available in the online
help.
The Z-stack that has been acquired will be automatically saved. You
can set the storage directory in the
Acquisition Settings > Saving >
Process Manager
dialog box. The preset file format is VSI.
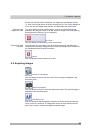
Selecting the
acquisition process
Selecting the
acquisition
parameters
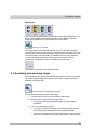
Acquiring the
image