4
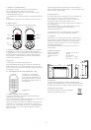
432
230
MIN
577
230
MIN
357
230 MIN
MIN
450
520 mm
min.
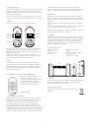
358mm
526 mm
min.
52
mm
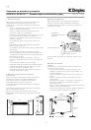
Instructions for Installation and Use
ECW 934, ECW 937 T Convector Heater
ecw93_ba 07/10/B
1. Important Information
Please read carefully all the information provided in these
instructions. Keep the instructions in a safe place and if
necessary give them to any future owner.
-
The unit may only be used for space heating in
enclosed rooms.
-
Any examination of the heater or repair work may only
be carried out by a qualified electrician.
-
Disconnect the heater from the power supply if it is
faulty or is not used for a long time. Unplug or
disconnect the fuse.
-
Do not cover the heater in any way (risk of fire).
-
Warning: Outer surfaces become hot when heater is
switched on.
-
Do not leave heater unattended when small children
are present.
-
Do not insert any objects into the openings.
-
Do not install the heater where the controls can be
reached by a person bathing or showering.
-
Do not use the heater in rooms containing flammable
materials (e.g. solvents, etc.).
-
Do not place the connecting lead on top of the
appliance.
-
Warning: If the heater is switched on automatically (by
the thermostat), danger can arise if it has been in any
way covered or blocked.
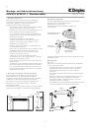
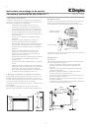
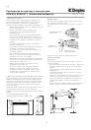
2. Positioning, Installation, Minimum Clearances
The heater can be stood on the floor or wall-mounted.
Minimum clearances must be complied with. The heater
must not be located directly beneath a wall socket outlet.
The plug must be accessible after installation.
Use only in an upright position, as shown in the illustration.
Do not place the heater on a long-pile carpet.
Caution: Do not place near flammable objects.
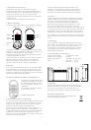
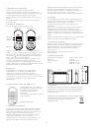
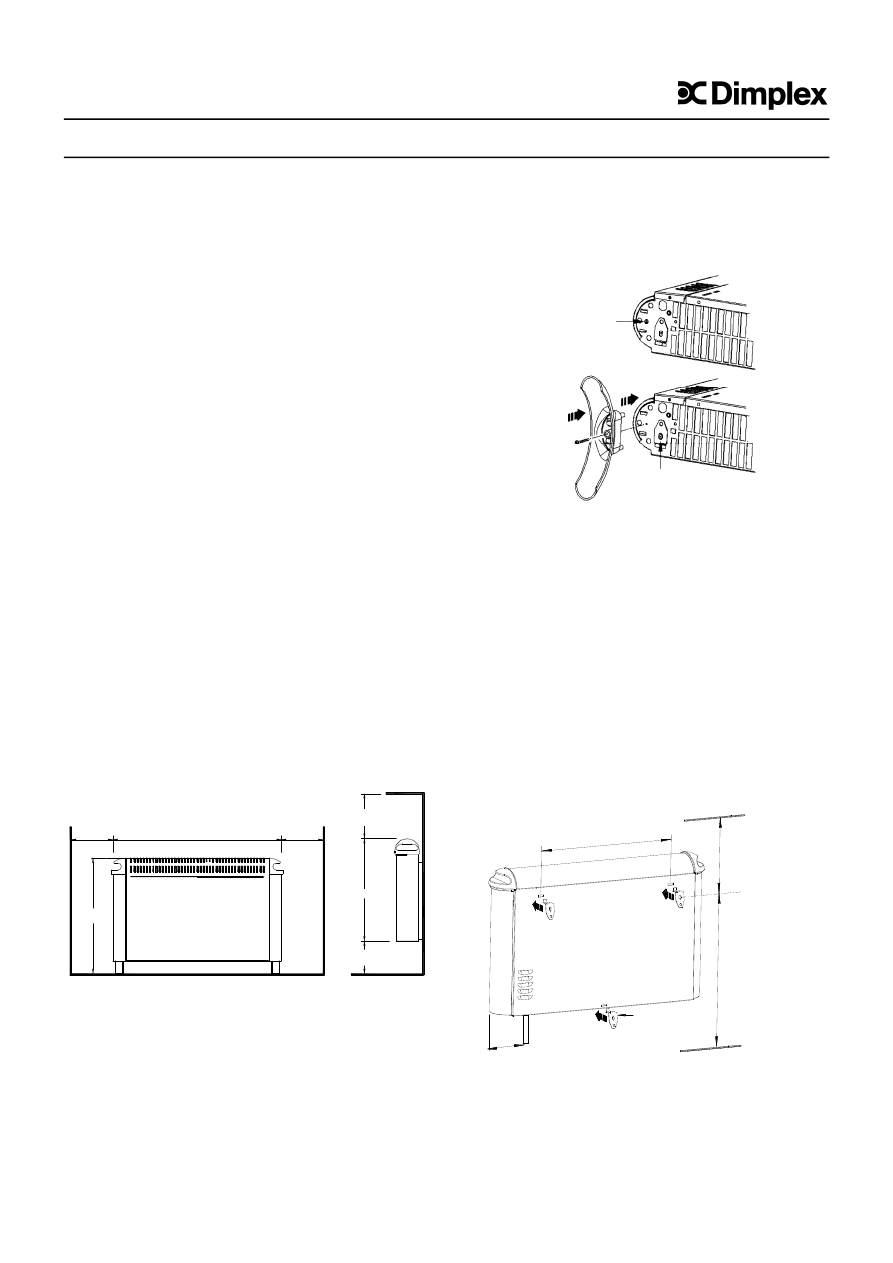
Attaching the Support Feet
The two fastening screws are located on the bottom of the
unit. Undo the screws.
Engage the support feet as shown in the illustration and
secure with the attachment screws.
Do not use the heater without the supplied feet.
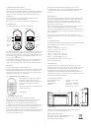
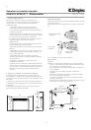
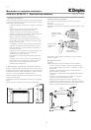
Wall Mounting
IMPORTANT-
The brackets attached to the bottom of the unit must be
used.
- Drill and plug mounting holes for the two upper wall
brackets. The holes must be horizontally aligned with a
spacing of 358 mm.
- Screw in the upper wall brackets and hang the heater
from them.
-
Insert the third wall bracket in the lower rear wall slit.
-
Check that the heater is horizontal and mark a hole for
the lower wall bracket.
-
Detach the heater; drill and plug the mounting hole for
the lower bracket.
-
Replace the heater on the upper brackets and screw the
lower bracket to the wall.
Undo the fastening screws
for the support feet
Screw in support
feet
Bracket for wall
mounting
Cable connection
GB