26
GB
Start-up and use
!
The position of the corresponding gas burner or electric hotplate is shown
on every knob.
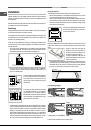
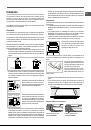
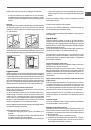
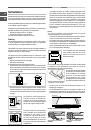
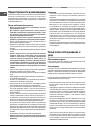
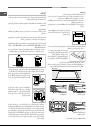
Gas burners
Each burner can be adjusted to one of the following settings using the
corresponding control knob:
●
Off
Maximum
Minimum
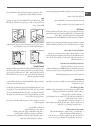
To light one of the burners, hold a lit match or lighter near the burner and, at
the same time, press down and turn the corresponding knob anti-clockwise
to the maximum setting.
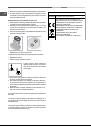
Since the burner is fitted with a safety device, the knob should be pressed
for approximately 2-3 seconds to allow the automatic device keeping the
flame alight to heat up.
When using models with an ignition button, light the desired burner pressing
down the corresponding knob as far as possible and turning it anticlockwise
towards the maximum setting.
!
If a flame is accidentally extinguished, turn off the control knob and wait for
at least 1 minute before trying to relight it.
To switch off the burner, turn the knob in a clockwise direction until it stops
(when reaches the “●” position).
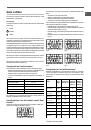
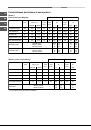
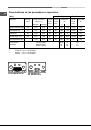
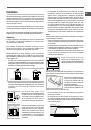
Practical advice on using the burners
To ensure the burners operate efficiently:
• Use appropriate cookware for each burner (see table) so that the flames
do not extend beyond the bottom of the cookware.
• Always use cookware with a flat base and a cover.
• When the contents of the pan reach boiling point, turn the knob to minimum.
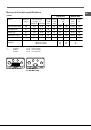
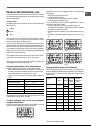
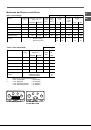
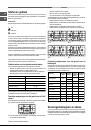
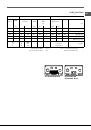
Reduced Rapid (RR)
Semi Rapid (S)
Auxiliary (A)
Semi-FishBurner (SP)
Triple Crown (TC)
24 - 26
16 - 20
10 - 14
16 - 20
24 - 26
Ø Cookware Diameter (cm)
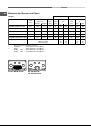
Burner
To identify the type of burner, refer to the designs in the section entitled, “Burner
and Nozzle Specifications”.
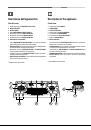
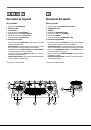
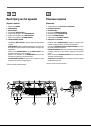
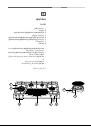
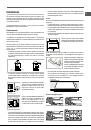
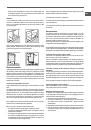
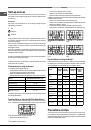
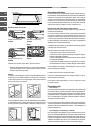
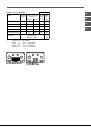
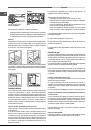
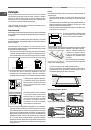
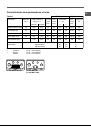
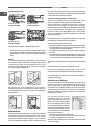
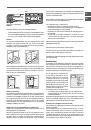
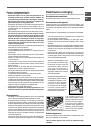
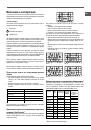
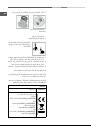
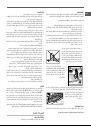
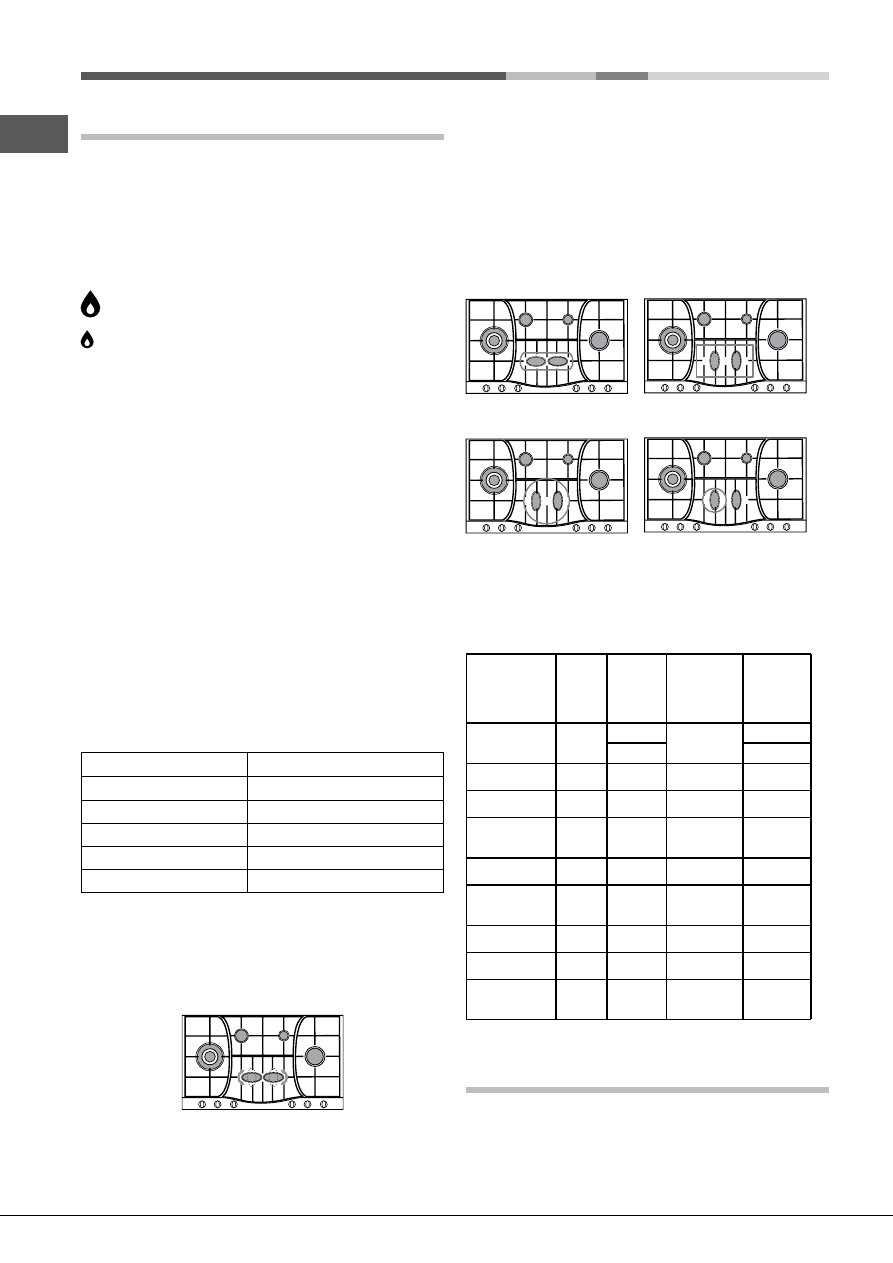
Practical Advice on Using the Half Fish-Kettle Burner*
The two “Half Fish-Kettle” burners, are eliptic in form and can be turned up
to 90°. This makes the cooktop more flexible in terms of how it can be used.
To turn the two burners 90°, proceed as follows:
• Make sure that the burners are cool;
• Lift the burner completely out of its housing;
• Replace it in its housing in the position desired;
• Make sure that the burners are positioned correctly before use.
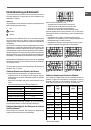
In addition, the two burners can be used in tandem or speartely with cookware
of different shapes and sizes:
• Double burner for a fish-kettle or oval cookware (Fig. A).
• Double burner for a griddle or rectangular/square cookware with minimum
dimensions of 28x28 cm (Fig. B)
• Double burner for large cookware (diameter of 26-28 cm) (Fig.C).
• Single burner for medium size cookware (diameter of 16-20 cm) (Fig.D).
Fig. A
Fig. B
Fig. C
Fig. D
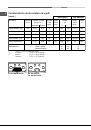
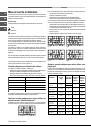
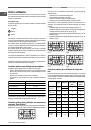
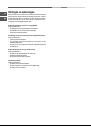
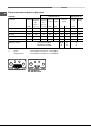
Practical Advise on Using the Broiler *
Preheat the broiler by turning the knob to 12. Settings 1-8 are recommended
for reheating food or for keeping it warm after it has been cooked. In general,
cooking vegetables can cause stains which are difficult to remove.
Pork
chops
Steak
Sausages
Shish Kabobs
(Meat)
Hamburger
Toasted
Sandwiches
Bread
Aubergines
Oven-roasted
Tomatoes
Food
Weight
(Kg)
0,50
0,60
0,45
0,40
0,40
N° 3
N° 4
3 Slices
3 Slices
Preheating
(min.)
5
5
5
5
5
5
5
5
5
Cooking
time
(min.)
Knob
Setting
12
10
12
10
12
10
11
12
11
12
15
20
10
20
14
15
2
10 - 15
3
5 - 7
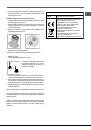
Precautions and tips
!
This appliance has been designed and manufactured in compliance with
international safety standards. The following warnings are provided for safety
reasons and must be read carefully.
*
Only available on certain models.